

 By Jeff Meyer/photos by the author
Editor’s Note: Enjoy this expanded online edition featuring more photos of Jeff’s detailed weathering process!
After the St. Louis Railroad Prototype Modelers Meet last year, a group of us from The Weathering Shop stopped by a local hobby shop. I was not planning on buying anything, but then this Penn Central 50’ plug door boxcar caught my eye. Before I bought the car I wanted to make sure that the car and paint scheme was prototypical. I asked my good friend and Conrail expert, Jered Slusser, to do some quick research on his smartphone. After confirming the accuracy and finding a couple of good photographs, I decided this car would make a good project.
Penn Central was the result of the 1968 merger of bitter rivals New York Central and Pennsylvania Railroad (with the New Haven added in 1969). The enterprise was a massive failure, declaring bankruptcy in 1970 and paving the way for the creation of Conrail in 1976. When it began operations, Conrail inherited thousands of freight cars that received little more than patched paint jobs before being sent back out on the road.
Penn Central Green is one of those colors that always looks good weathered. The main reason it looks good is because the dark red color of rust is a complementary color to the lighter jade green. In the photographs to follow, you will notice that most of the weathering products are from AK Interactive. I originally wrote a small article about this car for AK Interactive, using their products. Do not worry about having to use their products, as any of these items can be substituted with supplies you can find at either hobby shops or well-stocked arts and crafts stores.
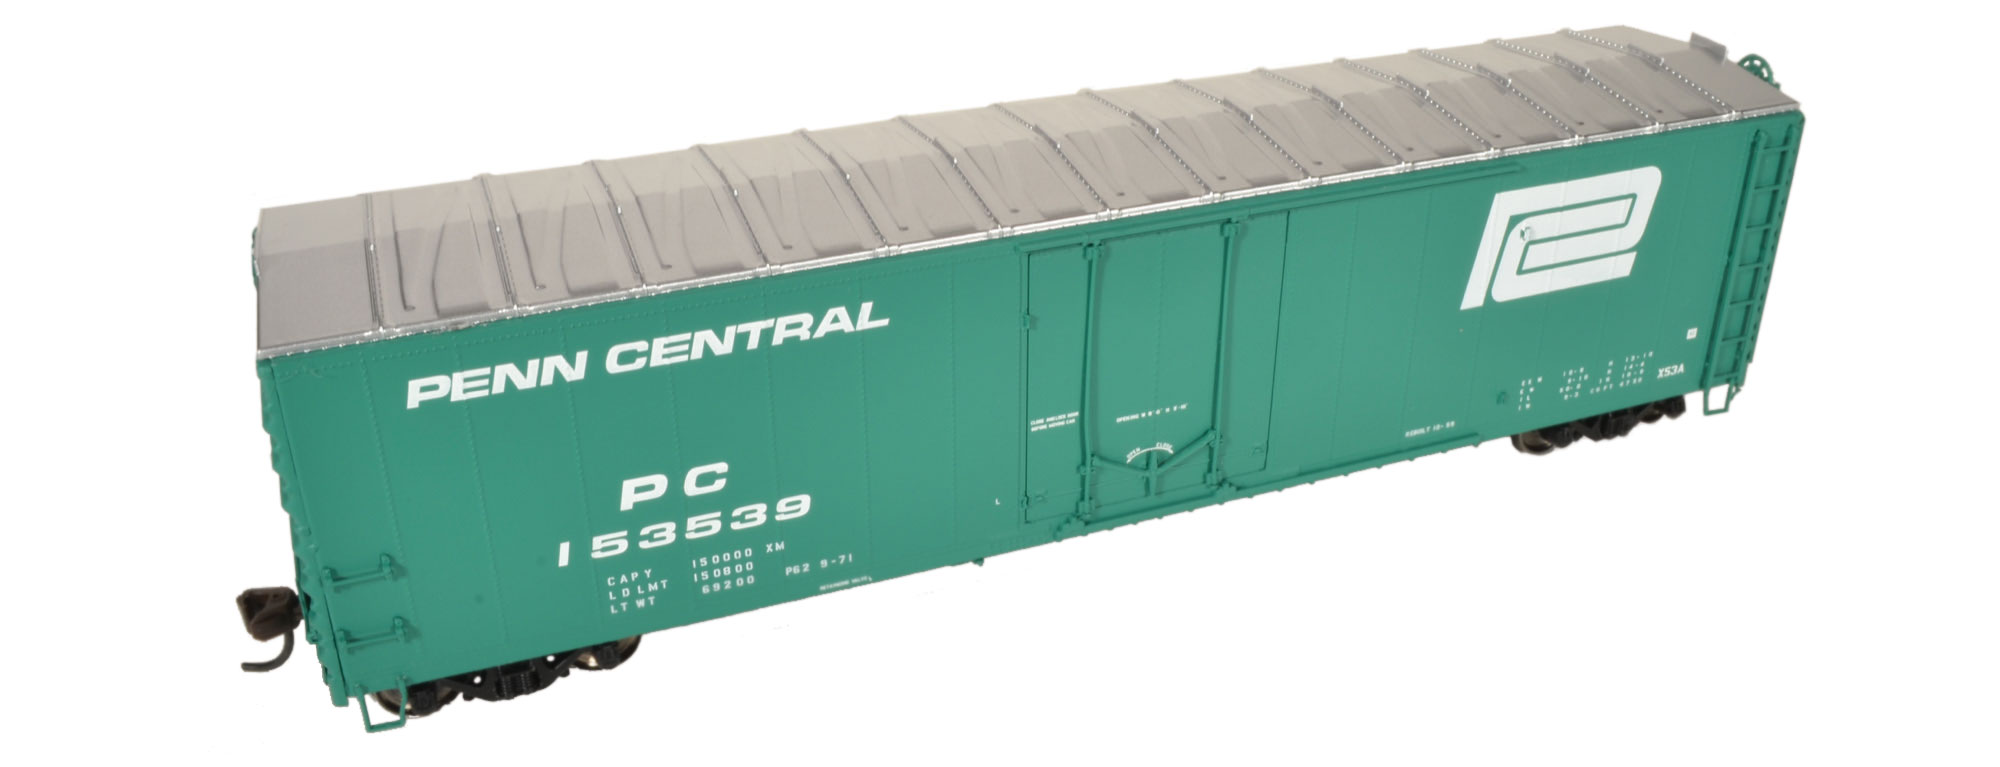
Step 1 – The HO Scale model right out of the box, made by Atlas Model Railroad Co. After some modifications and decals, we will seal the entire car with Testors Dullcote to prepare it for the fading. Spraying Dullcote from the aerosol can will work just fine.
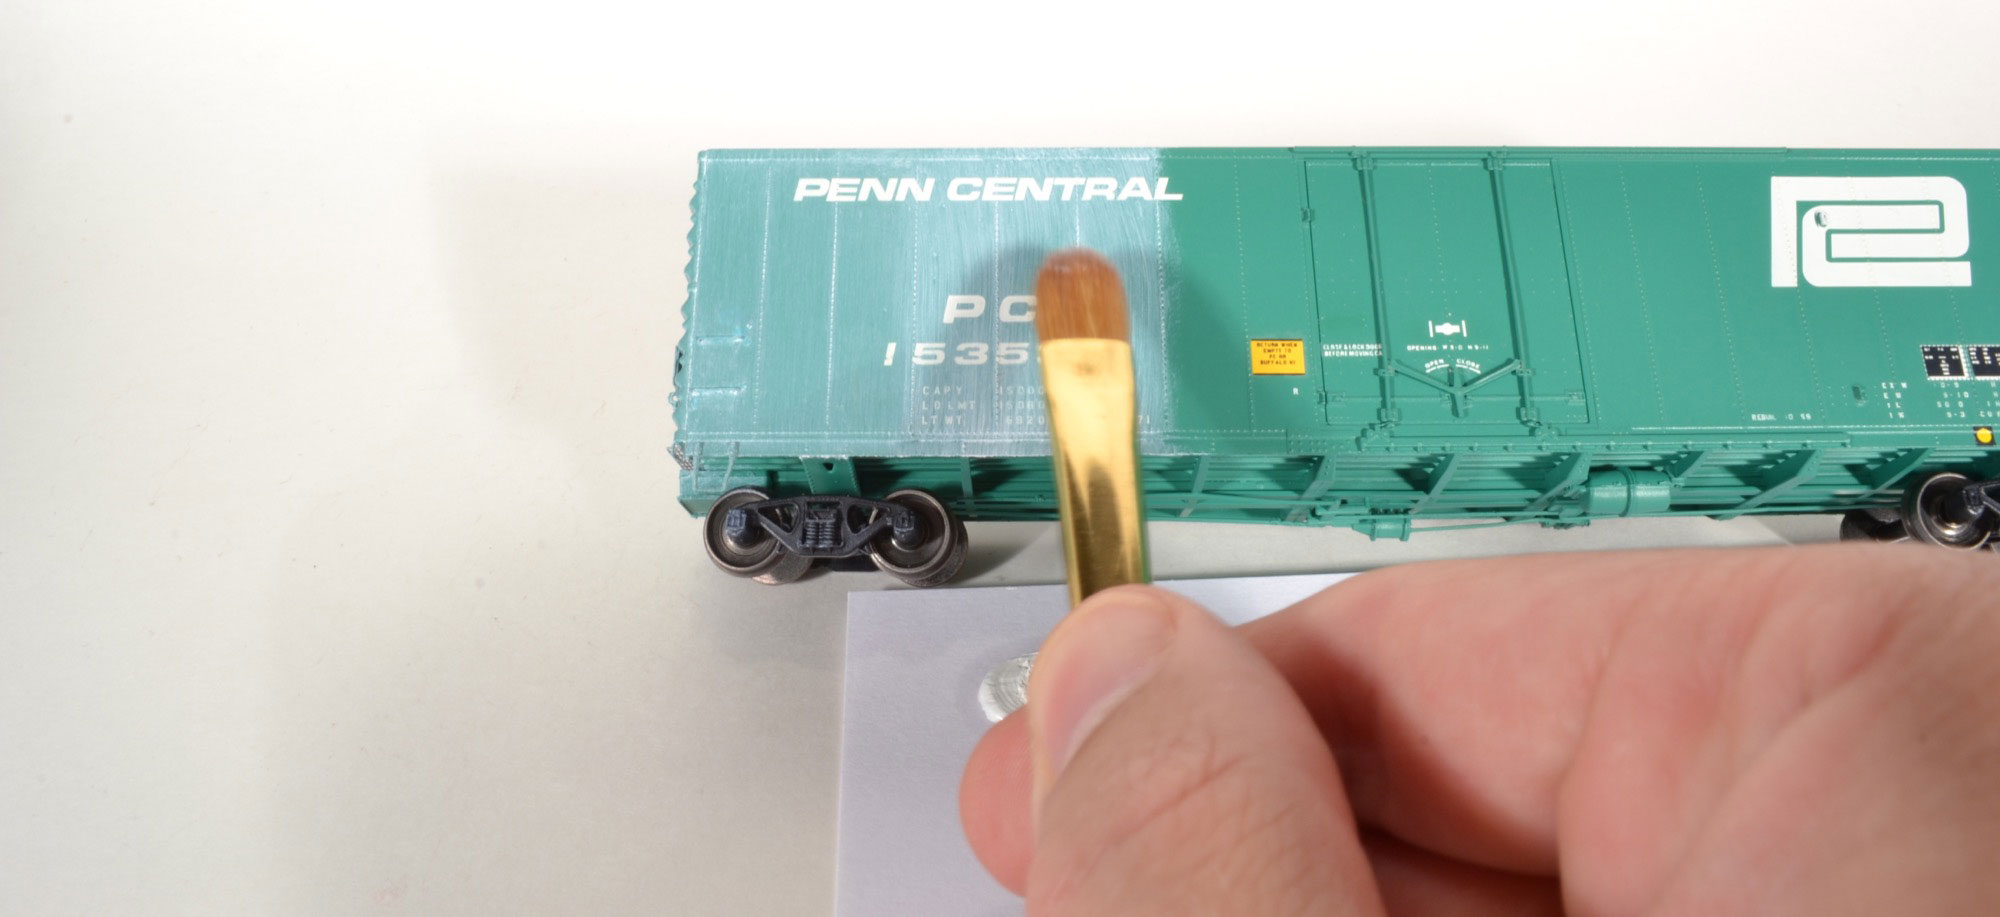
 Step 2 – I learned this fading technique from my good friend Jeremy St.Peter. We will use Zinc White as it is the most transparent white oil paint. Once finished, you can see how well it will fade the original Jade Green. Start by placing a drop of Zinc White oil paint on a notecard.
 Step 3 – Working on three panels at a time, use a small flat brush to cover the desired area.
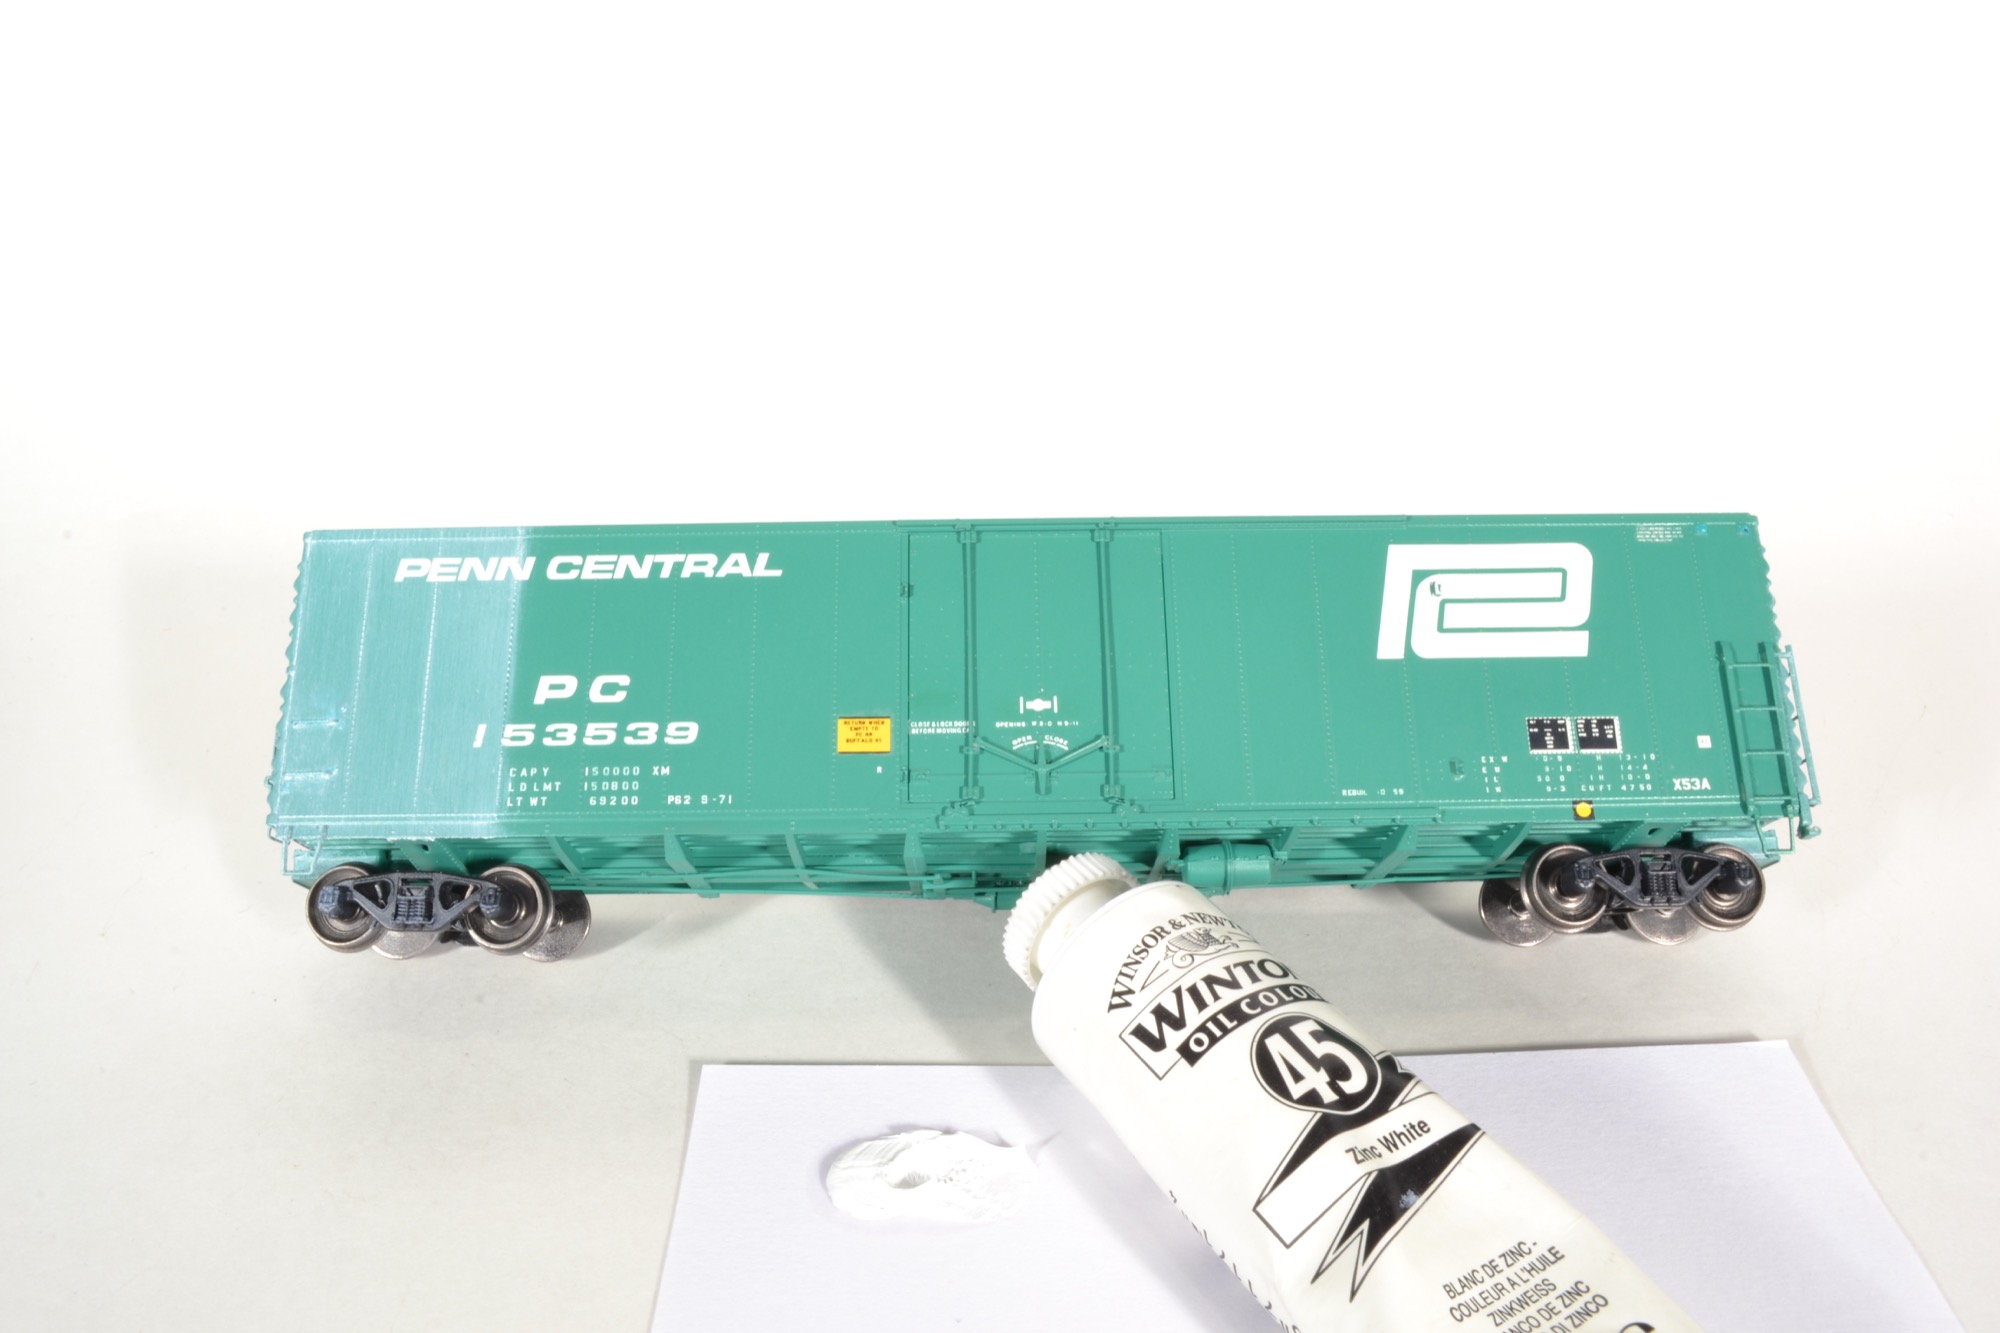
 Step 4 – Use a soft filbert brush to remove some of the paint and smooth out the finish. Wipe off any excess paint from the brush on a soft piece of cloth.
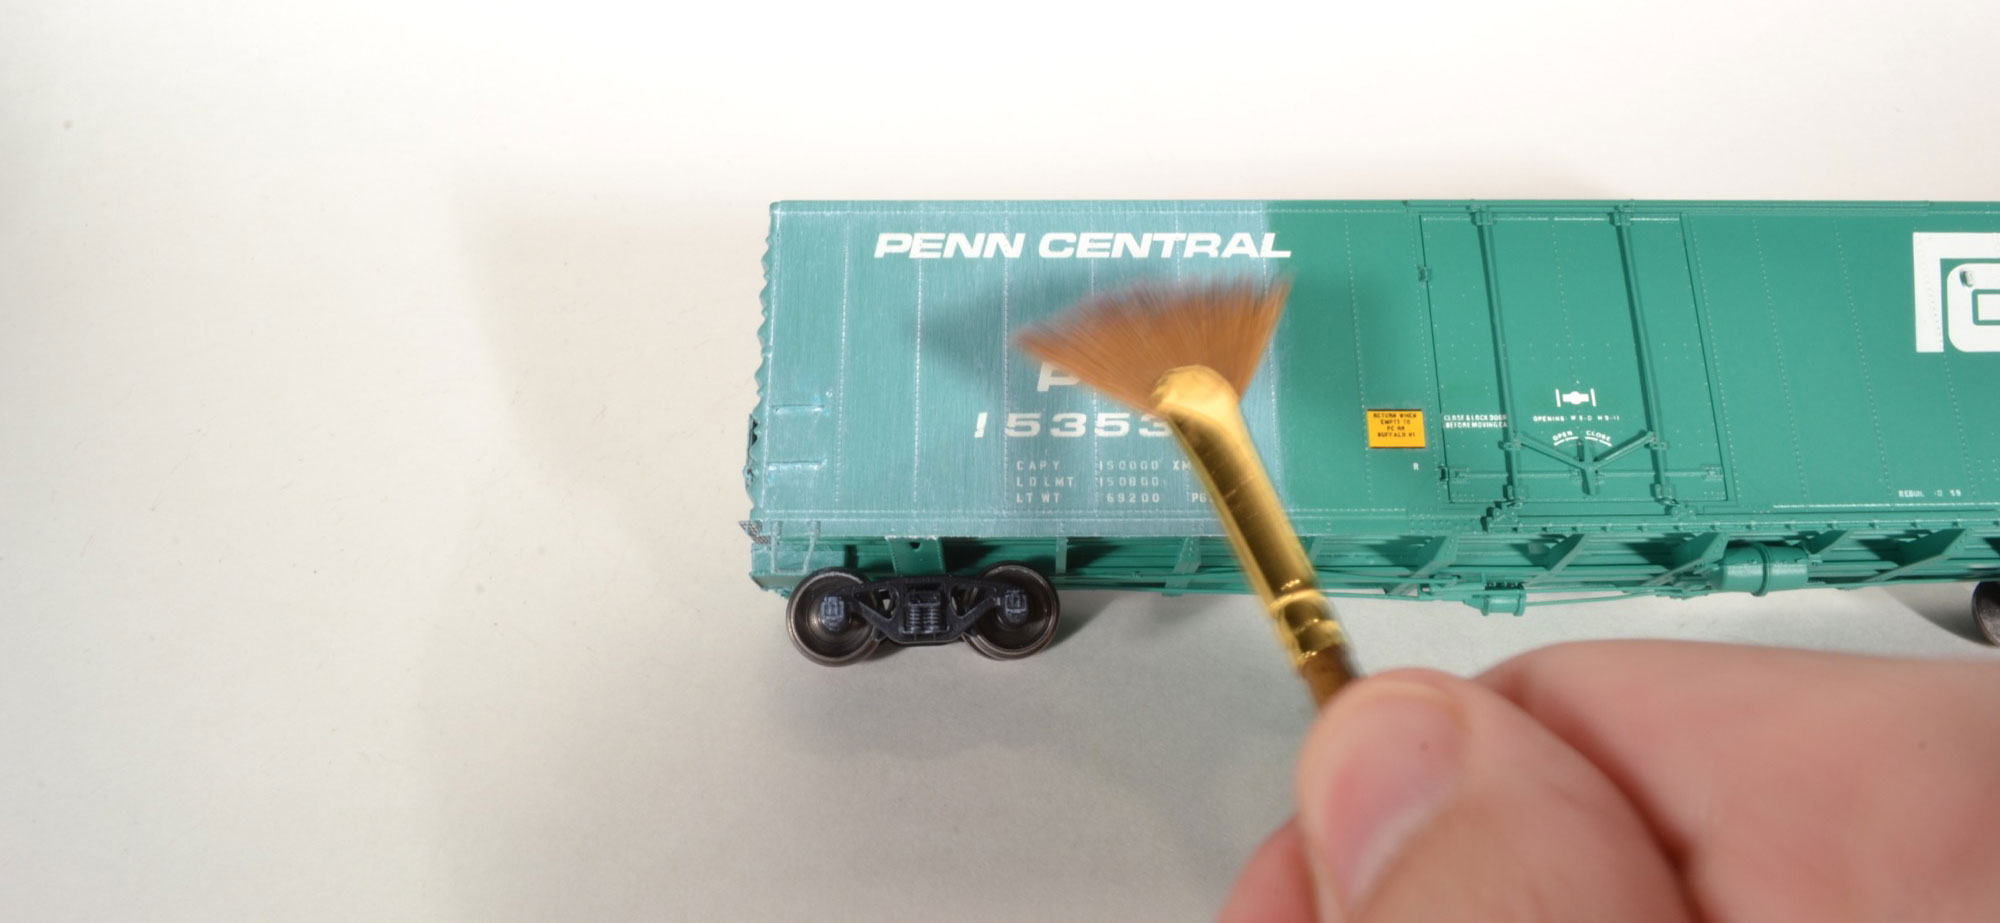 Step 5 – Use a fan brush to remove any remaining brush strokes. The white oil paint will need about 2-3 days to fully dry. Once dry, seal it again with Dullcote to prepare the model for following washes and filters.
 Step 6 – With the fading complete, some of the white paint will cling around small details. Use a small brush to remove any excess, but it is not imperative as we can cover it with techniques later.
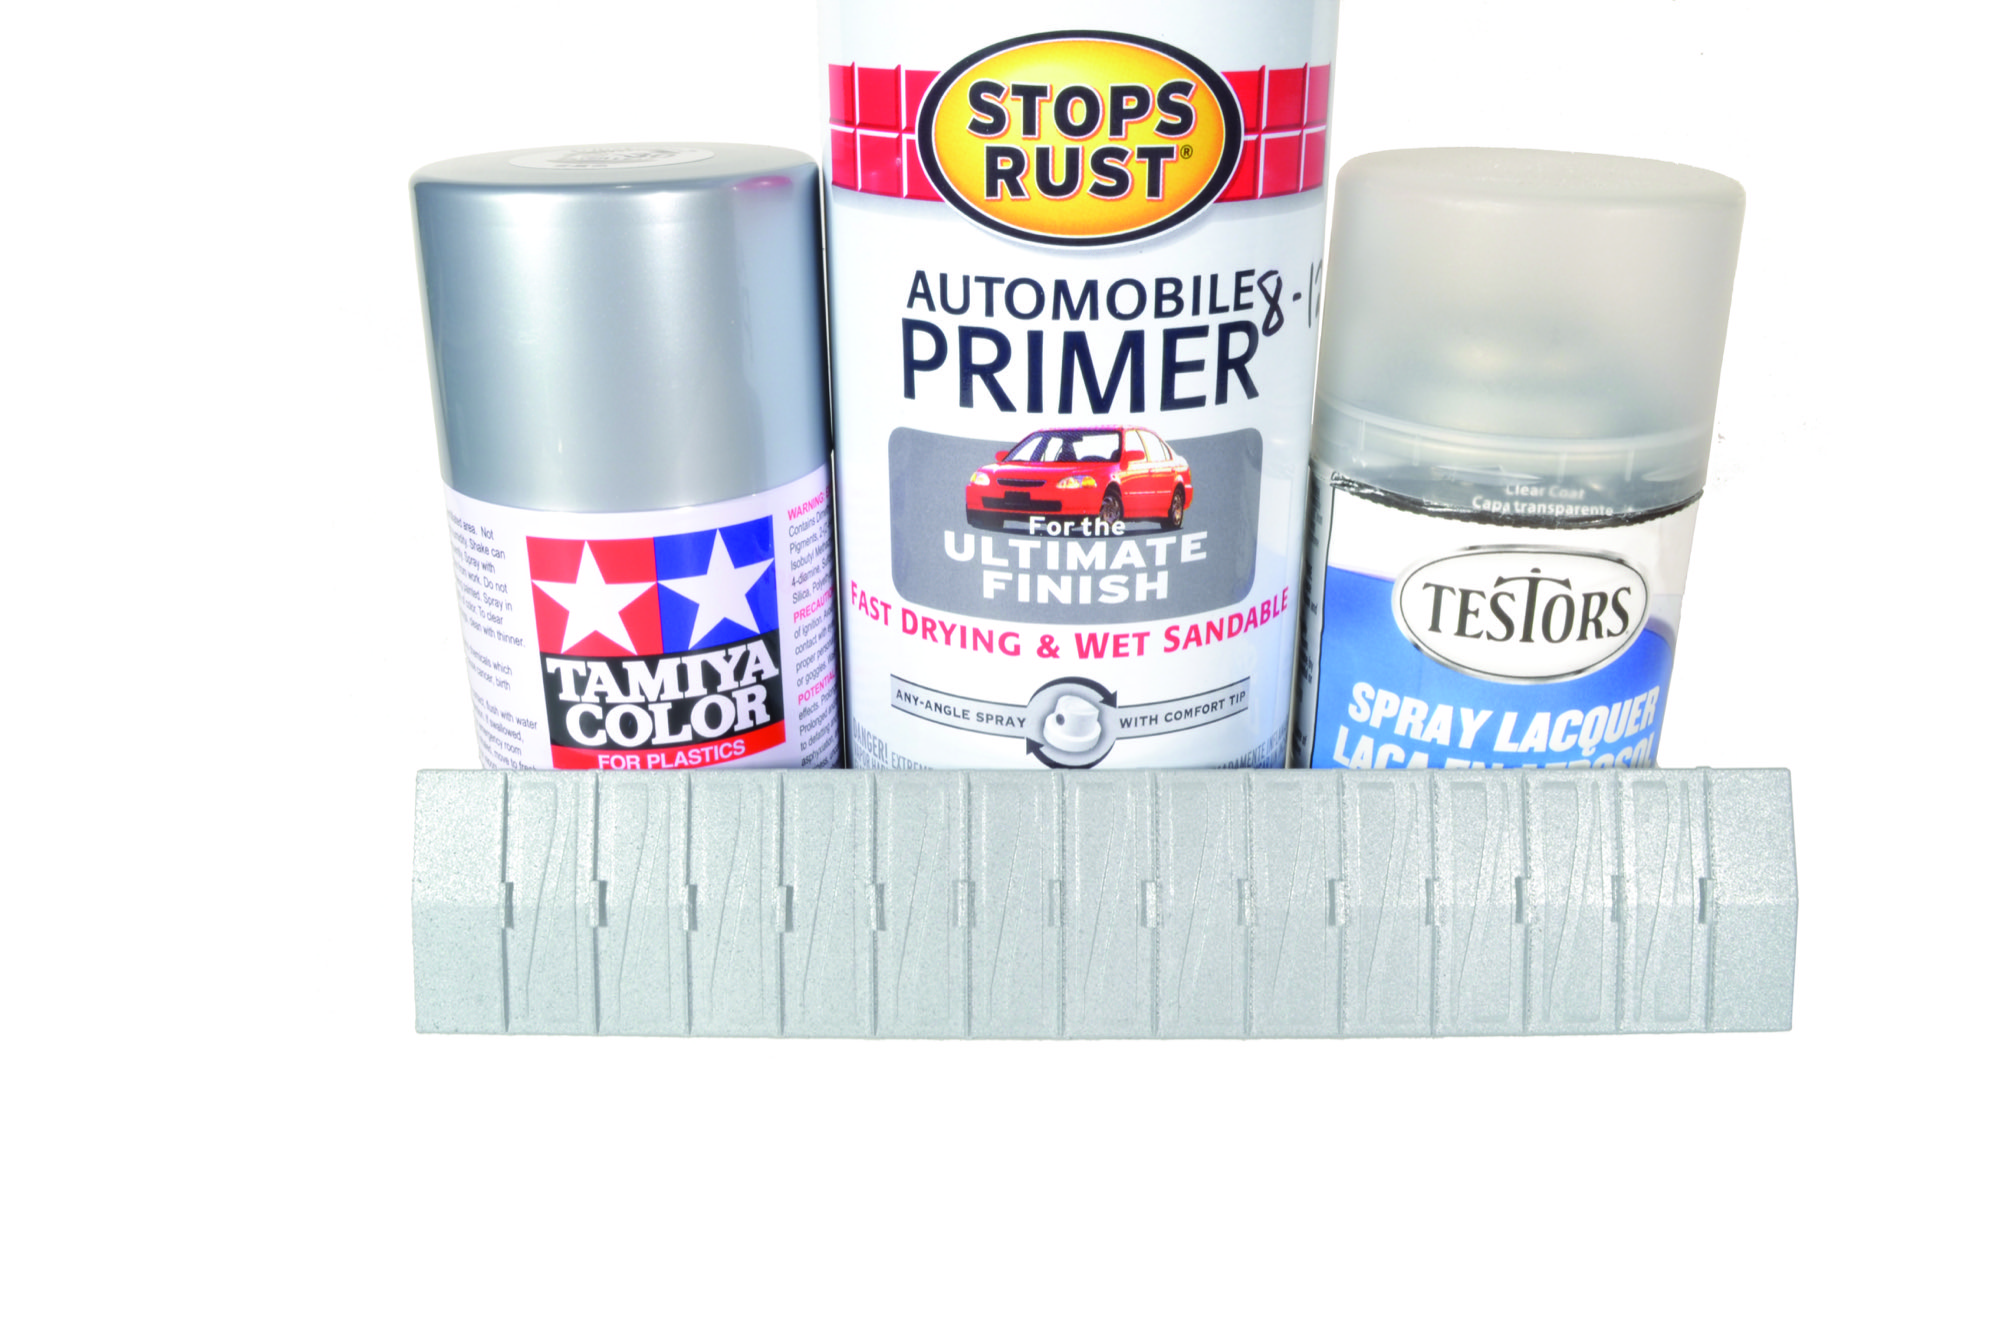 Step 7 – The original roof was removed and replaced with a Moloco Overhanging Stanray roof and roof walk brackets. Cover the entire roof with a light coat of Tamiya Silver Leaf spray paint. For a galvanized metal finish, apply a light mist of Rustoleum Light Gray Auto Primer. Seal the roof with Dullcote for the next weathering step.
 Step 8 – Use a soft round brush to apply a dark brown wash to the entire roof. The brown color will tone down the metal roof and add some subtle grime.
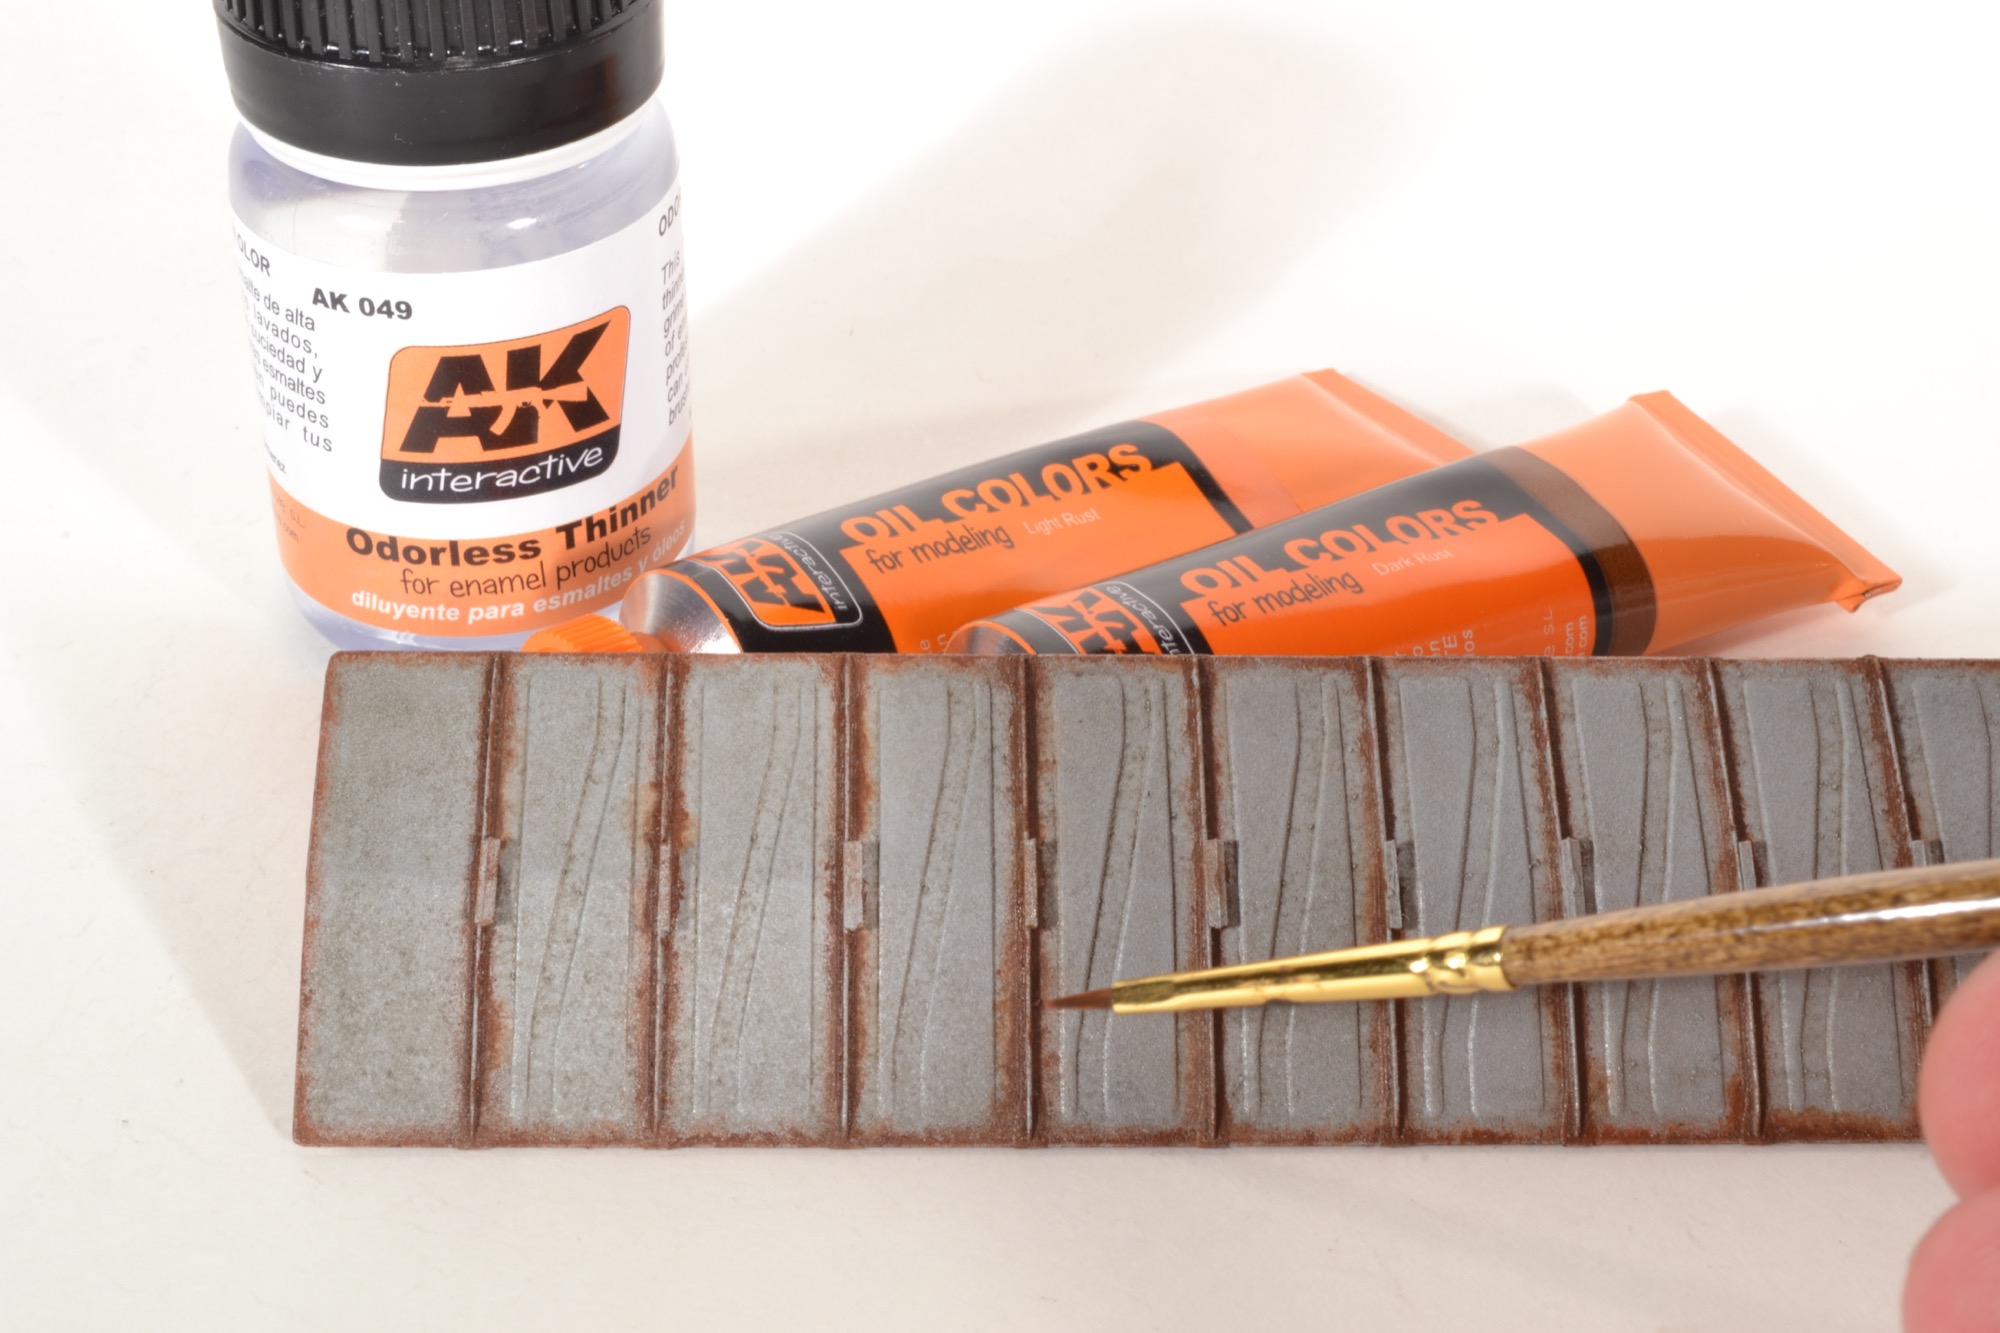 Step 9 – Apply rust to the roof by stippling on a light rust color like Burnt Sienna oil paint, followed by a darker rust color. I prefer Burnt Umber for most my darker rust. Lightly flood the edges of rust with Odorless Thinner or Mineral Spirits to soften the edges and create some slight runoff.
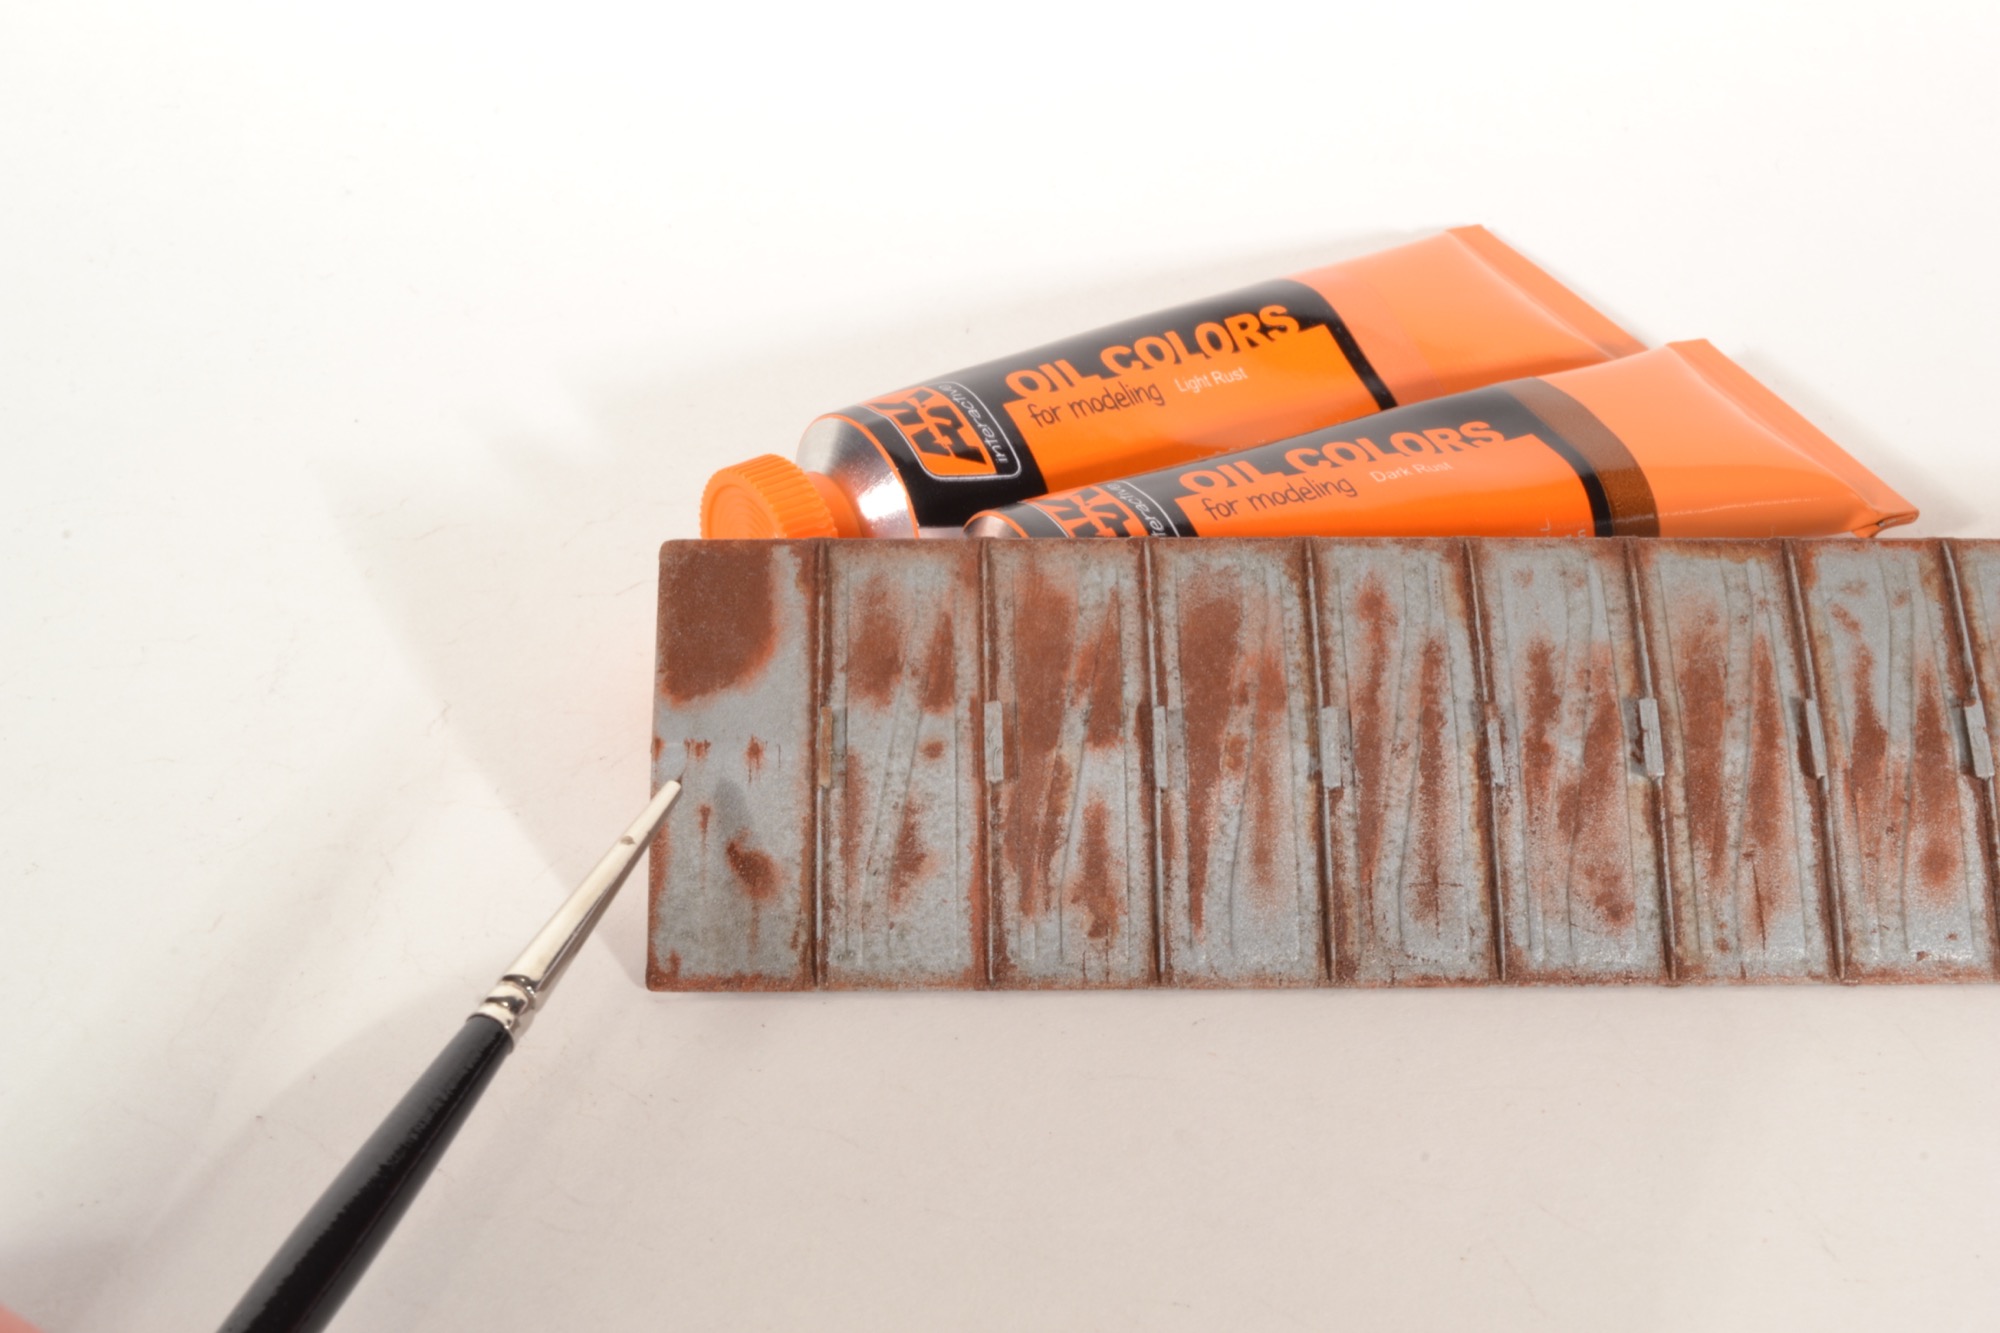 Step 10 – Using a trimmed down brush with only two or three bristles, we can add small pits, scrapes, and streaks using the oil paints. Make sure the paint goes on smooth and flat. We want to avoid any out of scale textures.
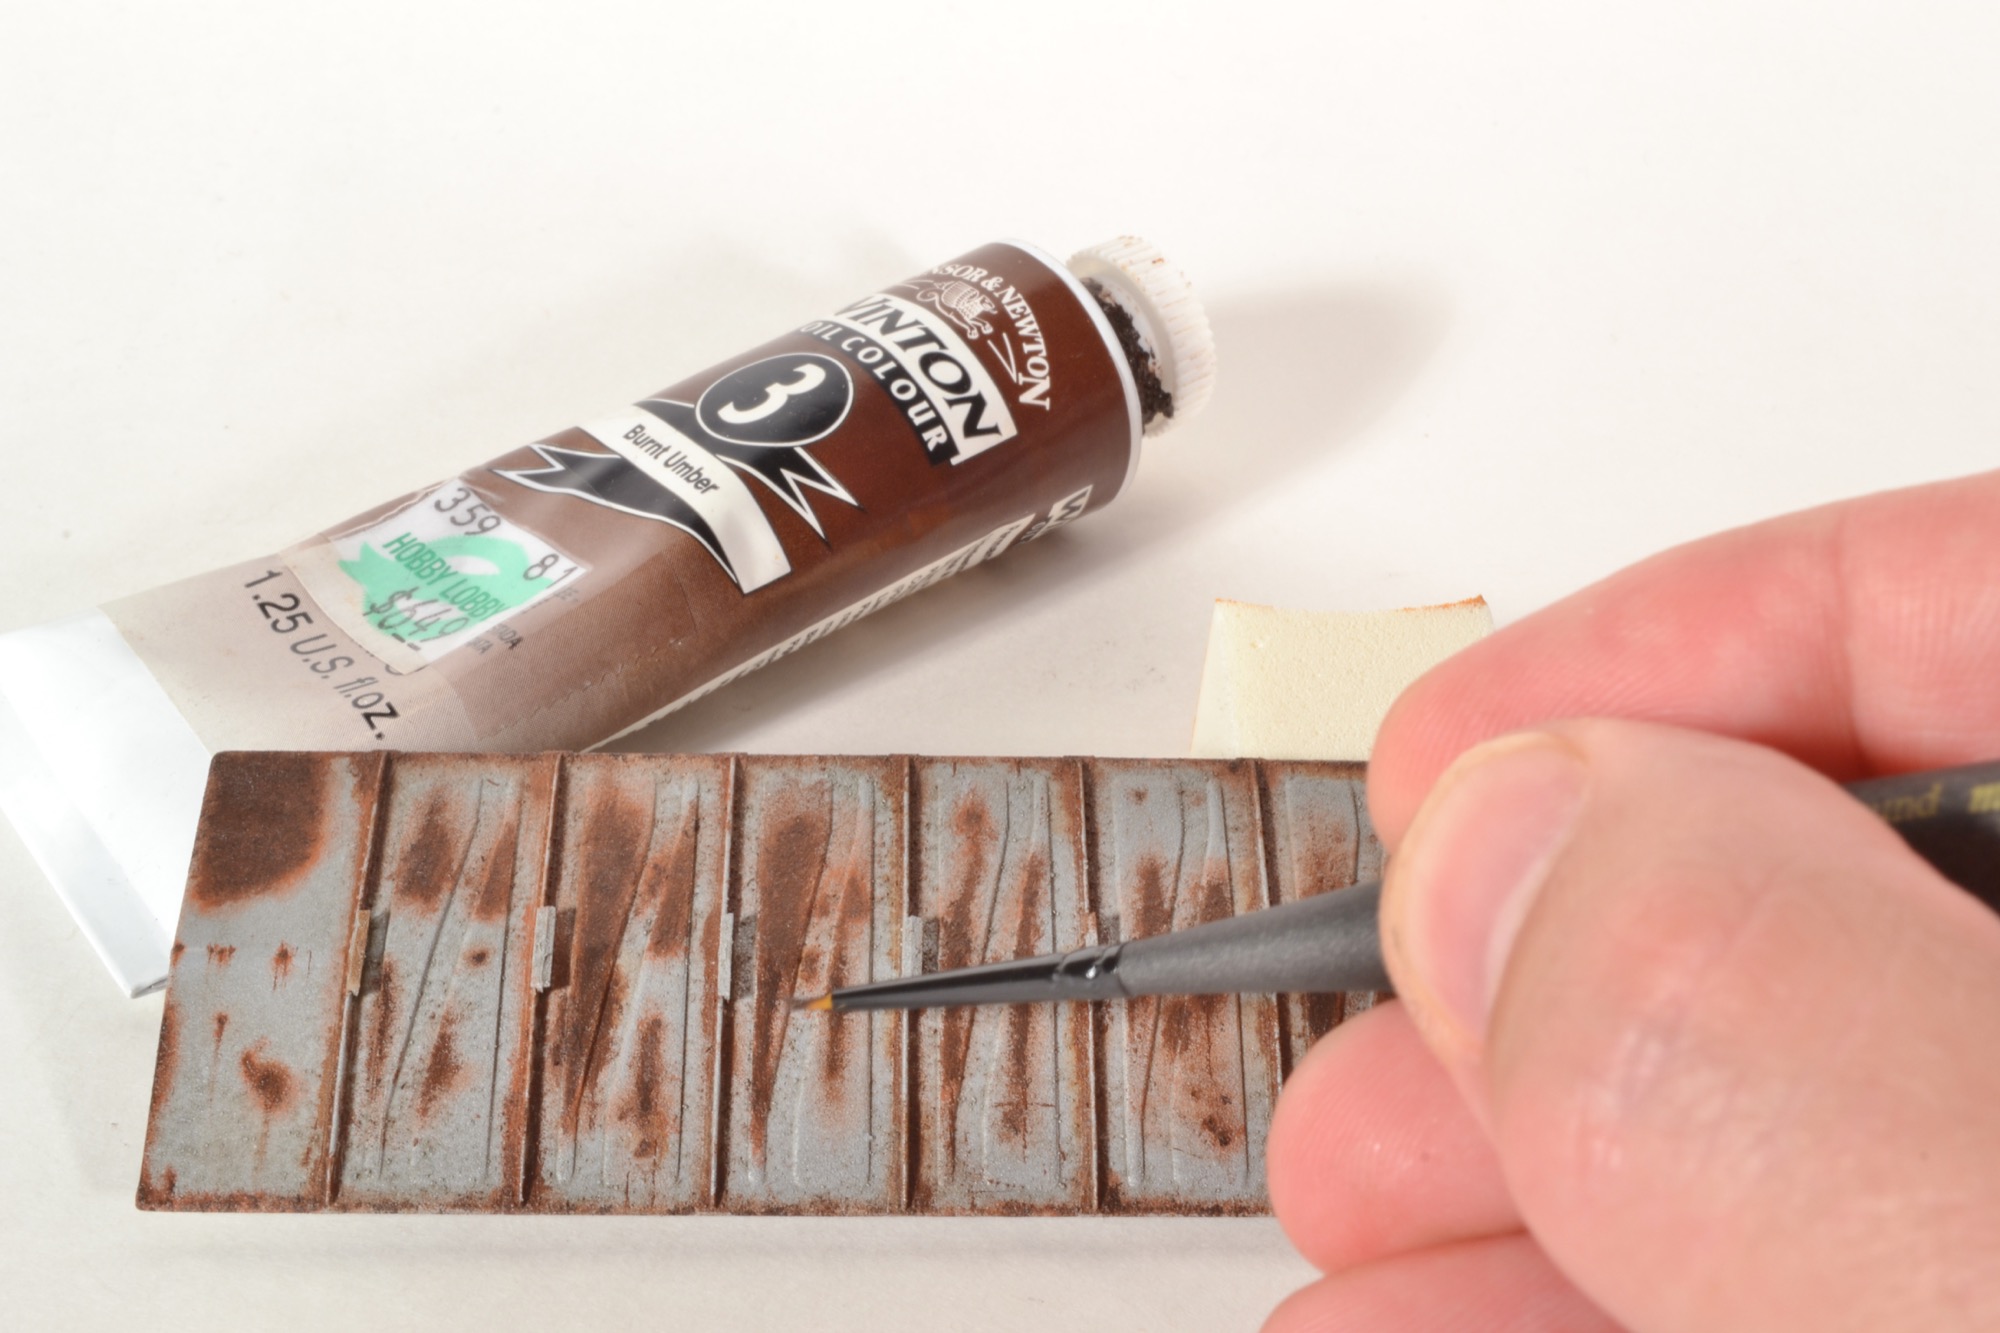 Step 11 – Use Burnt Umber oil paint to add darker areas of rust to the middle of the rust spots.
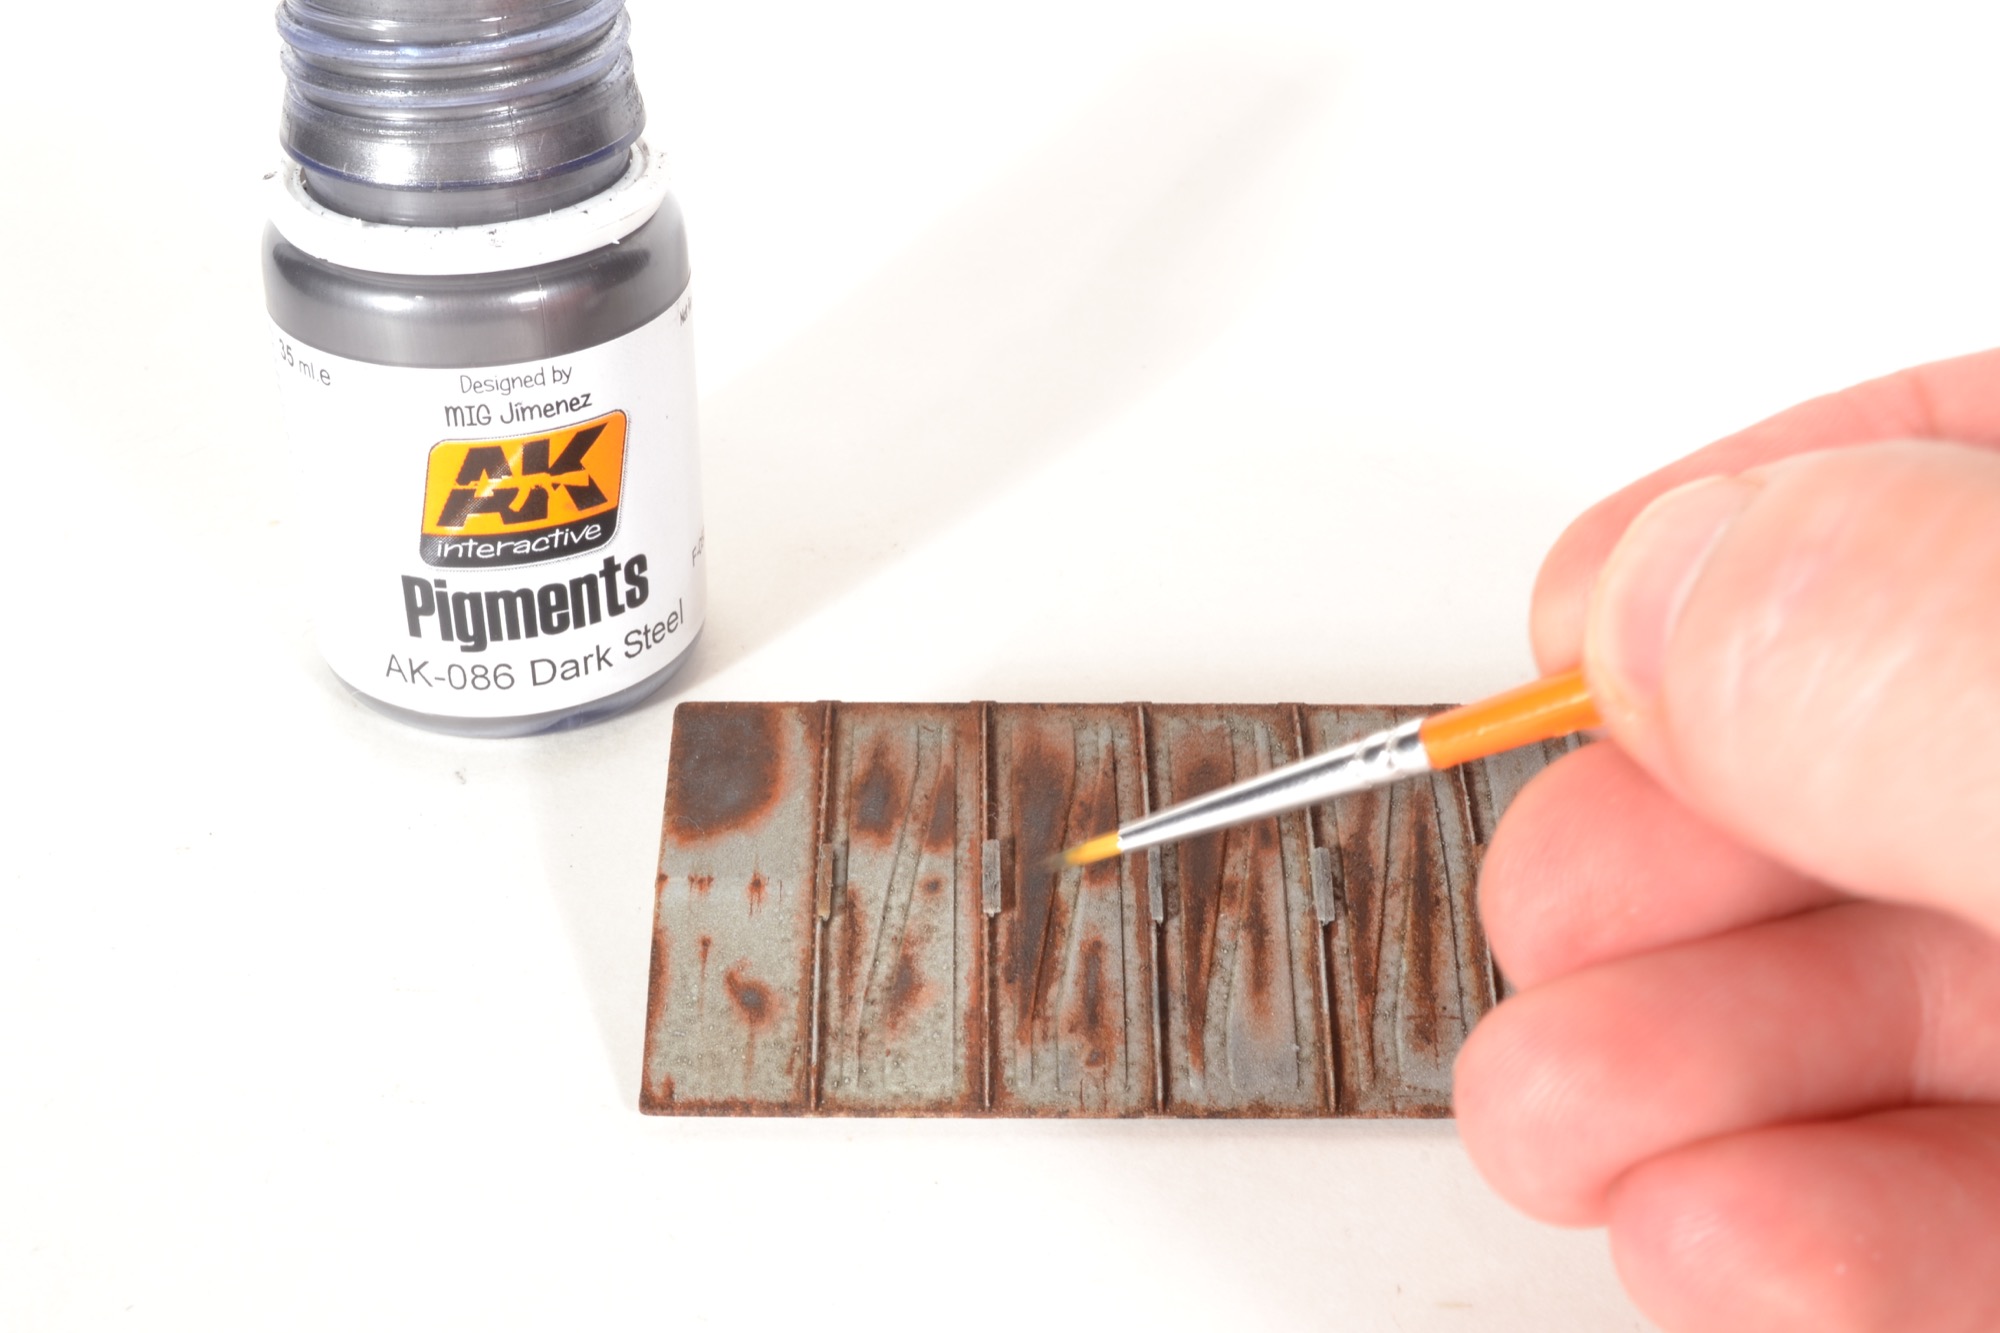
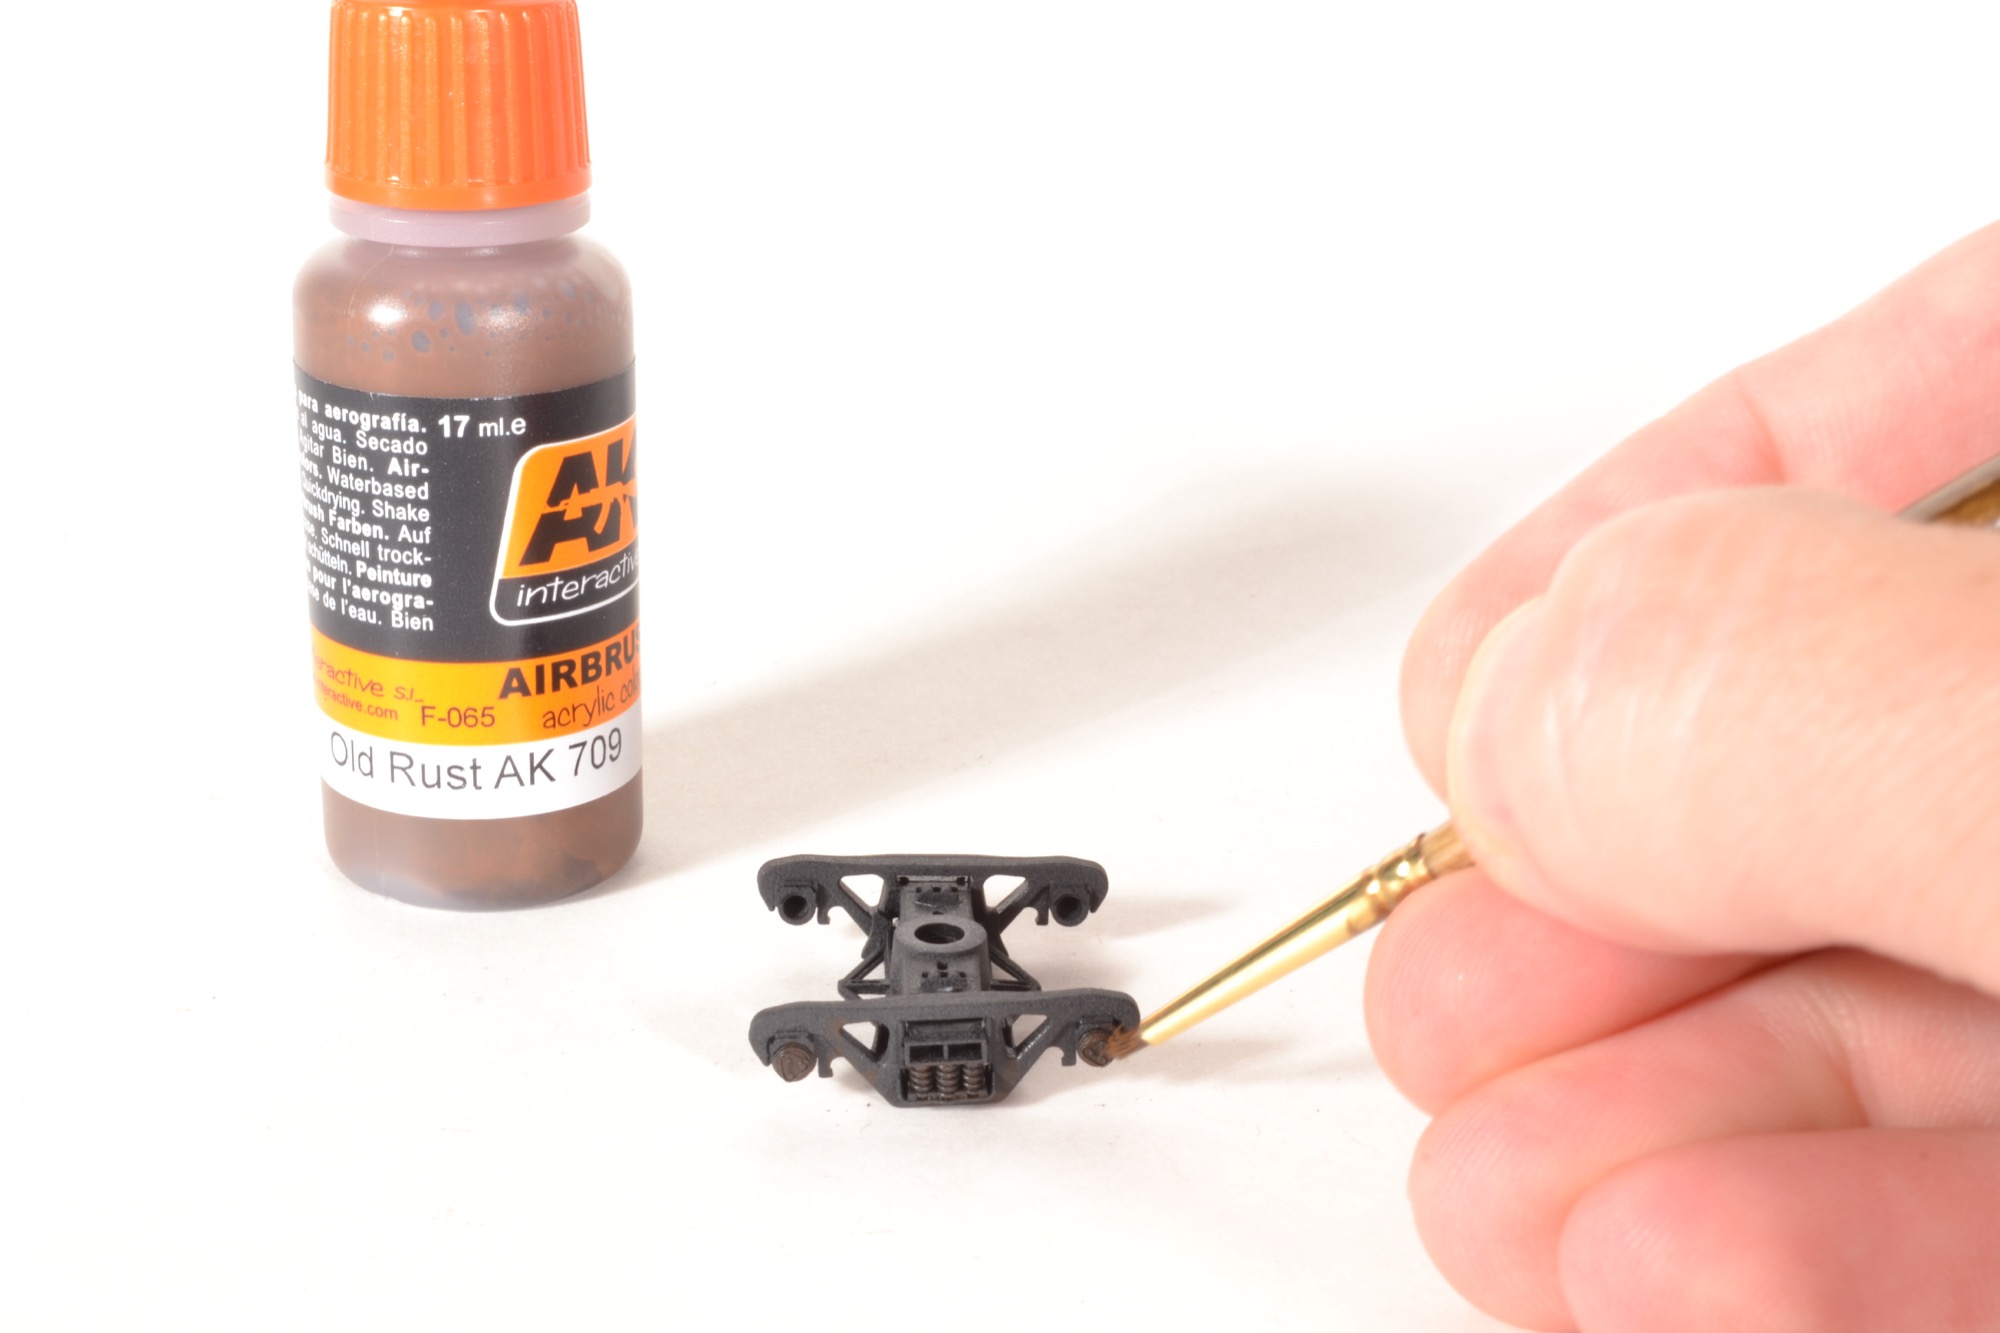
Step 12 – The final step for the roof is to lightly apply some AK Dark Silver pigment to the larger areas of rust. We can make our own “metal” pigment by grinding down the graphite from a #2 pencil.
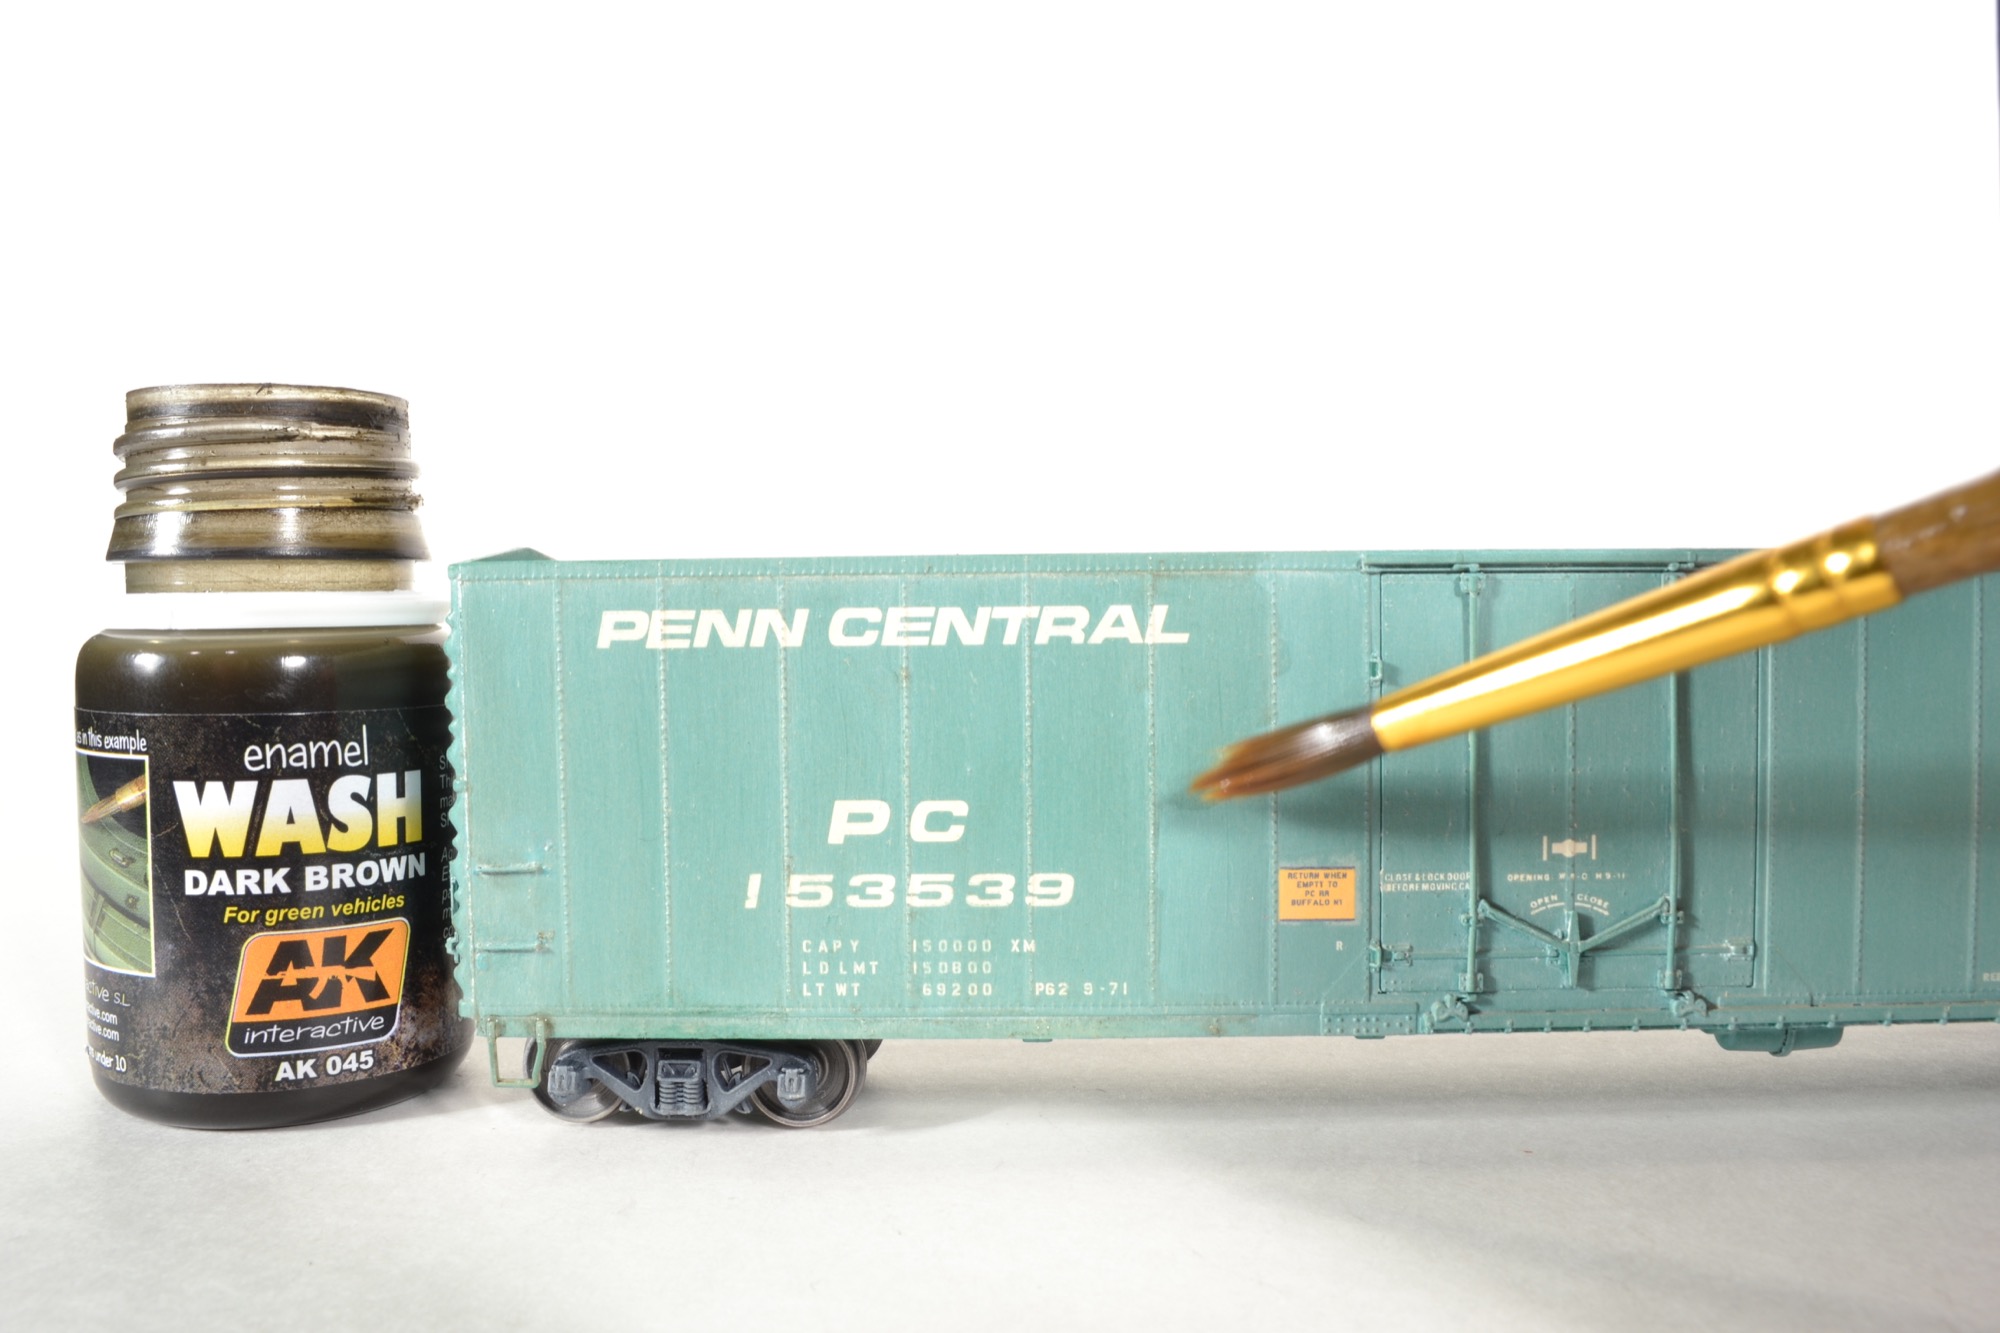
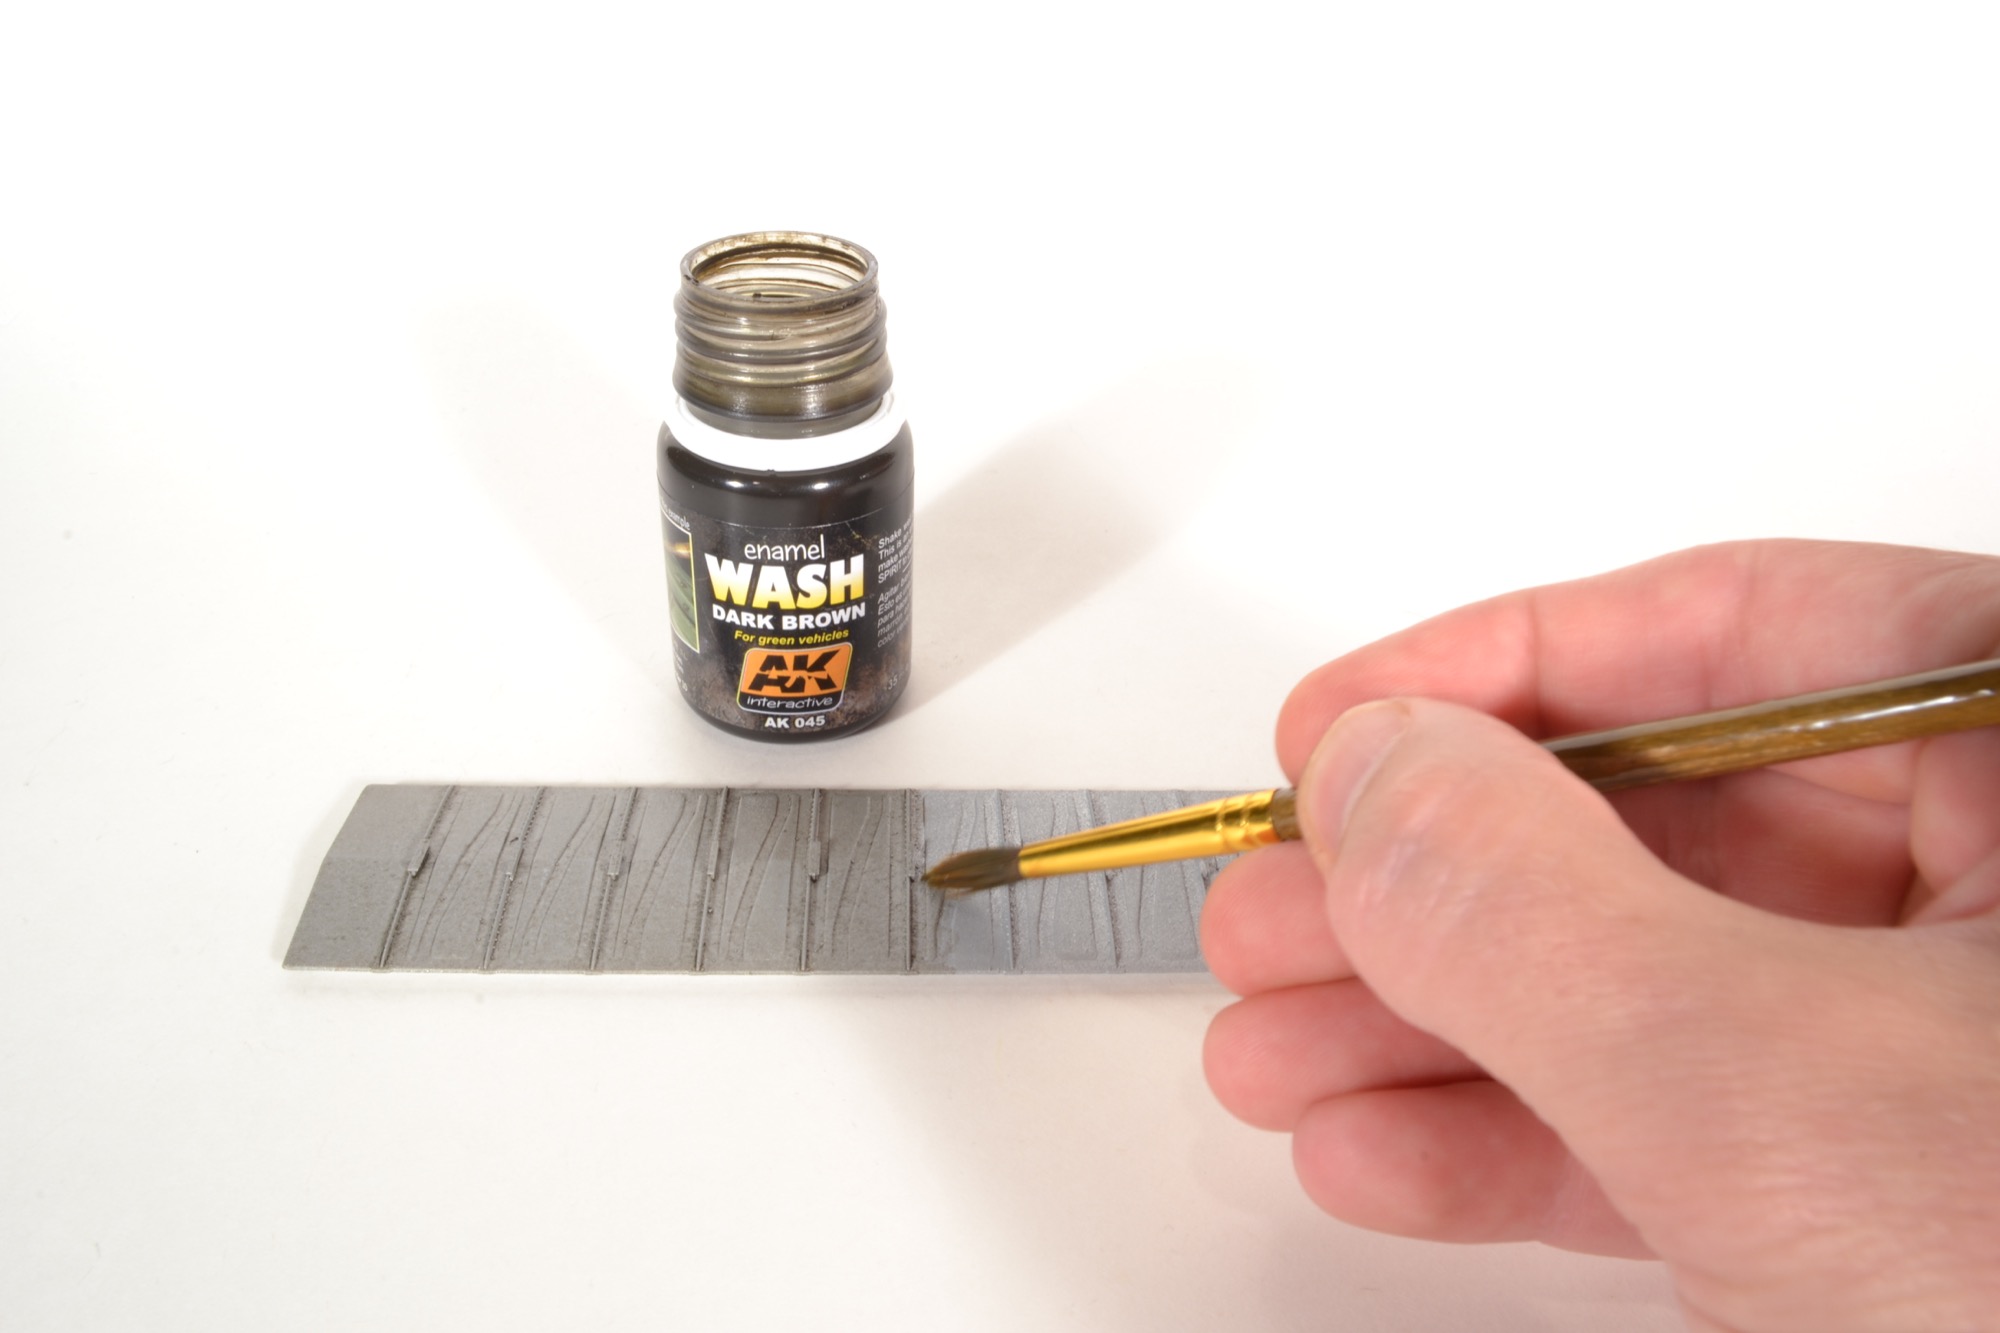
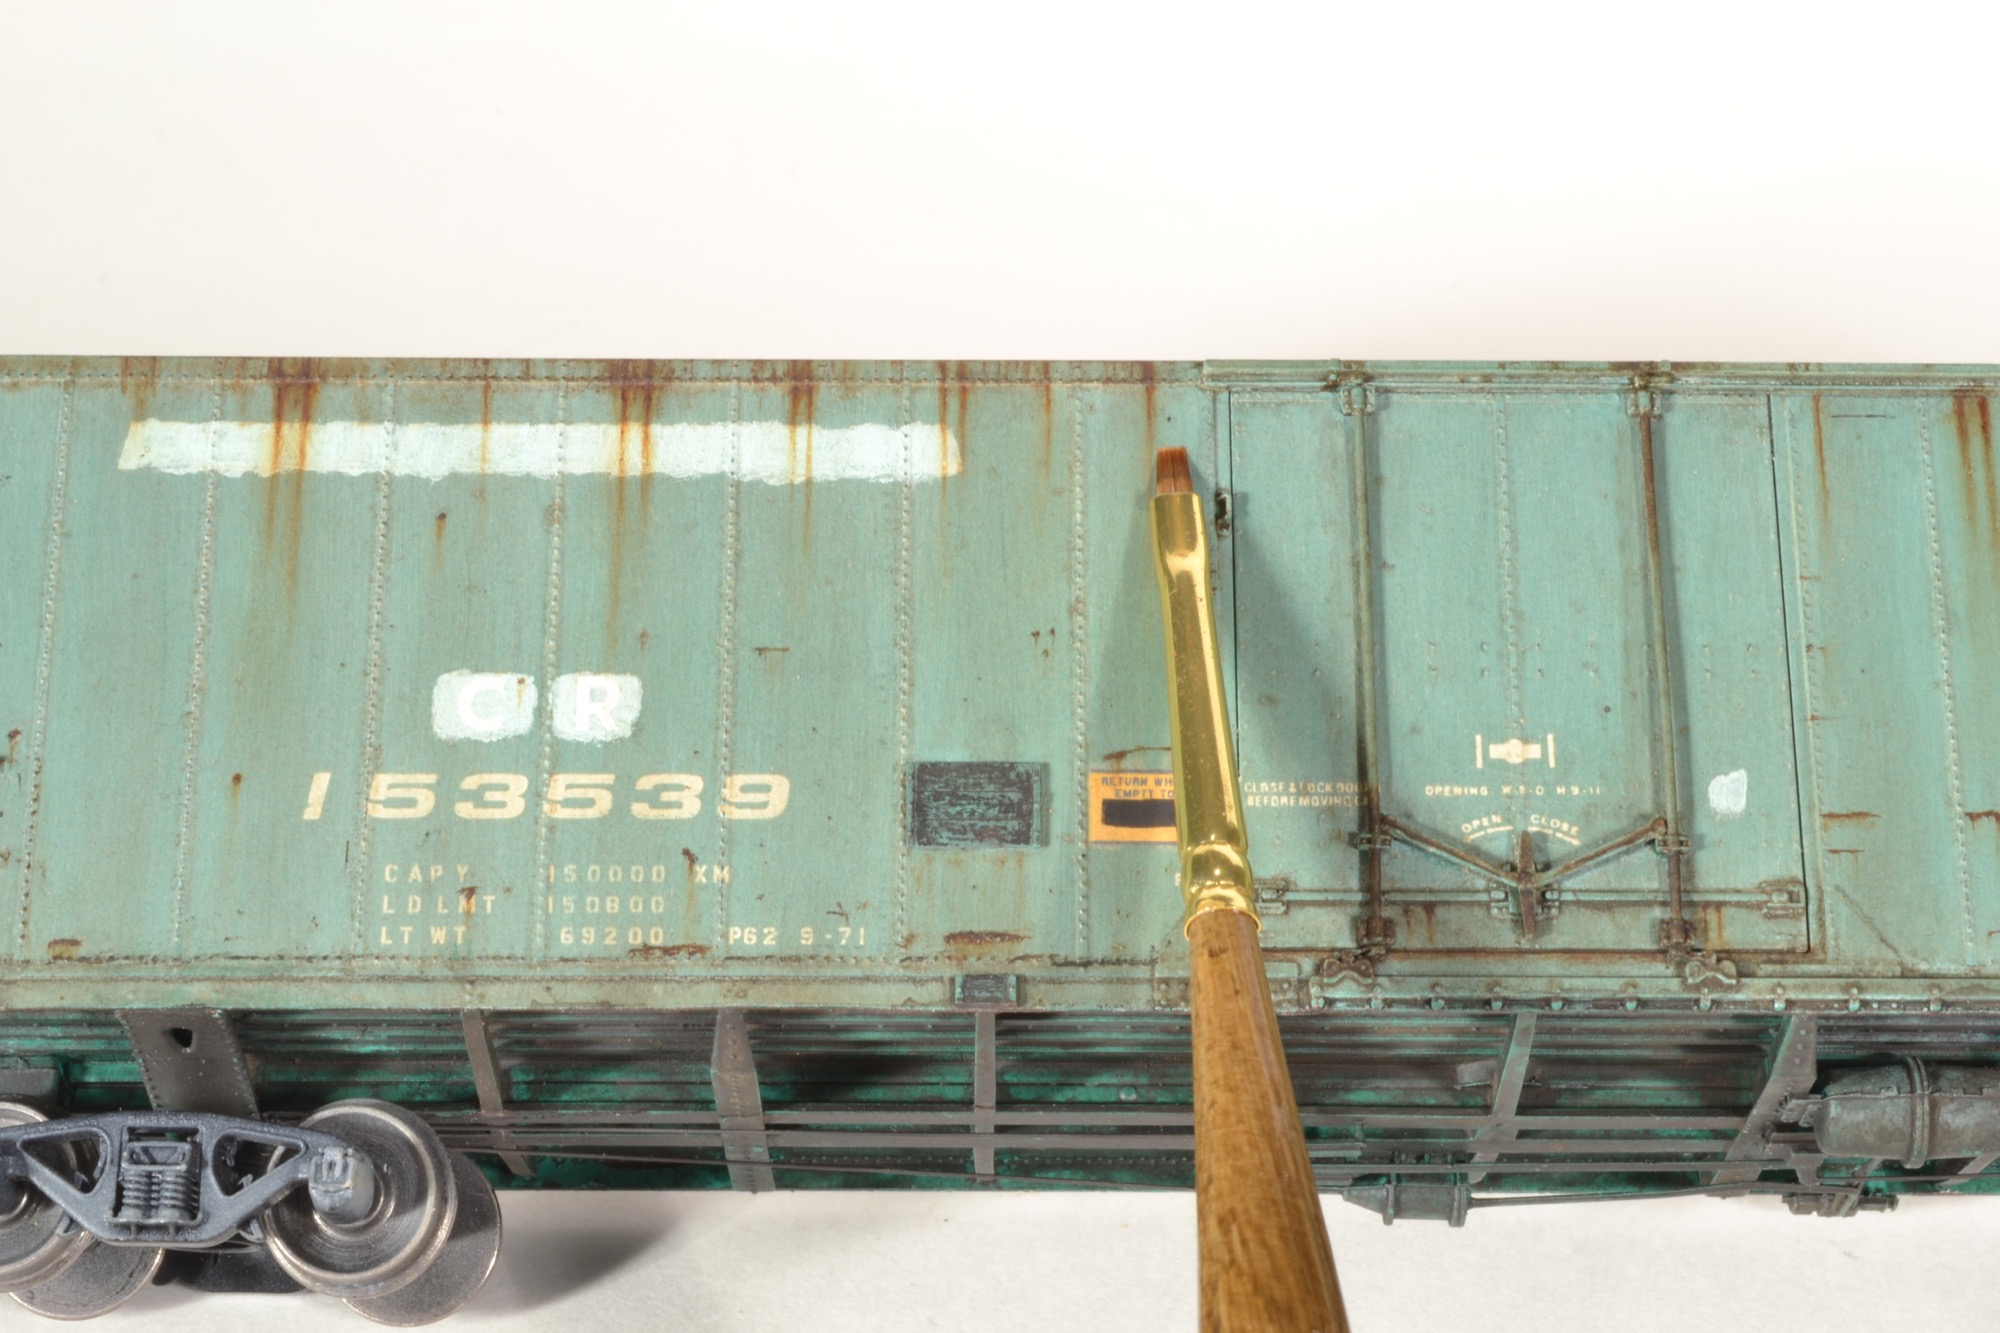
Step 13 – Moving back to the car sides, we will add a little a bit of grime to the car. Use a large round soft brush and some AK Dark Brown Wash. We only need a little bit of wash in brush, which will allow for more control. Be sure to move the brush vertically up and down on the car sides, and try not to leave any brush marks.
 Step 14 – Once the car is completely covered, we can add more coats of wash for a heavier amount of grime. If needed, be sure that the wash is allowed to dry for about 30 minutes, otherwise we will disturb the first layer of wash.

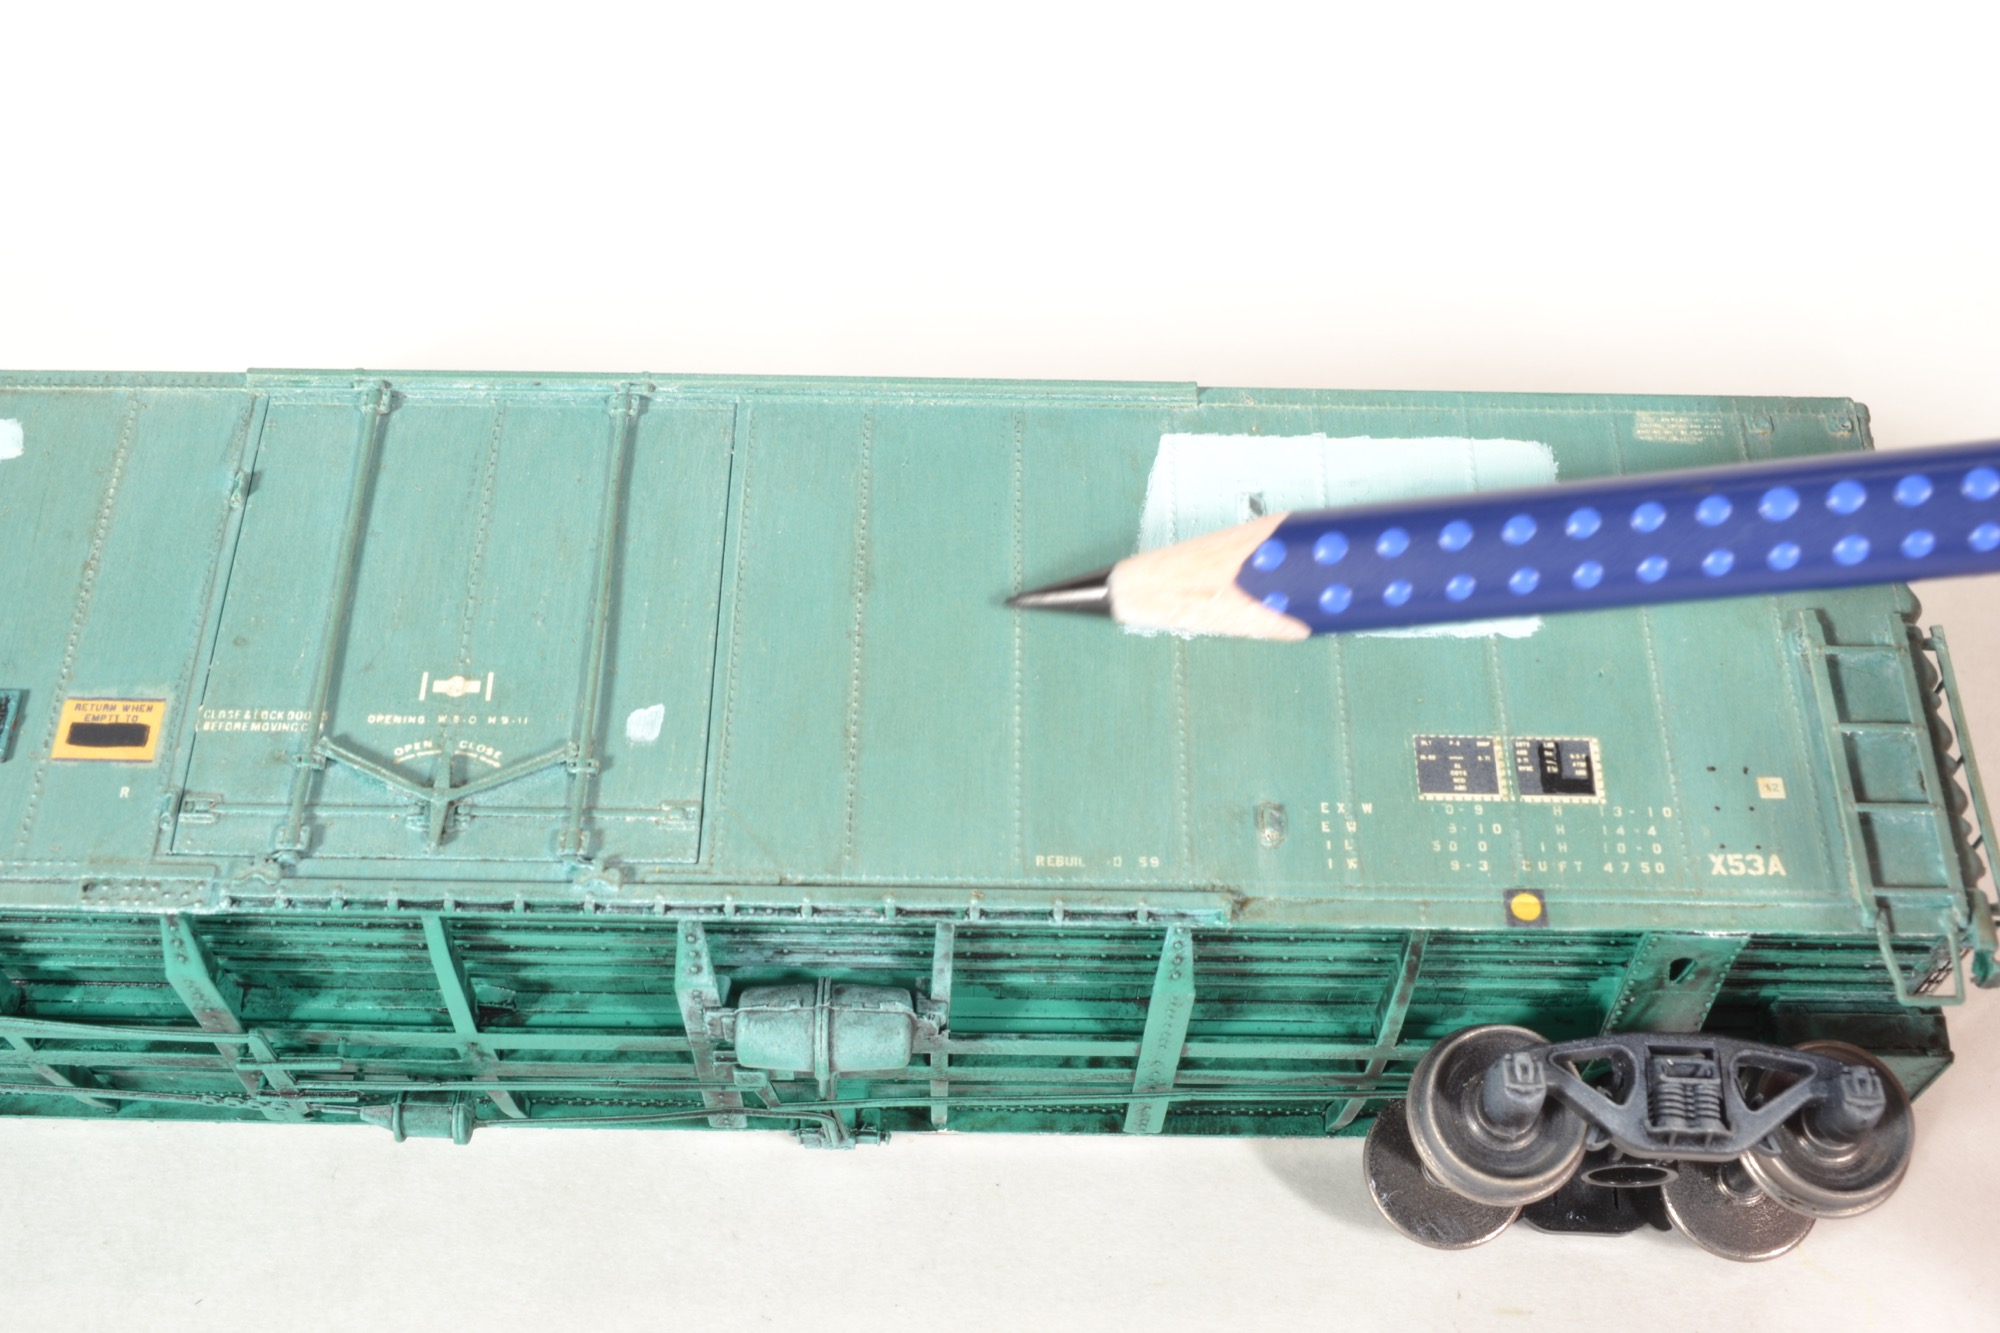
Step 15 – Apply patches by mixing some Jade green and White, and then applying them with a small flat brush. Apply one light coat, so the underlying graphics show through, as was common on many of the Conrail patched equipment.
Step 16 – Darken the line of rivets with a Black Acrylic Artist Pencil. Lay the pencil almost flat against the car, with just the tip touching the rivets, and then begin to move the pencil up and down along the row of rivets.

Step 17 – A lot of grime accumulates on the top of the car ends. To simulate this, we can simply brush raw umber oil paint on the top of each corrugation.
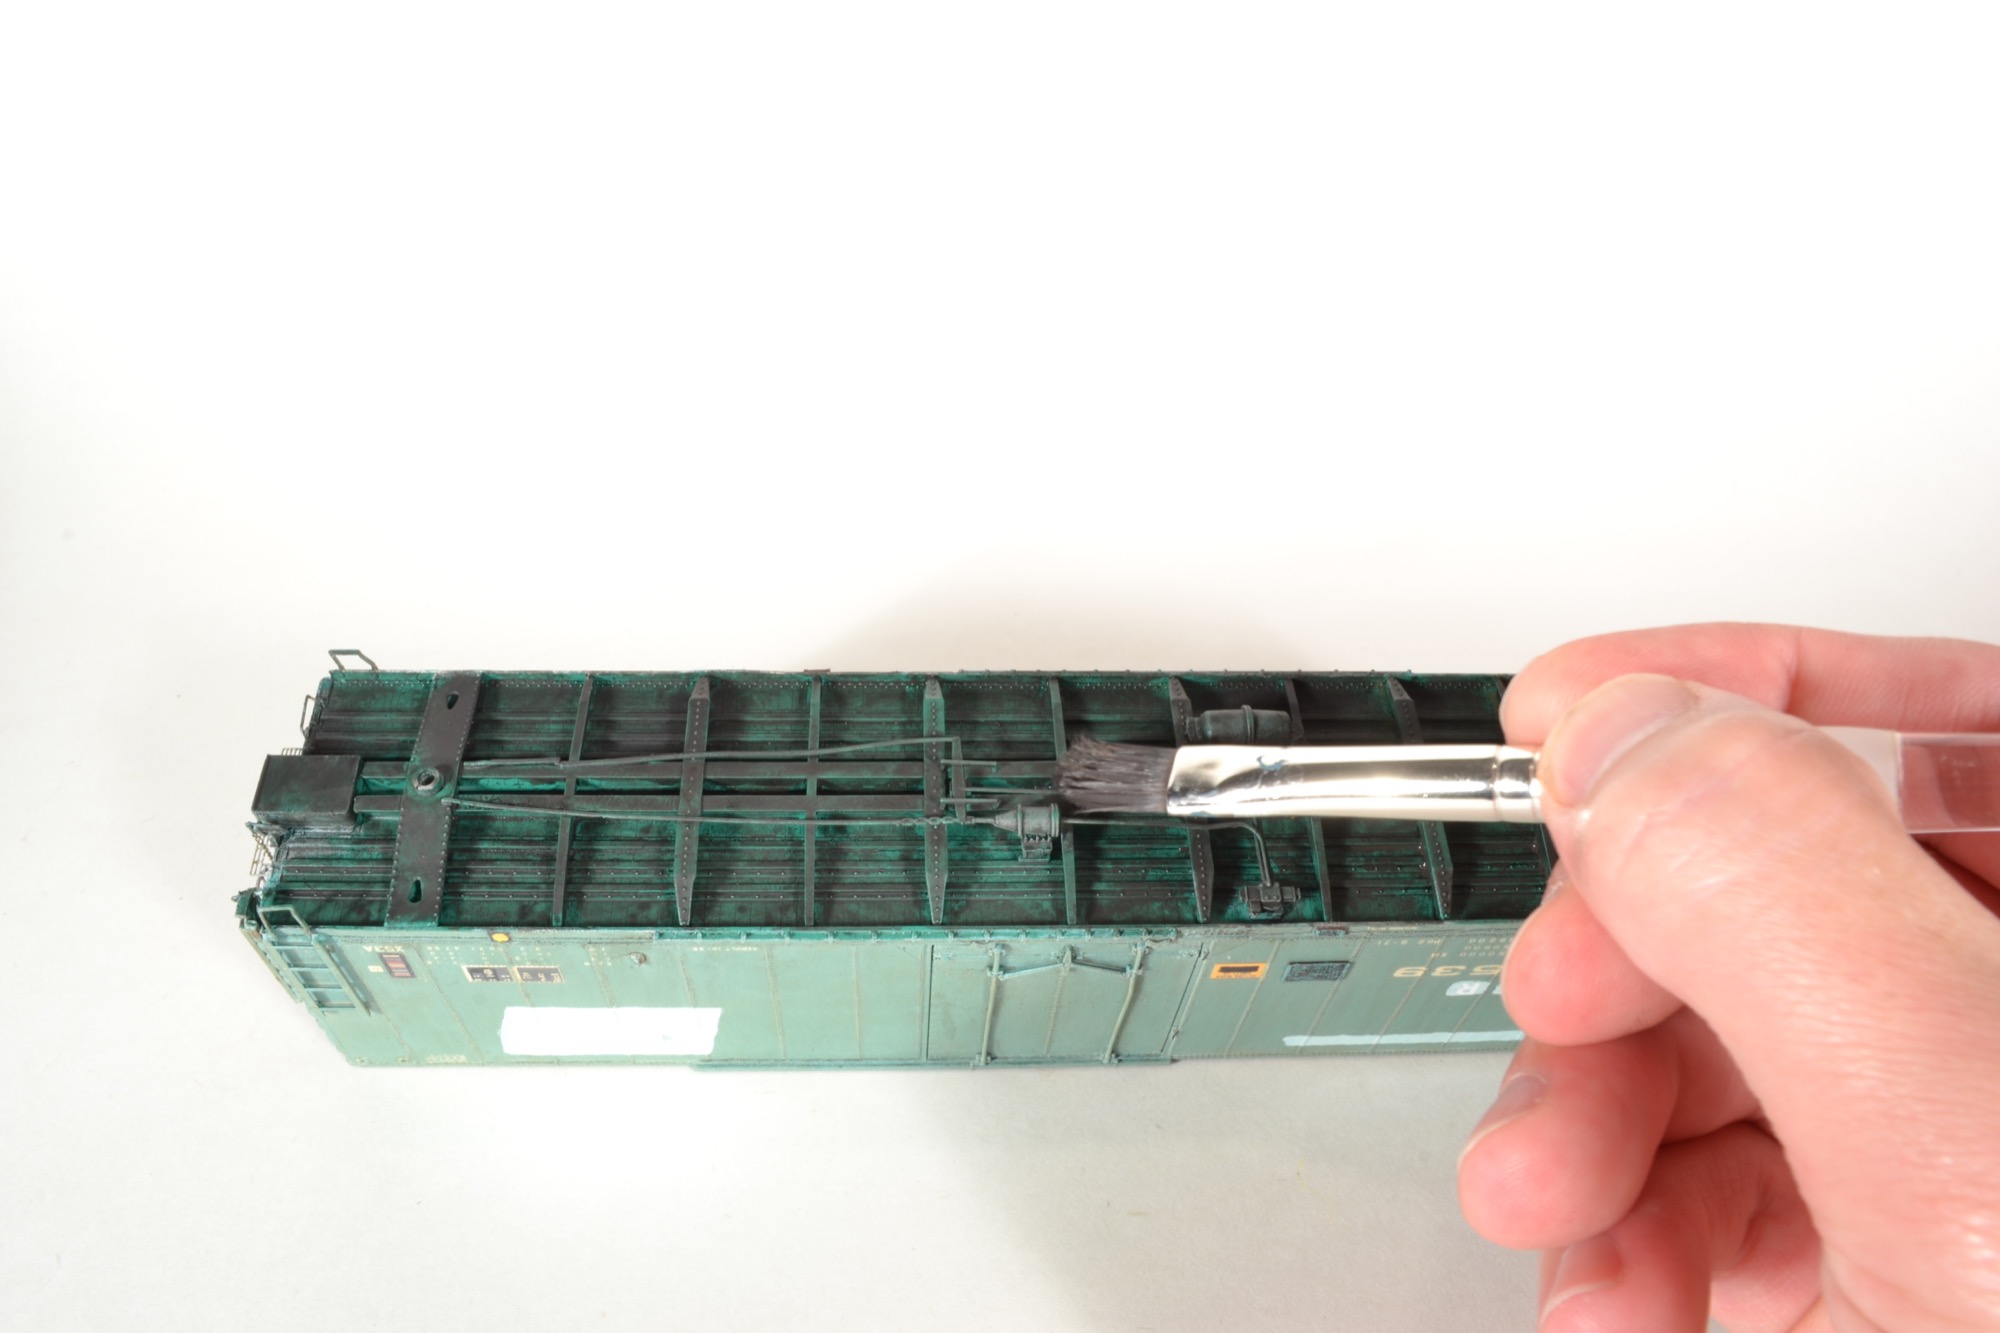
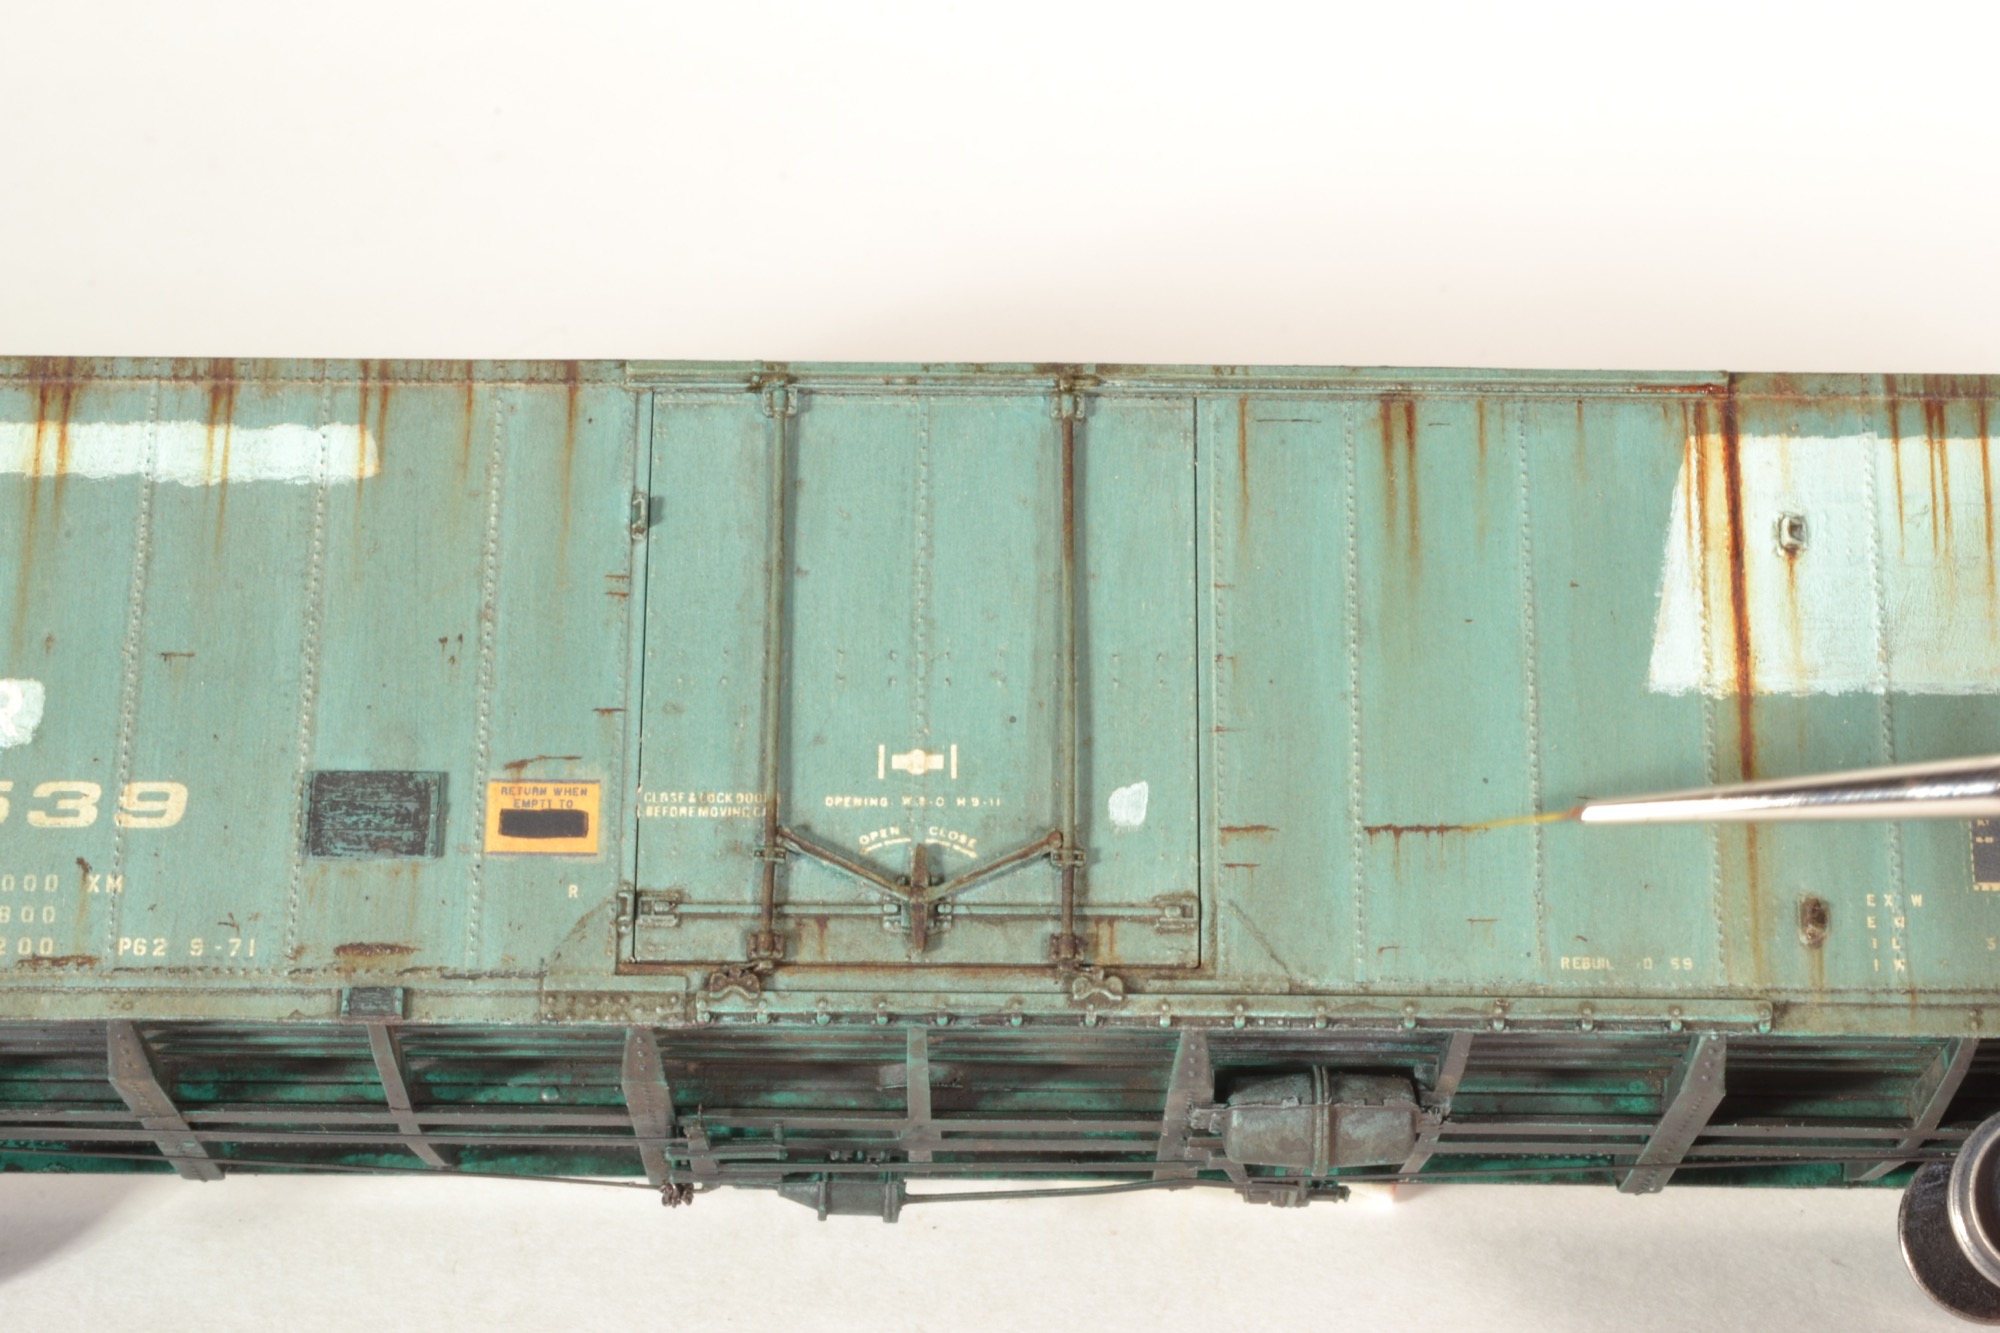
Step 18 – For the underframe, we can quickly add some grime by adding black or dark gray acrylic paint with a larger filbert brush. The acrylic paint can be thinned with Windex if needed.

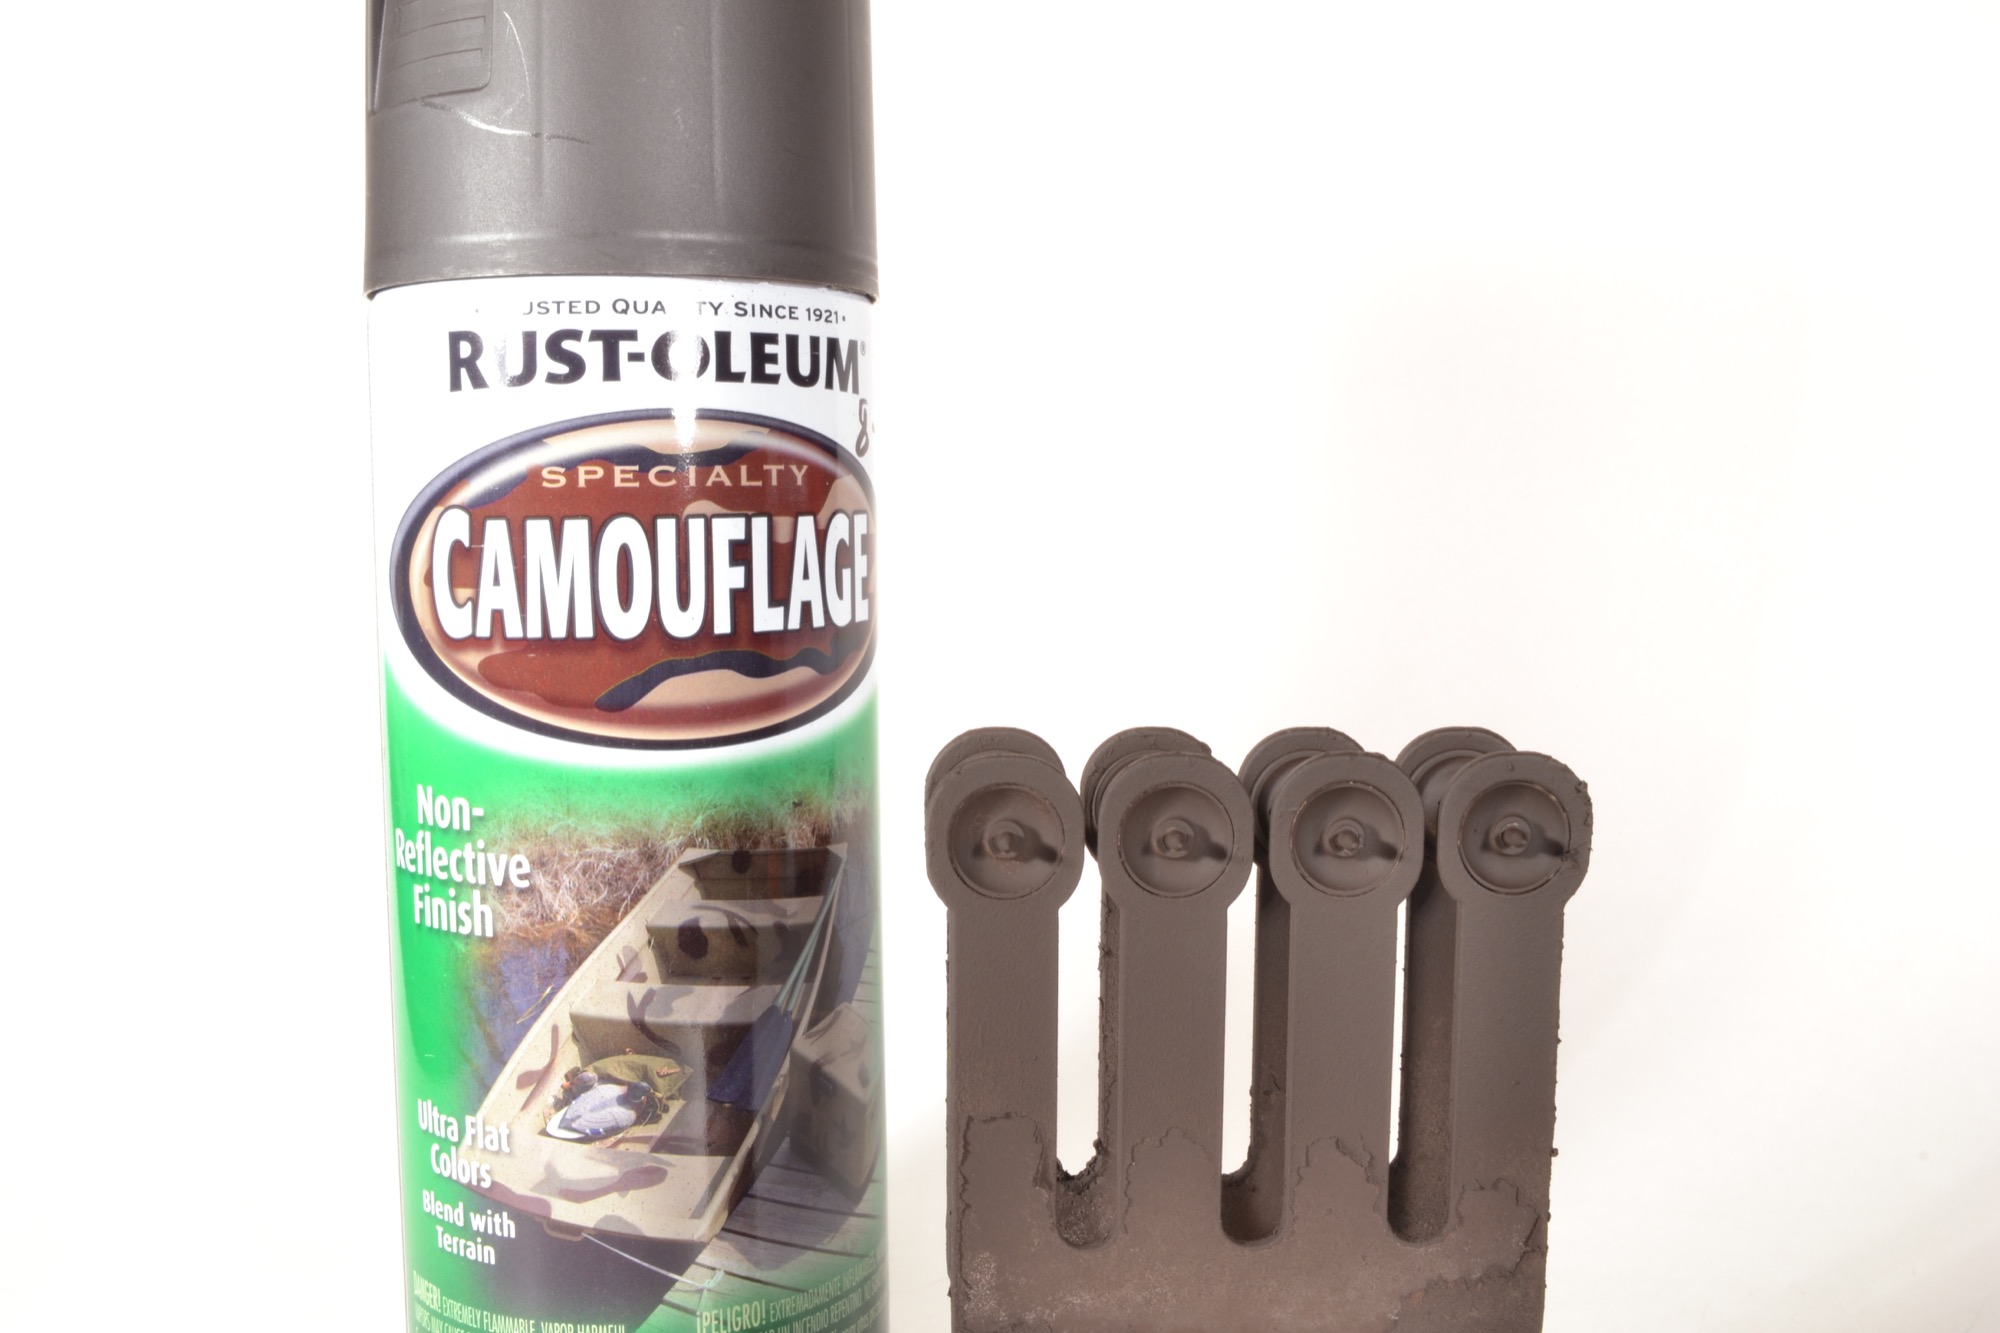
Step 19 – One of the best, and also the easiest ways to paint freight car trucks, is with Rust-Oleum Dark Gray Auto Primer spray paint. Thread a pair of trucks onto a large pipe cleaner, and be sure to wear a latex glove on the hand that holds the pipe cleaner. Use the pipe cleaner to rotate the trucks as you apply a few light coats of paint.
Step 20 – Paint the truck springs and bearing caps with a dark brown rusty color. A burnt umber acrylic is a great color for old rust.
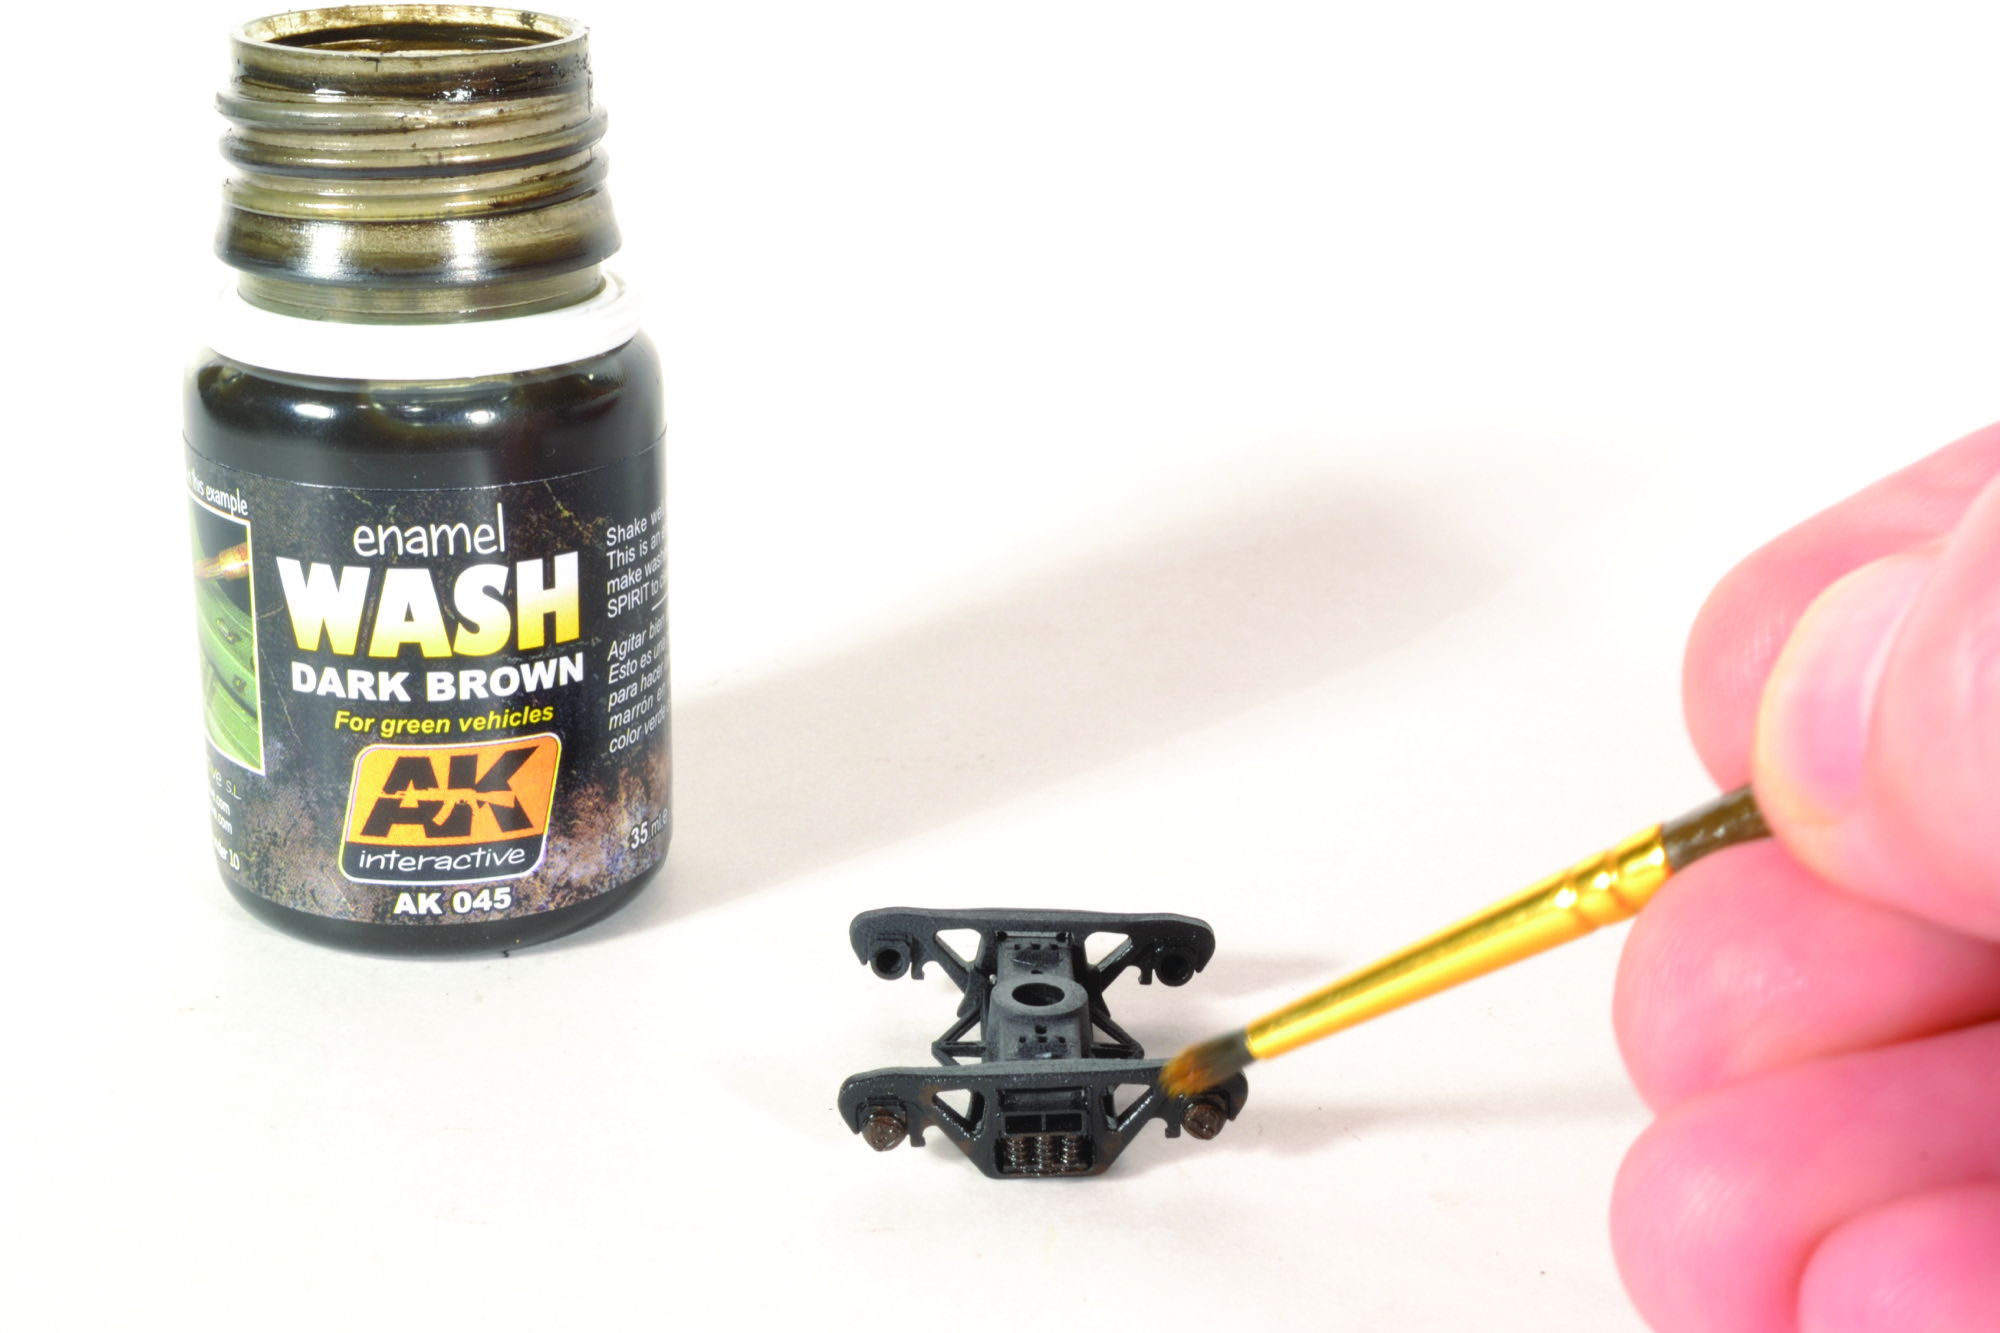 Step 21 – Apply dark brown washes all over the trucks for a layer of grime.
 Step 22 – The Wheel Mask from American Model Builders is a great tool for painting wheels.
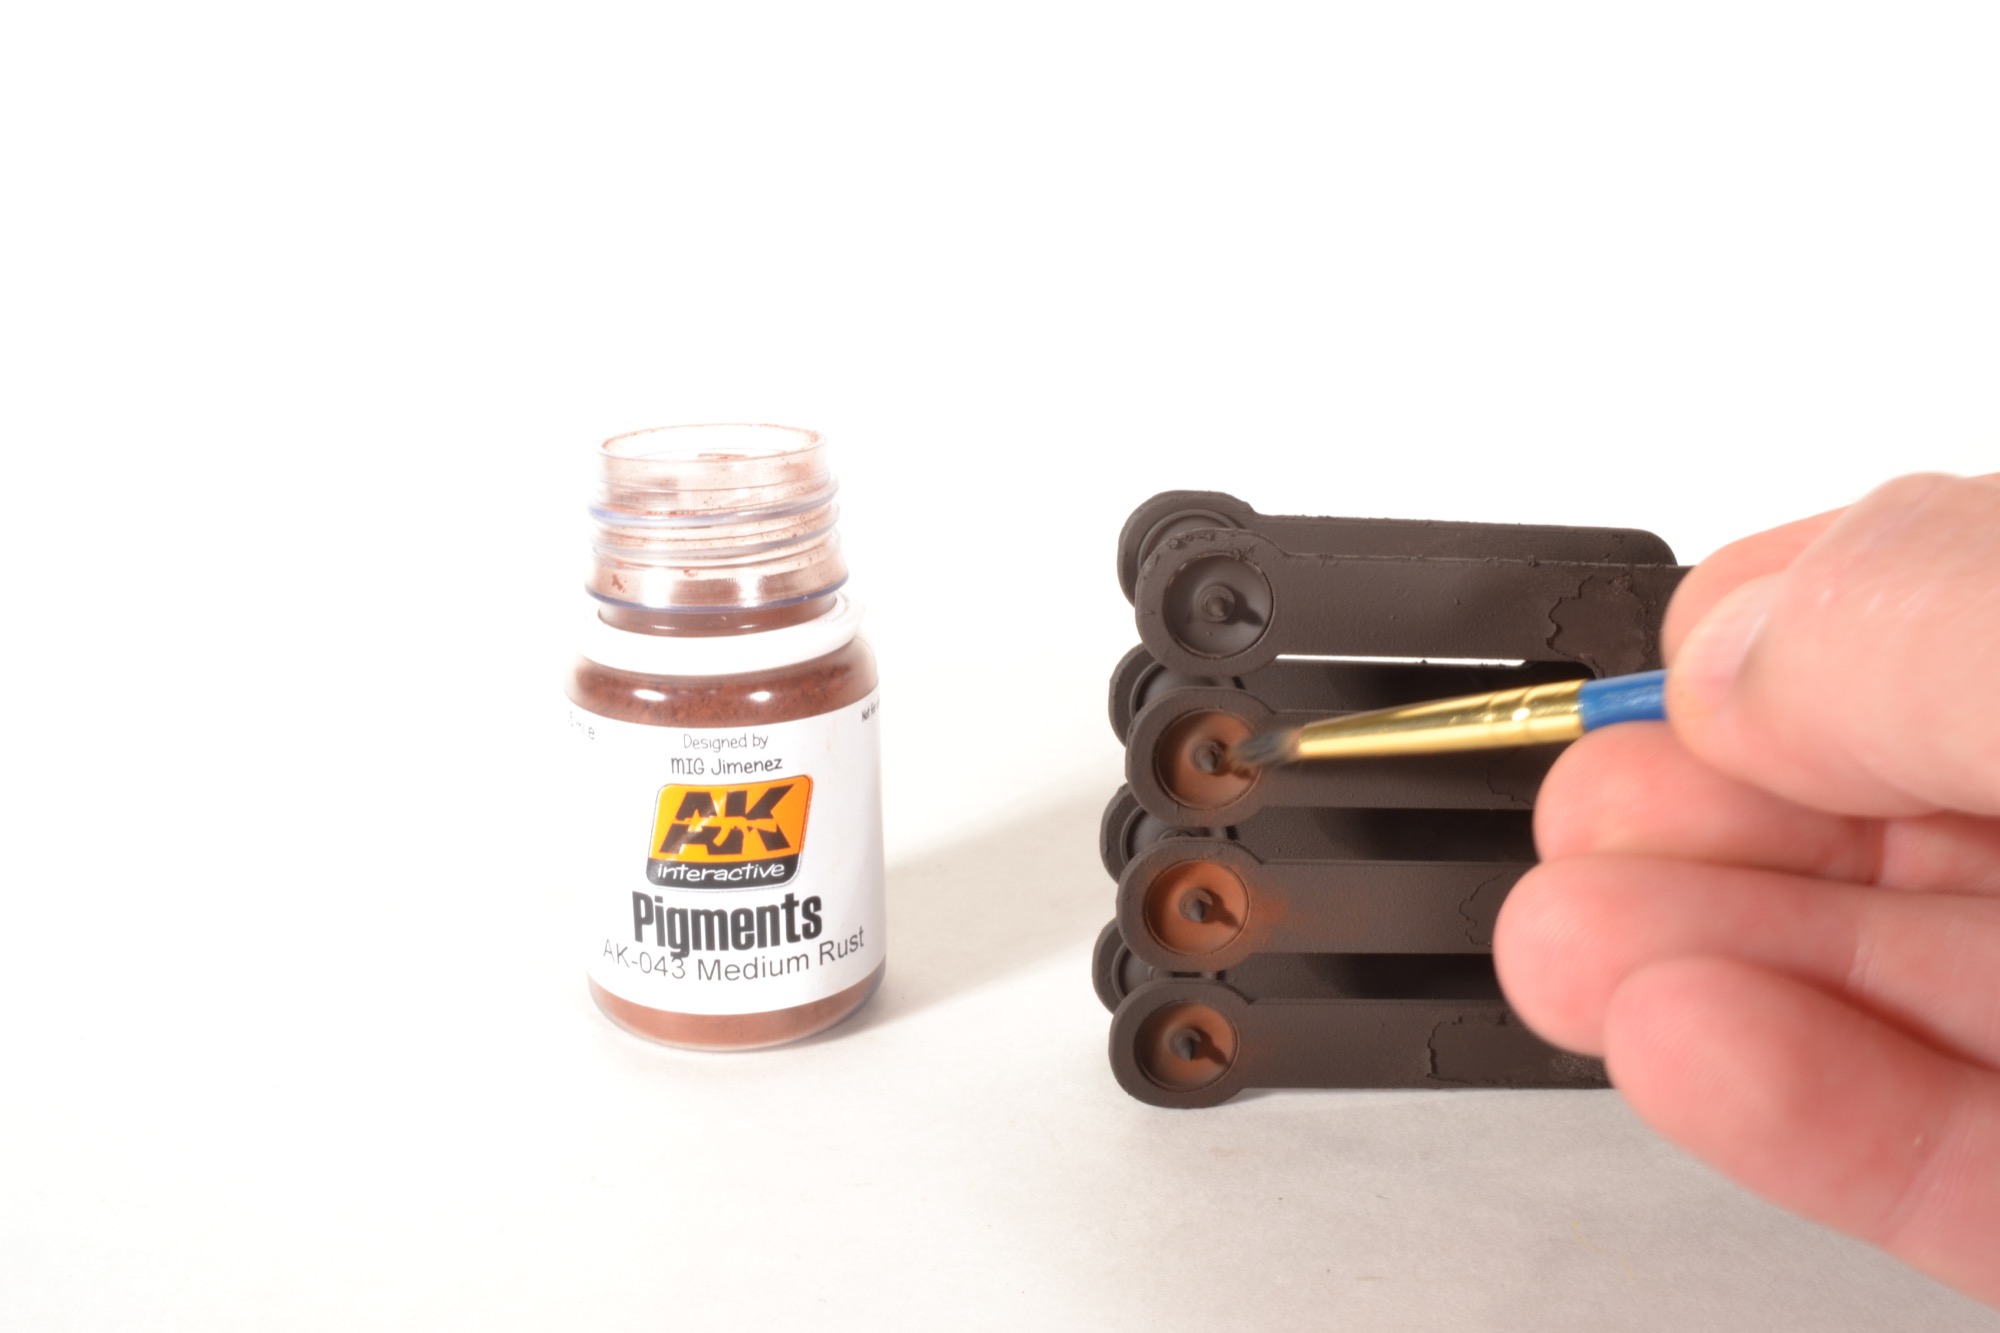 Step 23 – Leave the wheels in the mask, and we will begin by adding a lighter colored rust powder.
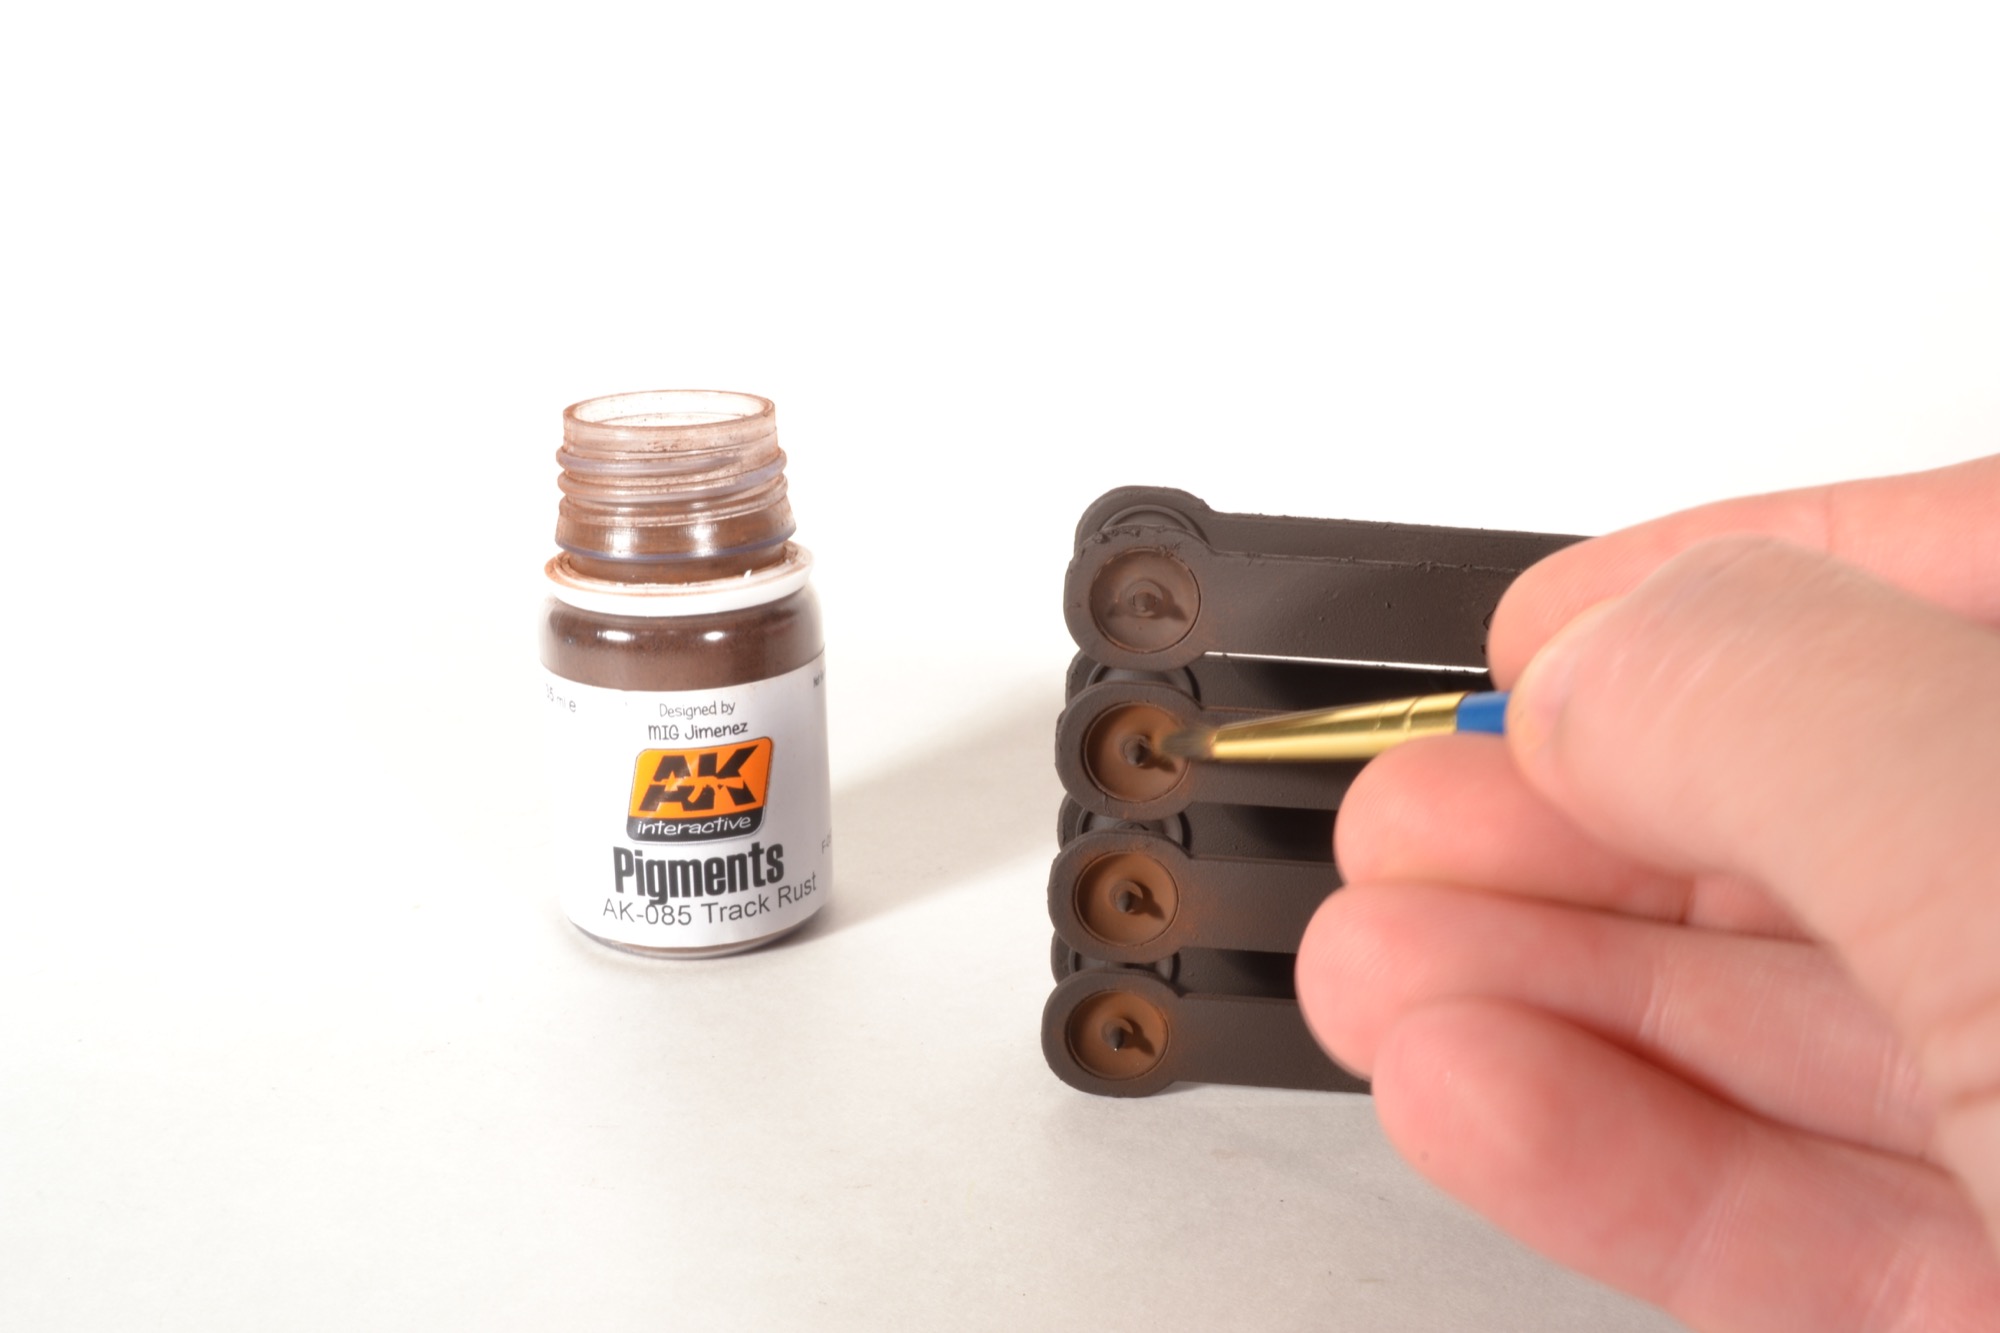 Step 24 – The second color to add will be a darker shade of rust.
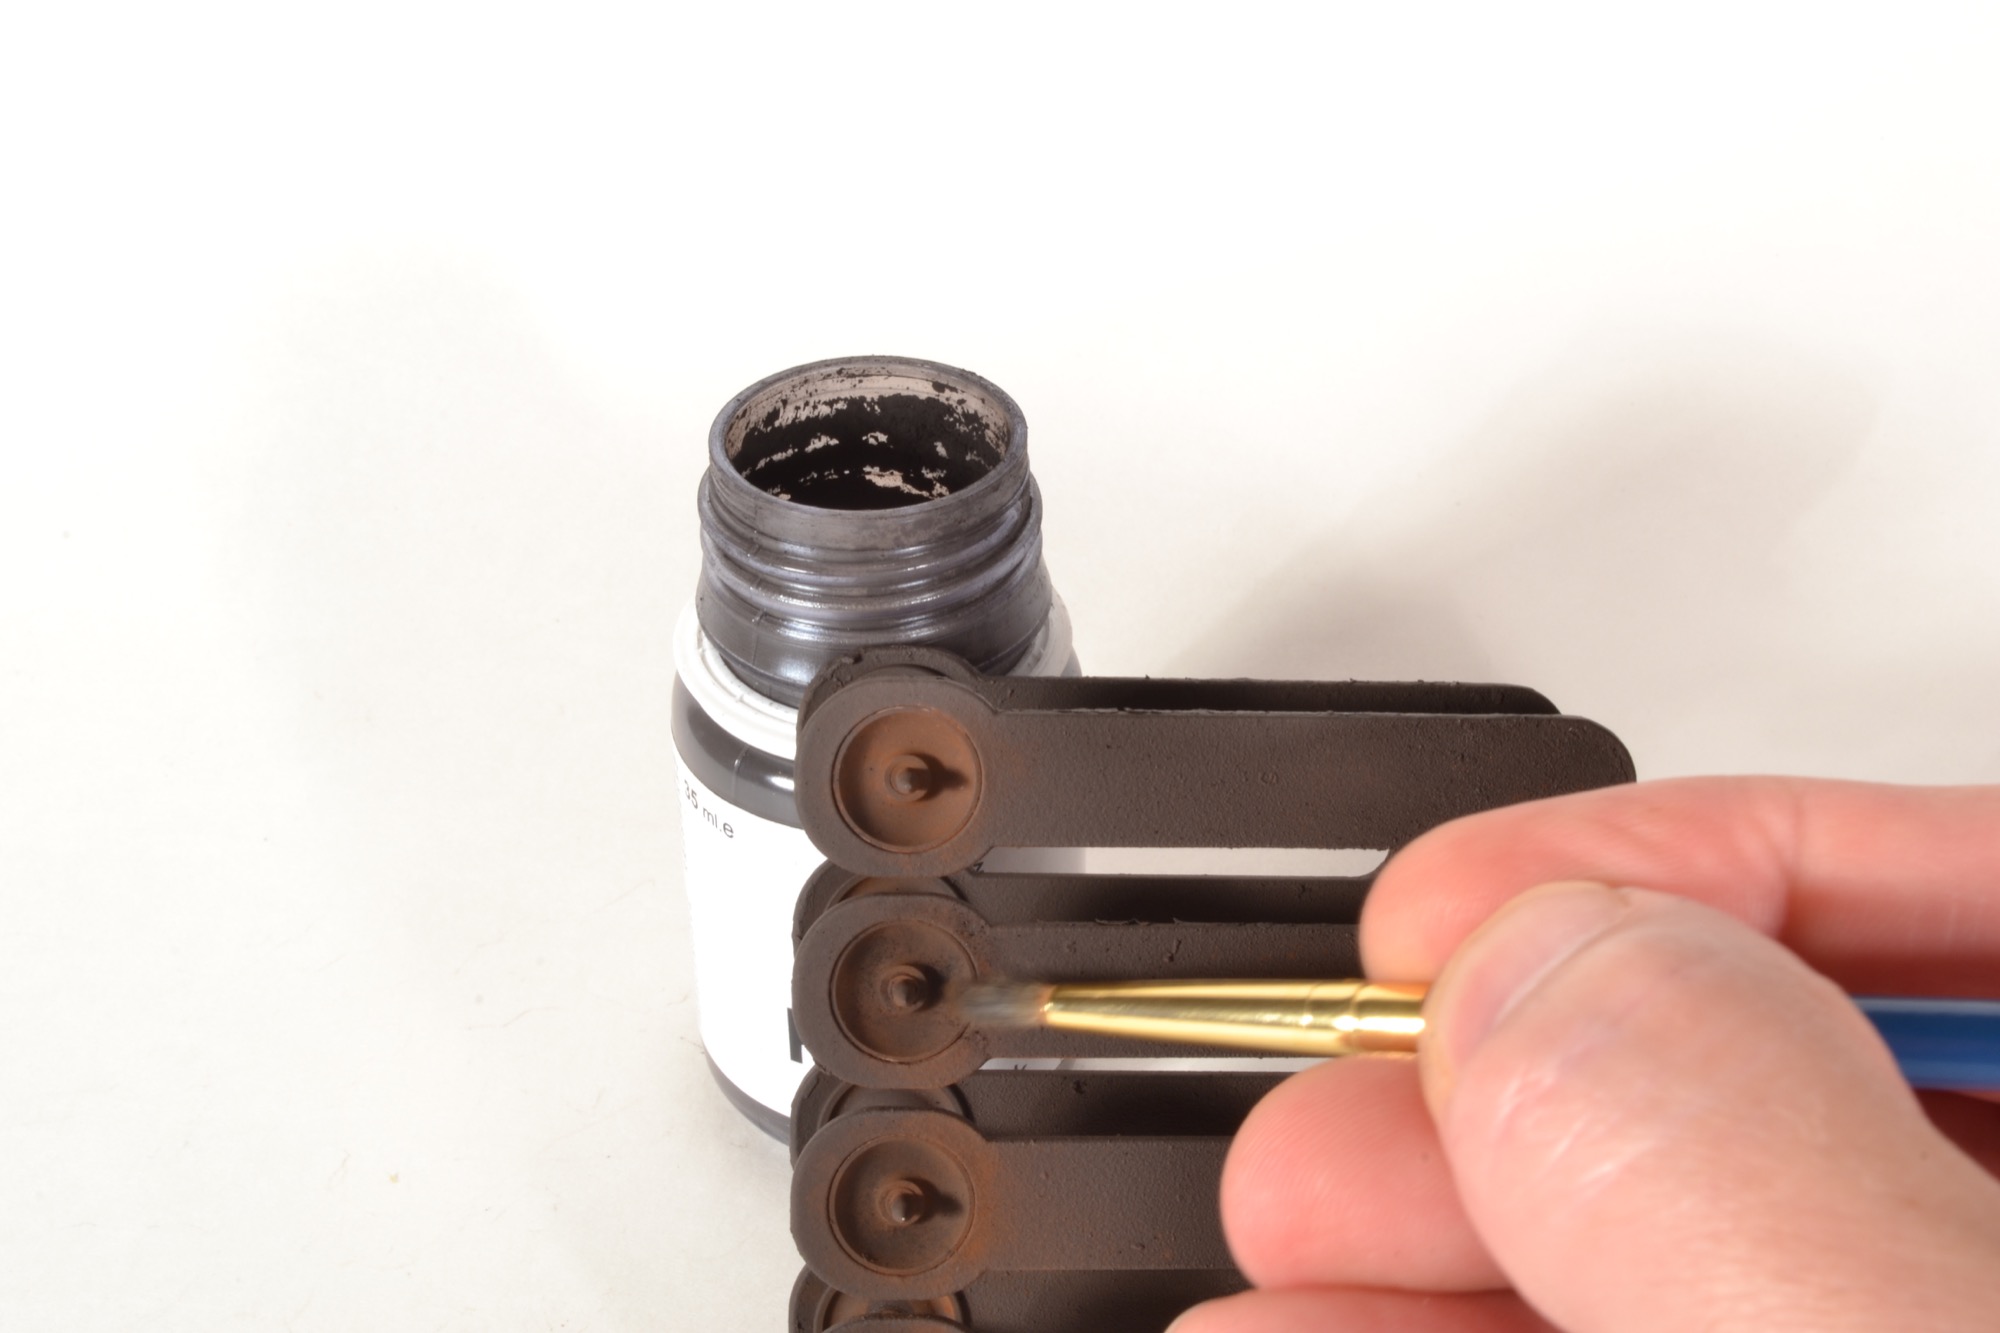 Step 25 – The final step is to apply a small amount of a very dark gray powder to the wheel faces.
 Step 26 – Notice the variation in colors on the wheel faces. Do not seal the trucks and wheels with Dullcote, otherwise most the the powders will disappear.

Step 27 – Brush paint the Sergent couplers with burnt umber acrylics. After that, we can add some wear to the face of the knuckle with a metallic silver Sharpie.
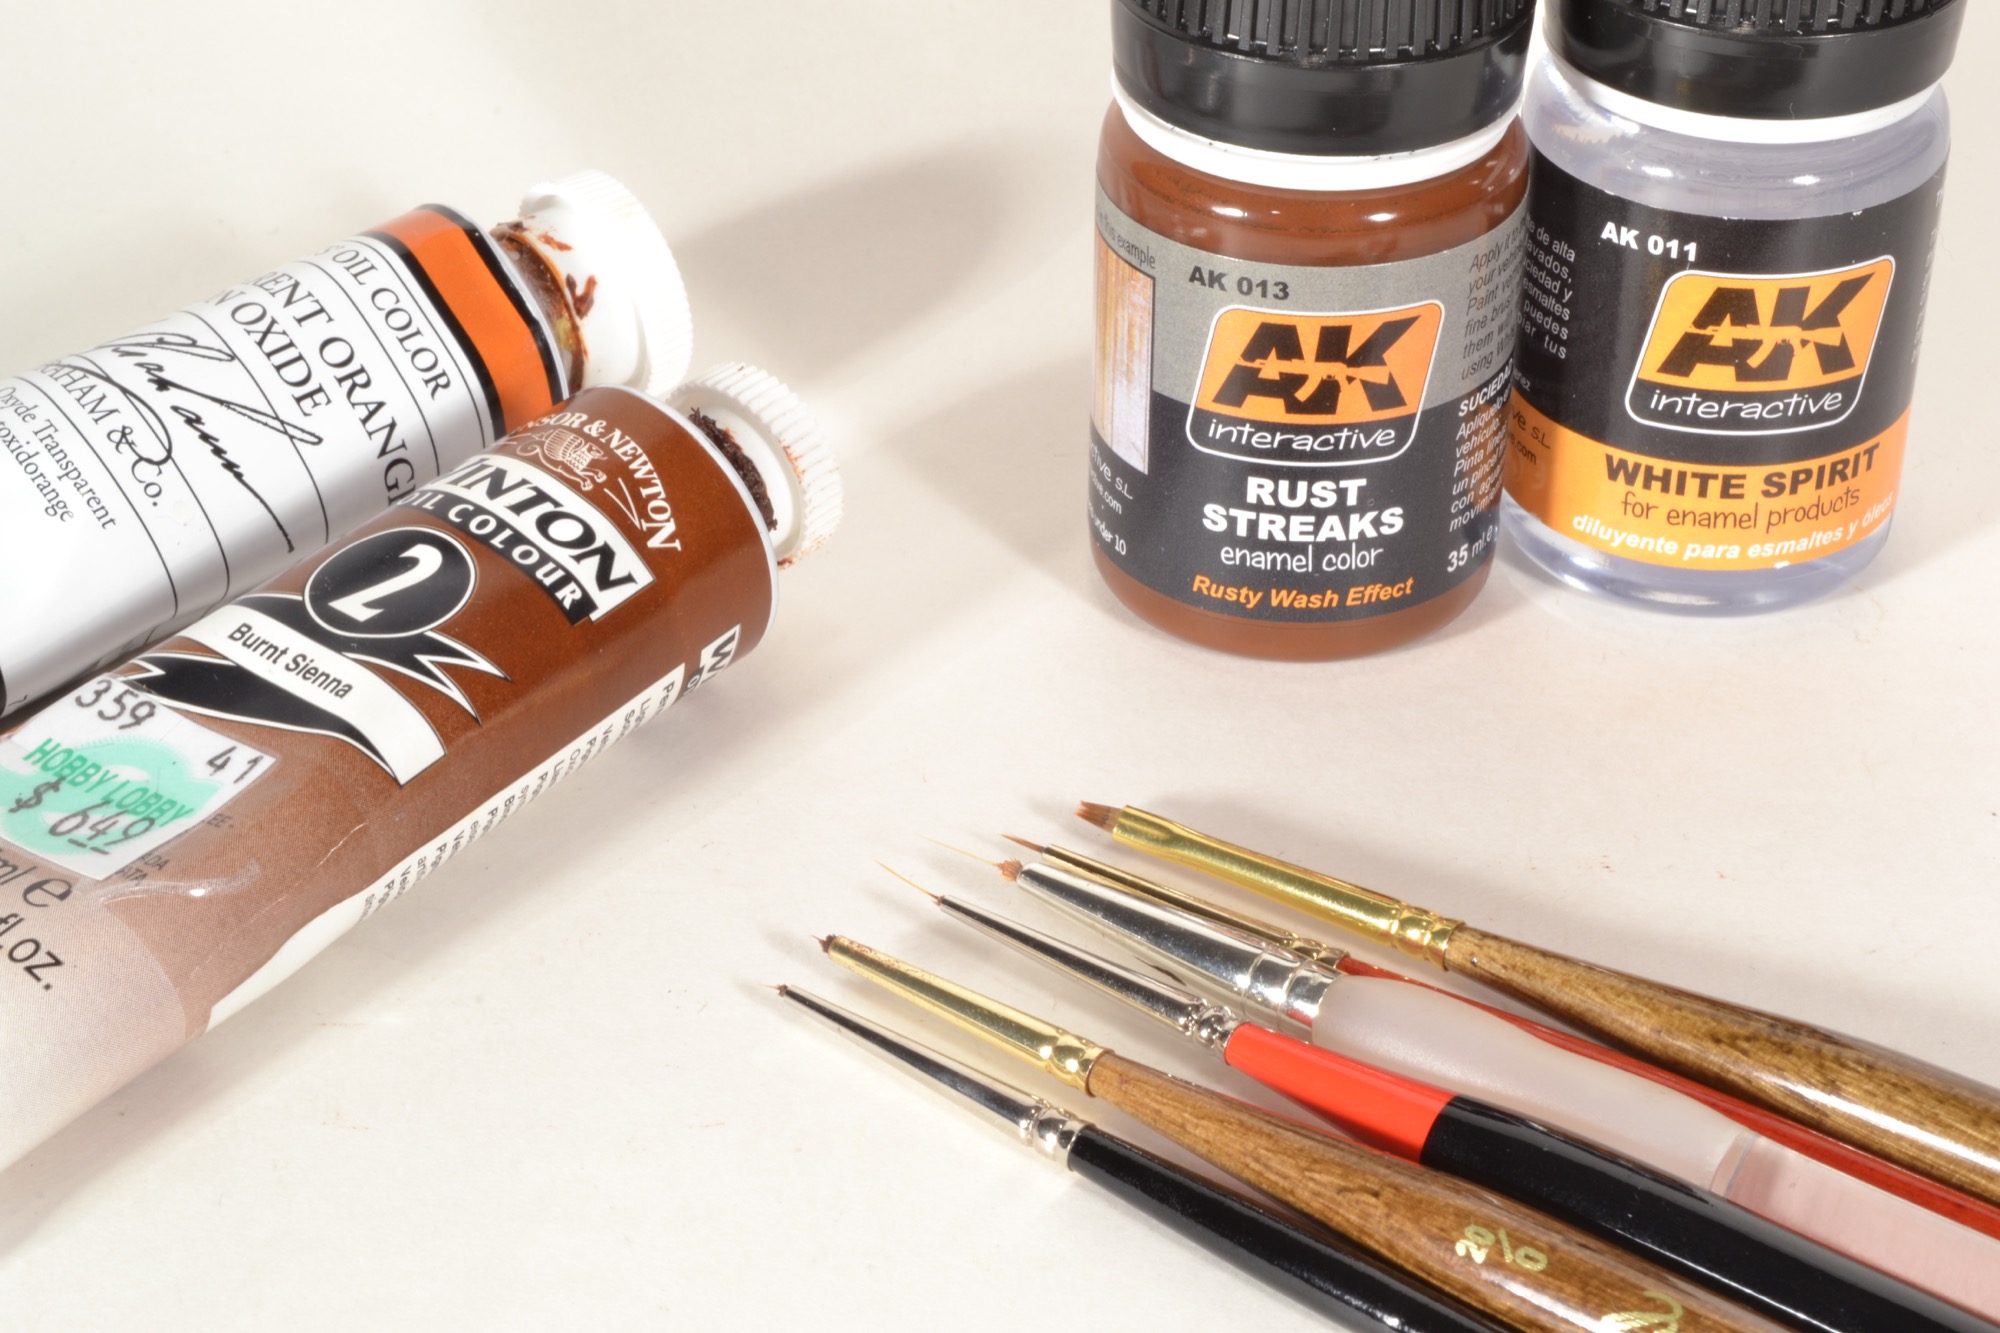
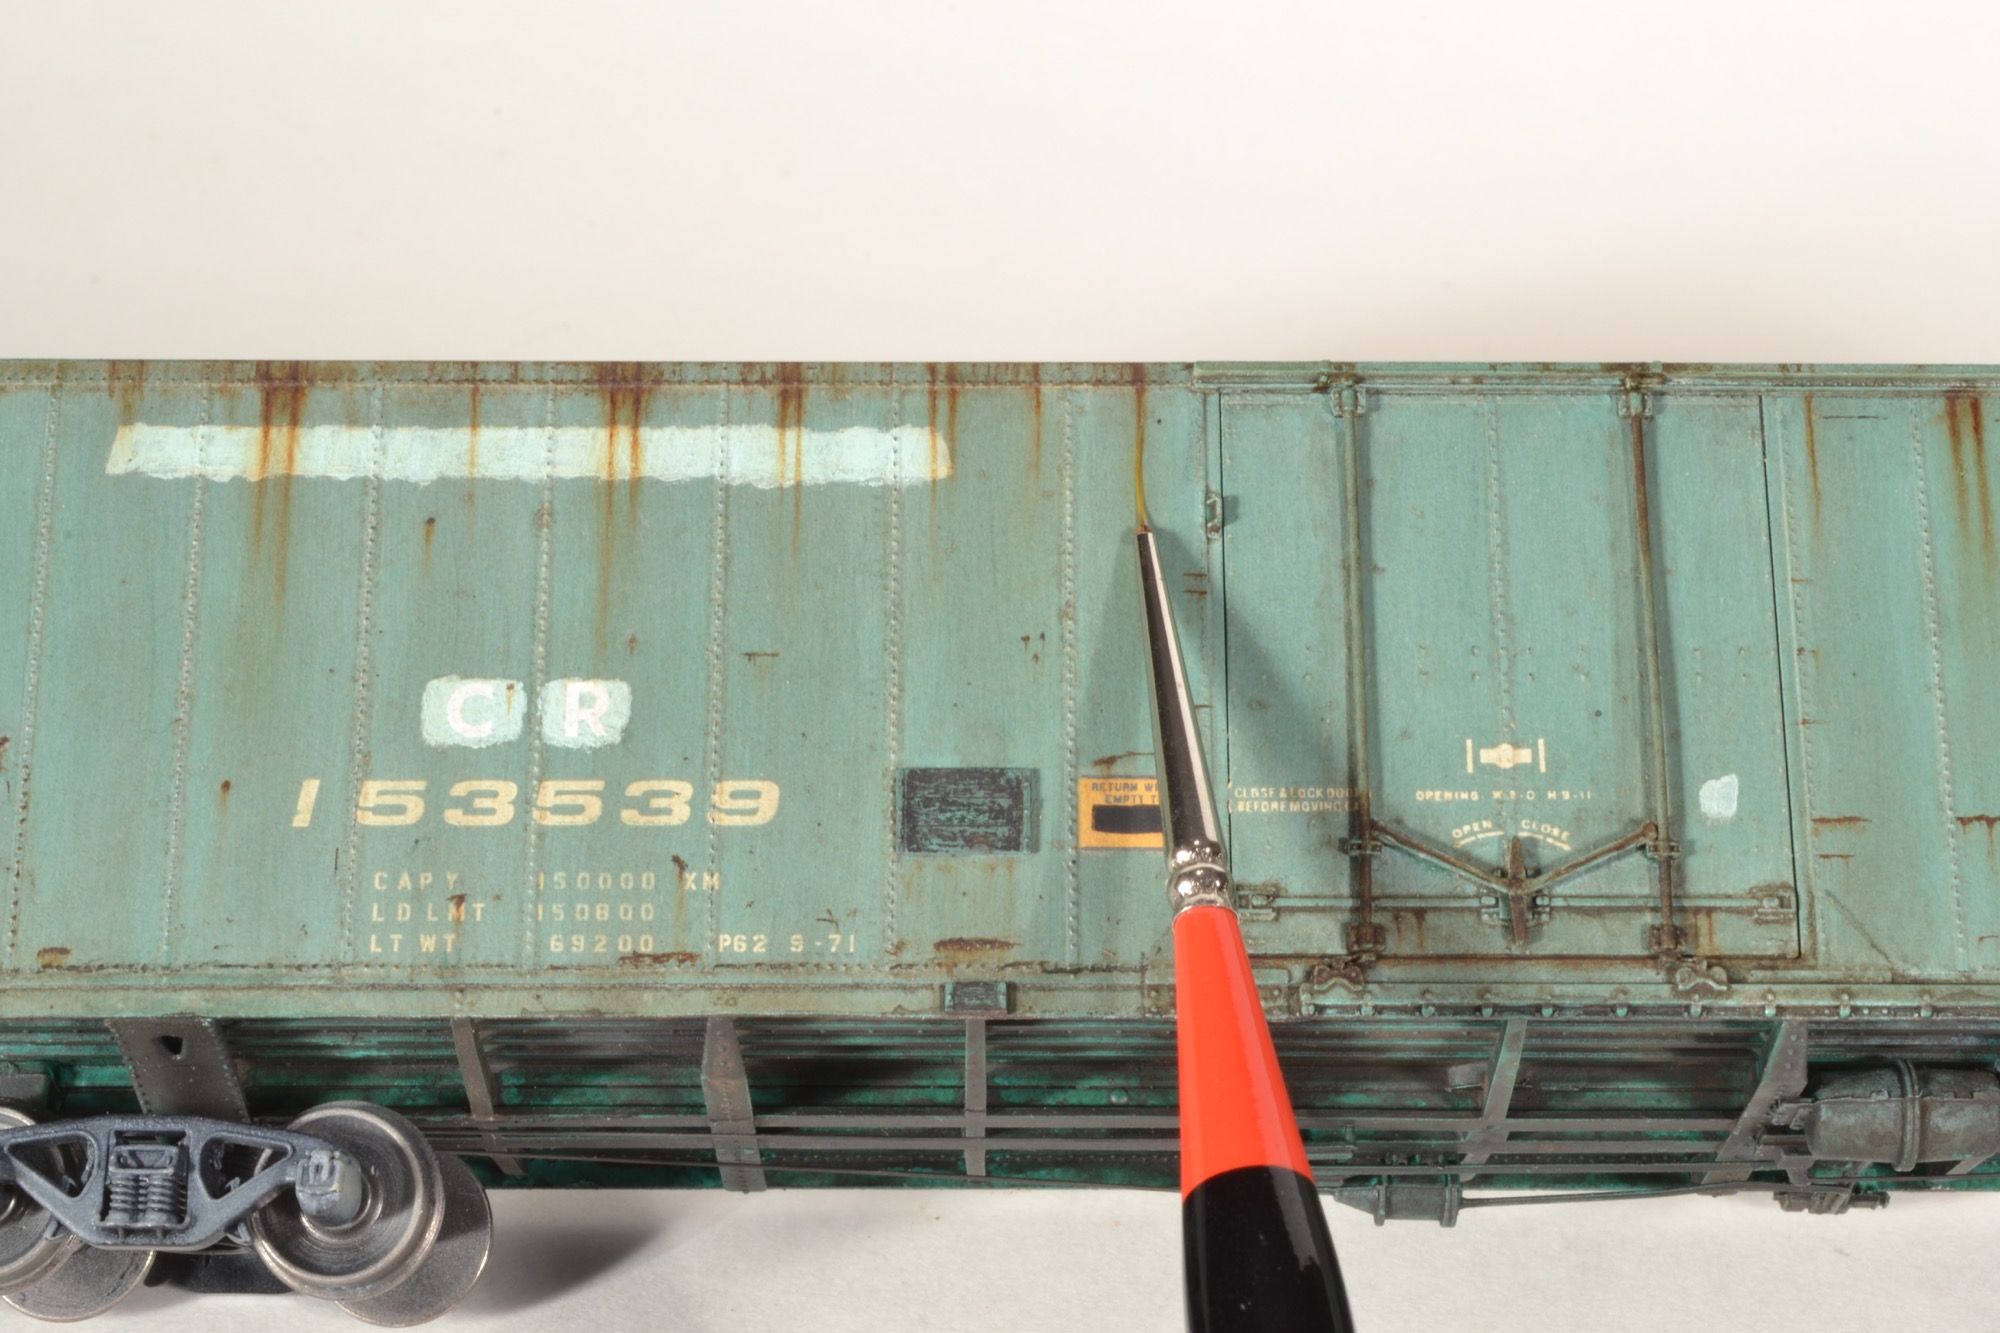
Step 28 – To recreate the tiny pits, scrapes, and streaks, we will need to trim down some already small brushes, typically leaving less than five bristles. AK Interactive Rust Streaks, Burnt Sienna and Transparent Orange Iron Oxide oil paints work great for streaking effects. For the darker pits and scrapes we will use Burnt Umber oil paint.
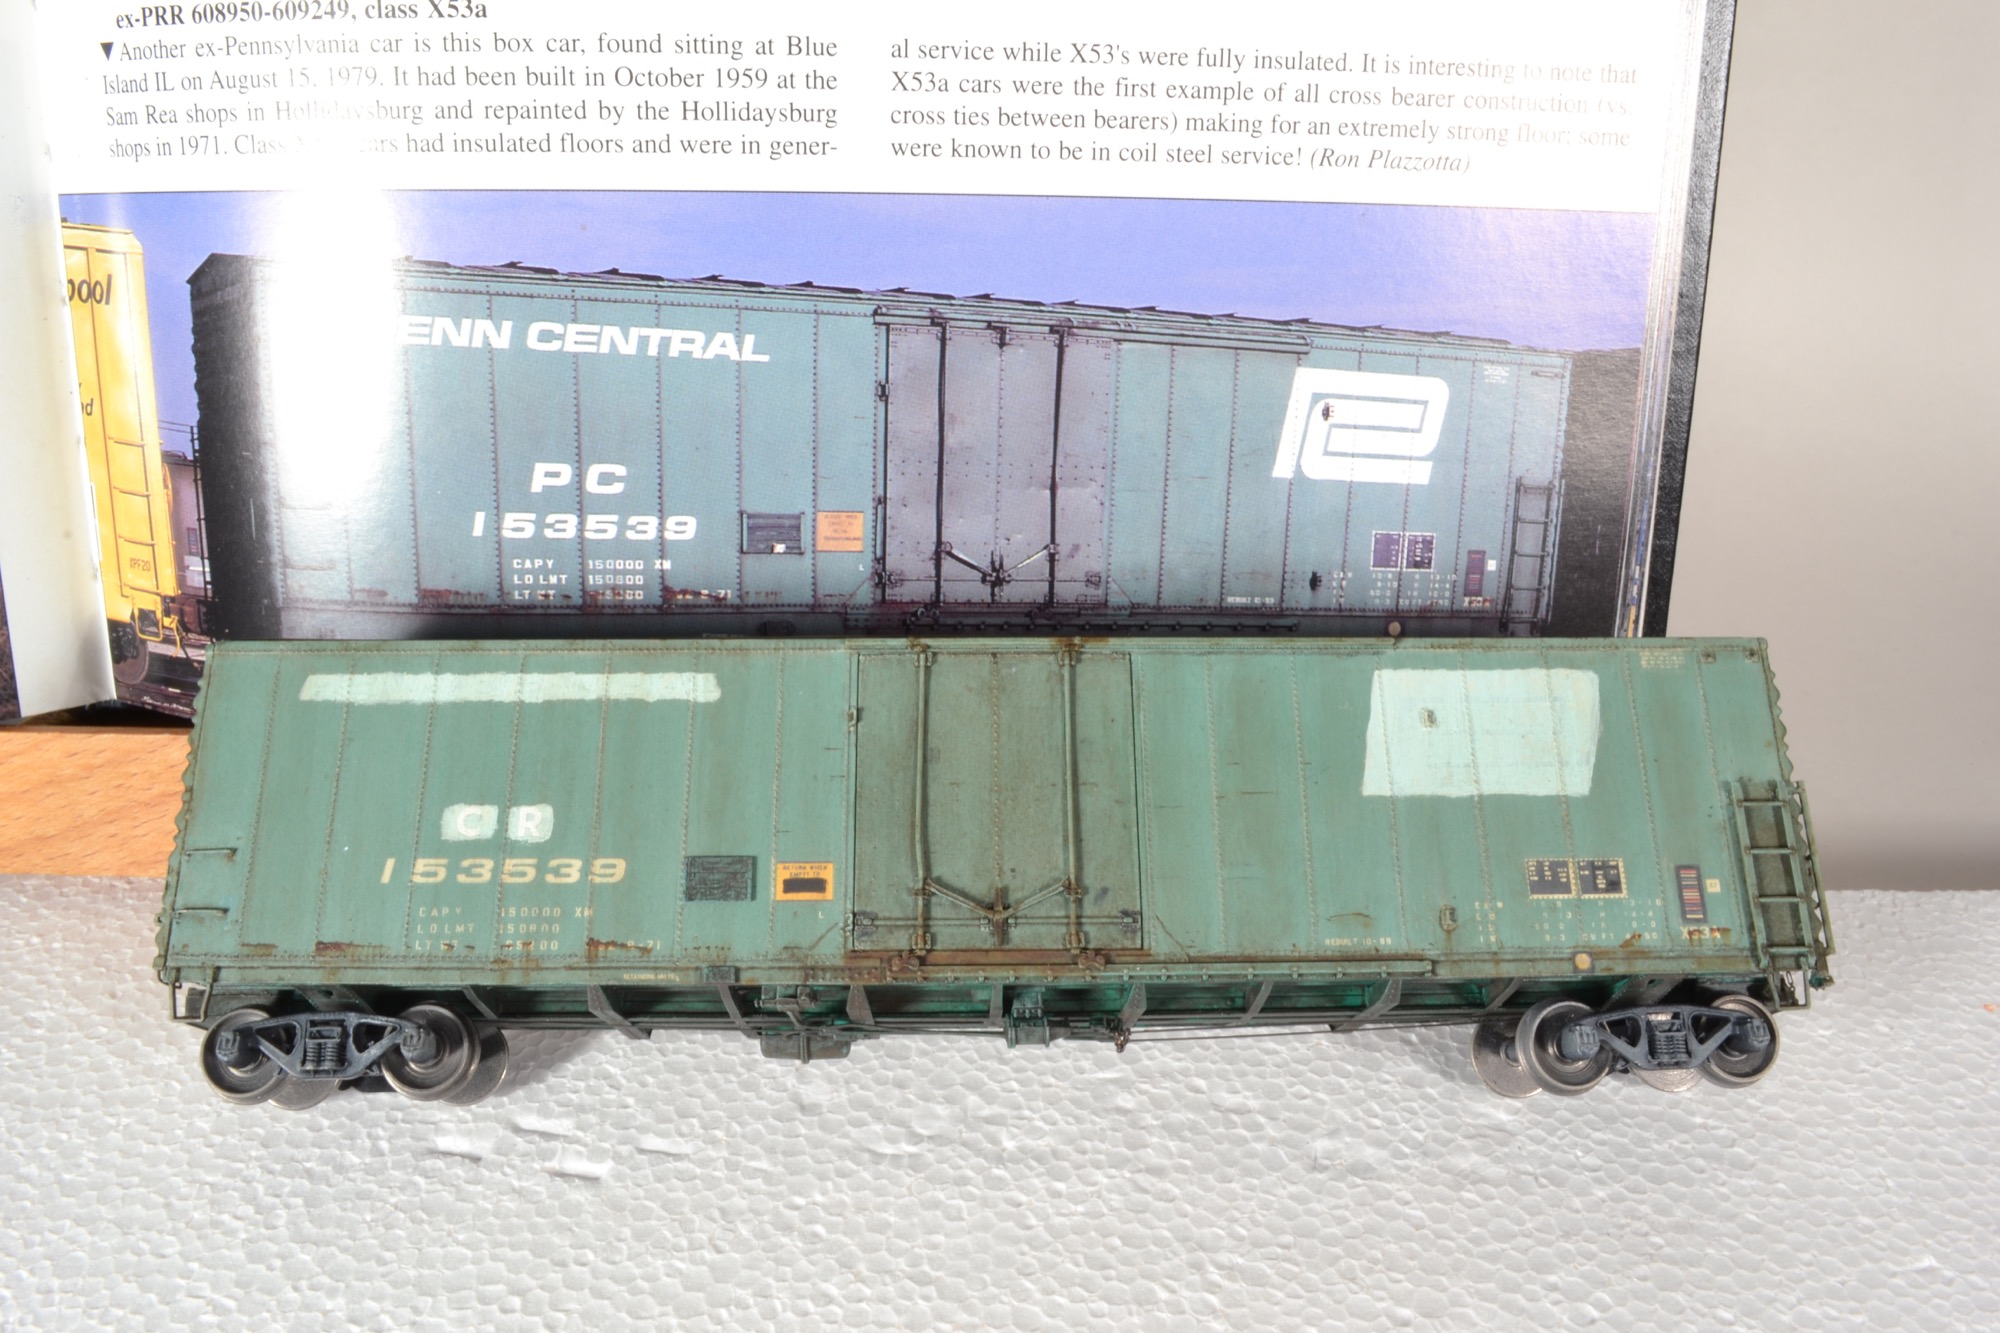
Step 29 – Working from a prototype picture as your guide is one of the best ways to ensure that your weathering will look believable. The model will represent a car that is five to ten years older than the prototype picture and painted out for its new owner. If you look closely near bottom of the car you can see that the rust is in the same location as the picture.
Step 30 – Using a small brush with longer bristles, pick up a small amount of Burnt Sienna oil paint by slowly pulling the bristles over a drop of paint. Almost like putting paint on the edge of a razor blade. Slowly pull the brush down the model, the longer bristles will help keep the streaks straight.
Step 31 – Use a small flat brush dampened with Mineral Spirits to soften the edges and straighten the streak if necessary. AK Rust Streaks can be used on top of the streaks and near the bottom of the streaks to simulate lighter run off.
Step 32 – We can apply horizontal scrapes in the same manner as the streaks, but this time we will use Burnt Umber to simulate older damage. Add tiny streaks from the scrapes and pits using either Burnt Sienna or AK Rust Streaks.
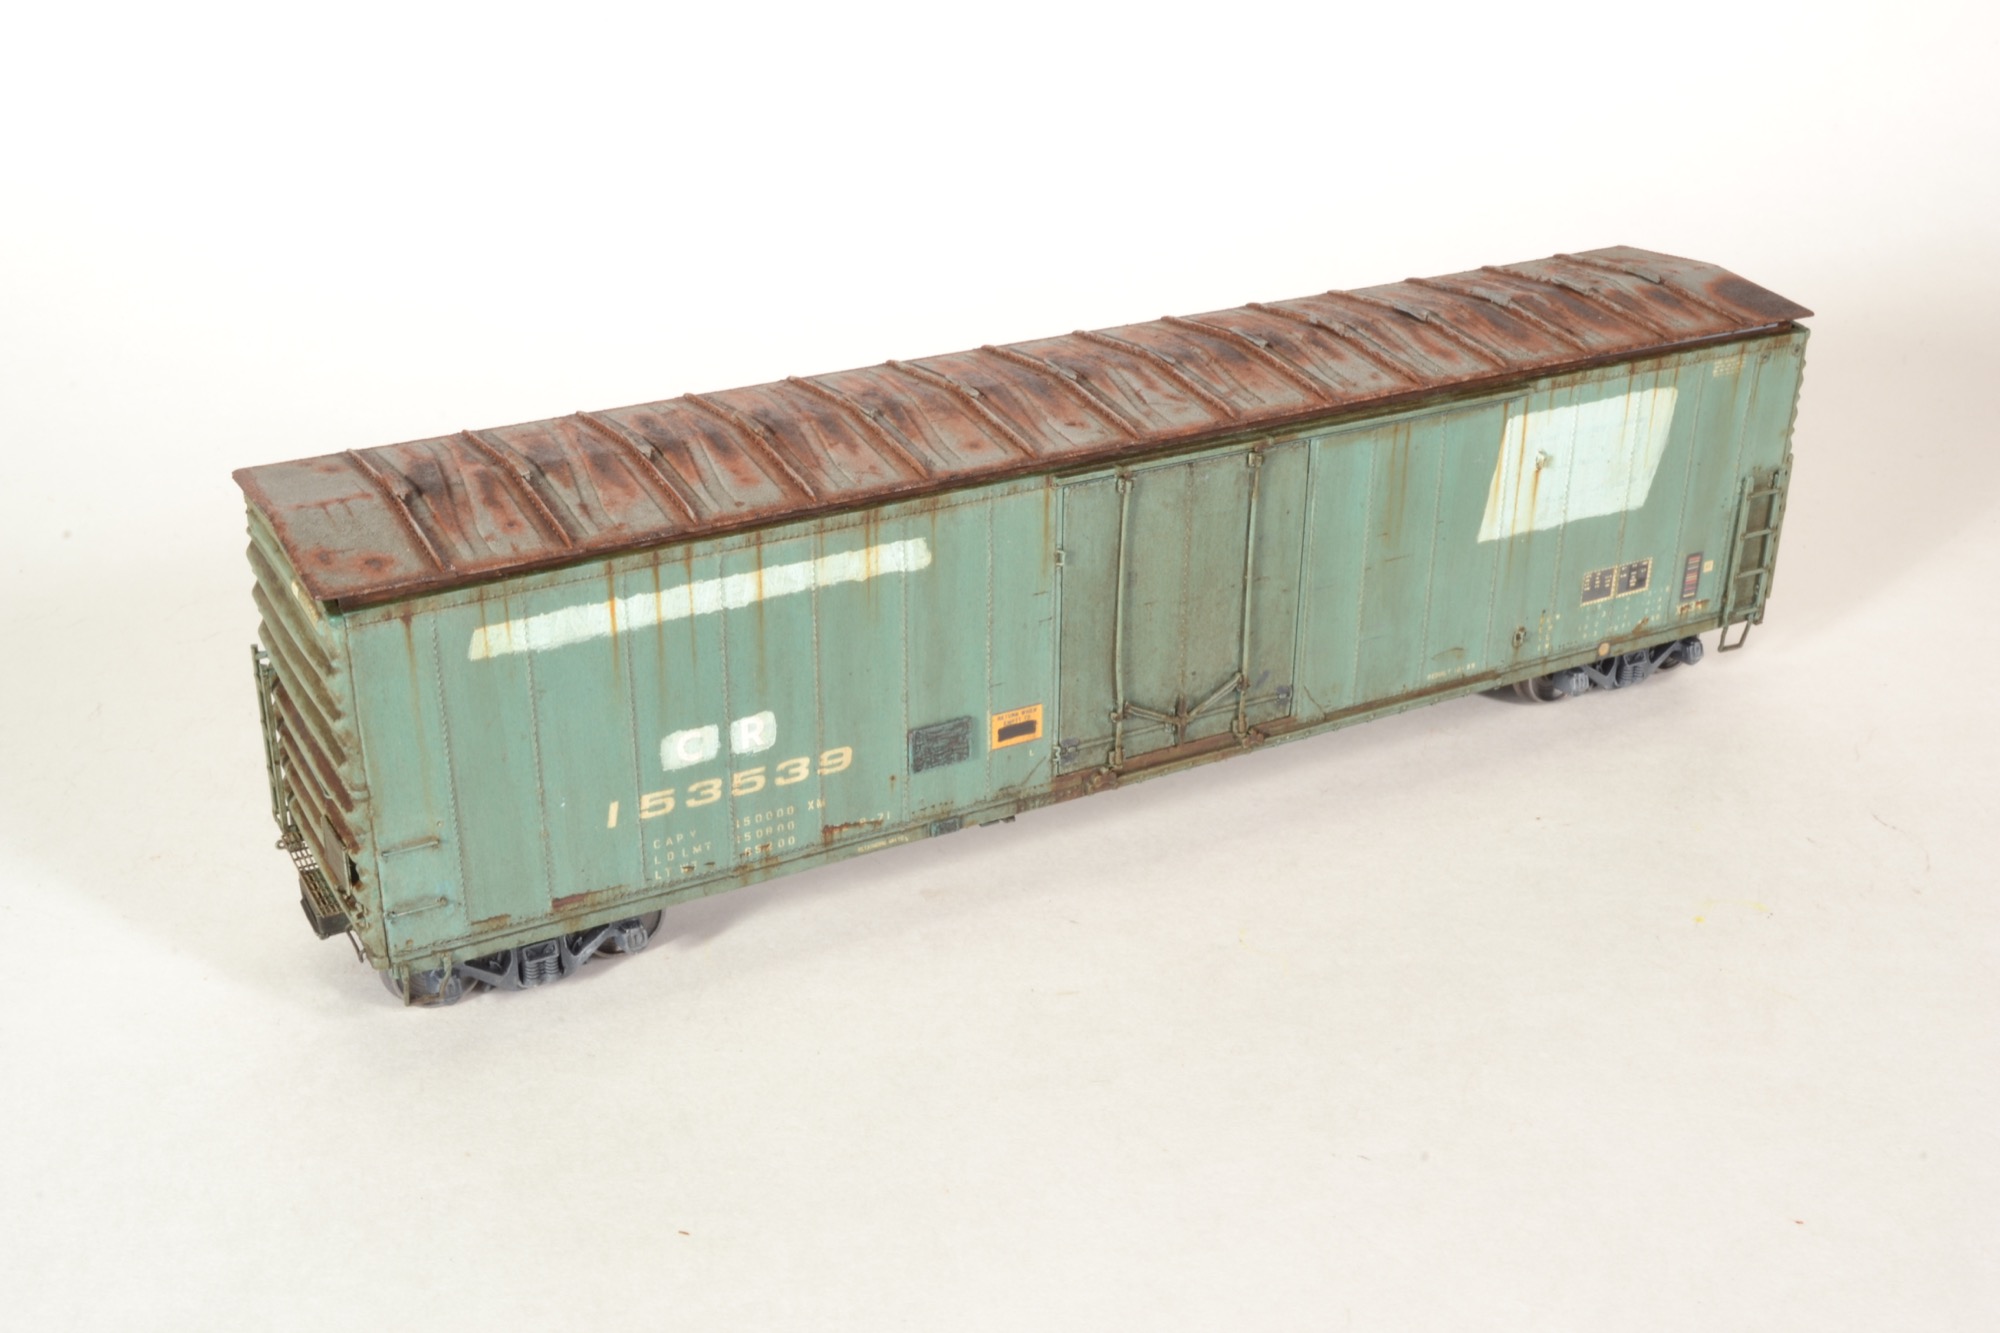
Step 33 – The roof still needs to be secured, trucks, couplers and other details added, but that is all for the weathering.
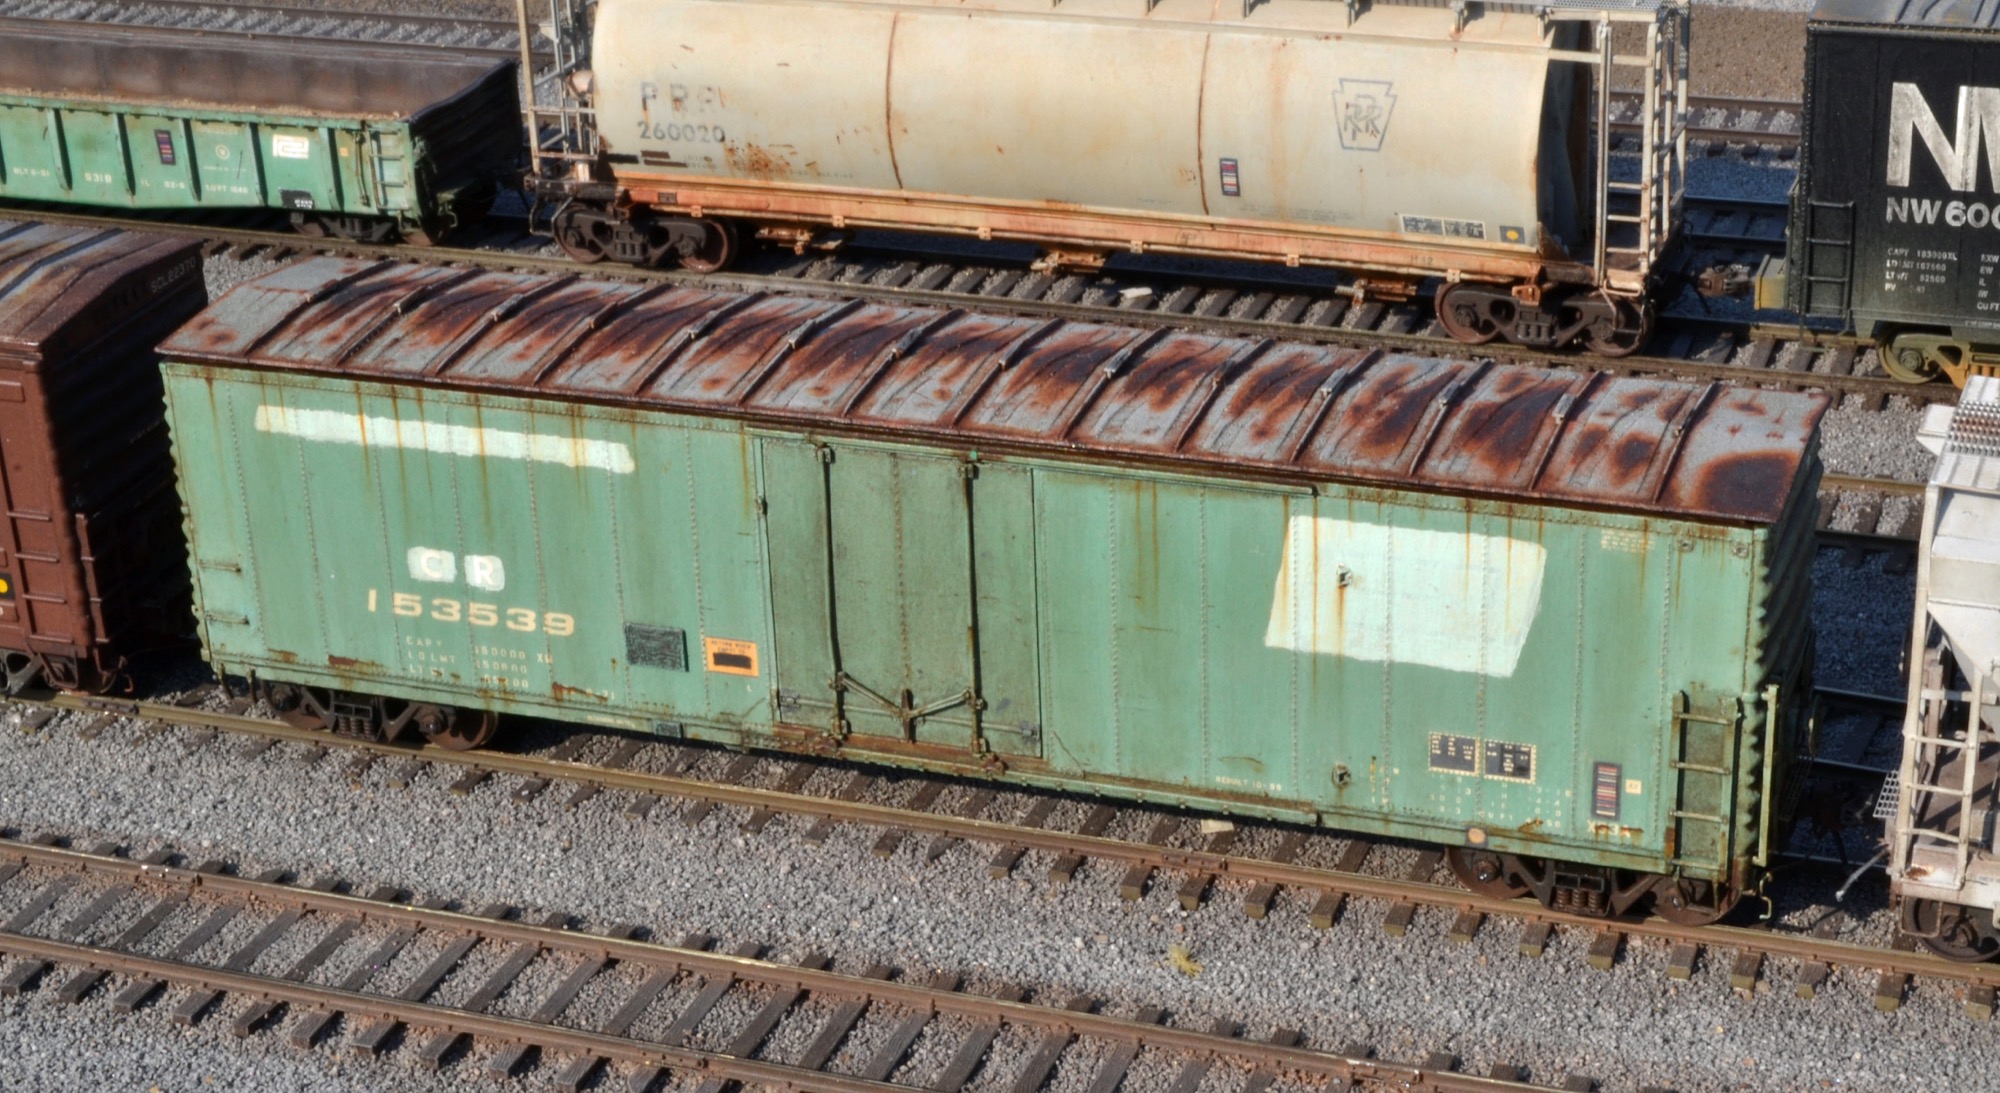
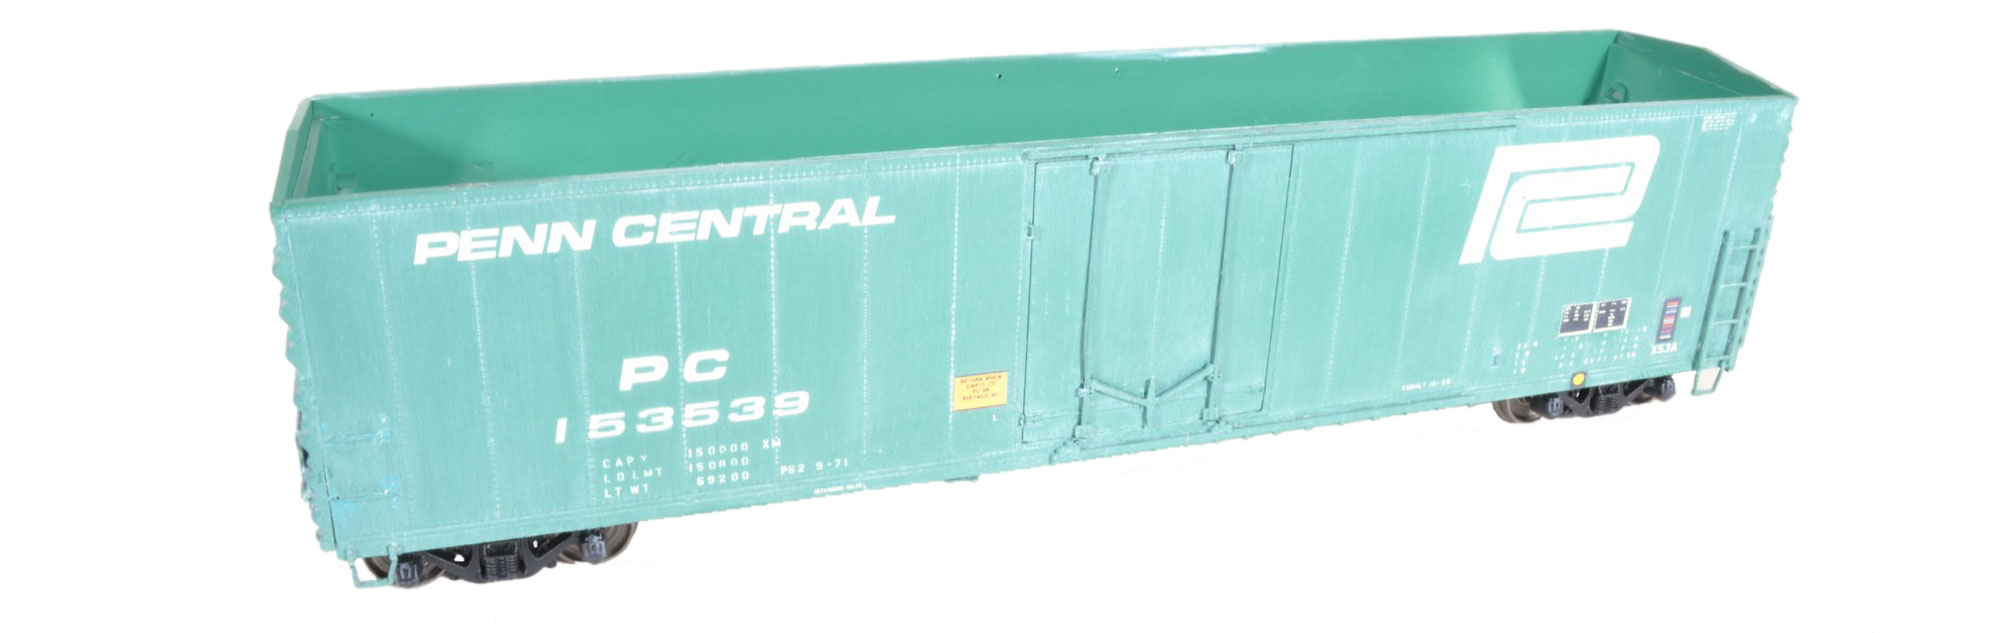
The View from the Top – A view of the completed model from above. This car is now ready to head back out onto the road and earn some much needed revenue for the fledgling Conrail!
Bill of Materials
Atlas Model Railroad Company
- 20001374 HO 50′ Plug Door Boxcar, Penn Central
Moloco Trains
- RF-0801 Stanray Diagonal Panel Roof
- RB-0802 Roofwalk Support Brackets
Tamiya
- TS-30 Silver Leaf Spray Paint
Testors
- 1260 Dullcote Spray
Rust-Oleum
- 2081 Automobile Primer – Light Gray
- 1918830 Rustoleum Camouflage Earth Brown
Windsor & Newton Winton Oil Colours
- 748 Zinc White
- 76 Burnt Umber
- 74 Burnt Sienna
- 554 Raw Umber
Generic
Odorless Mineral Spirits, any brand – to thin oil paints.
Ammo by MiG
- AMIG1005 Dark Brown Wash for Green Vehicles
- AMIG3005 Medium Rust
- AMIG3008 Track Rust
- AMIG3009 Gun Metal
- AMIG1204 Streaking Rust Effects
