
 By Don Loffelman/photos by the author
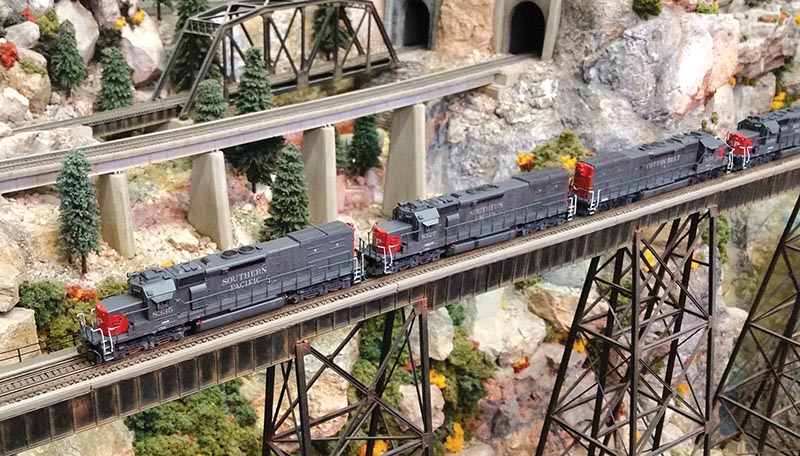
Back in 2003, InterMountain Railway Company produced a much-needed model for the N scale community when it released the EMD SD40T-2 “Tunnel Motor.” This is one of the most quintessential locomotives for modelers of the Southern Pacific (and subsidiary Cotton Belt) and Denver & Rio Grande Western, designed specifically for the mountainous terrain these railroads crossed. The main spotting differences from standard SD40-2s are the radiator intakes and radiator fan grilles located at the rear of the locomotive, to pull in cooler air when the train is working hard through long tunnels. The SP version also has a larger 4,400-gallon fuel tank.
Upon closer inspection, the model lacks some details specific to SP that gives them their unique appearance. Therefore I wanted to see if I could update this 20-year-old model and bring it closer to my present-day expectations, while improving the level of detail and overall appearance.
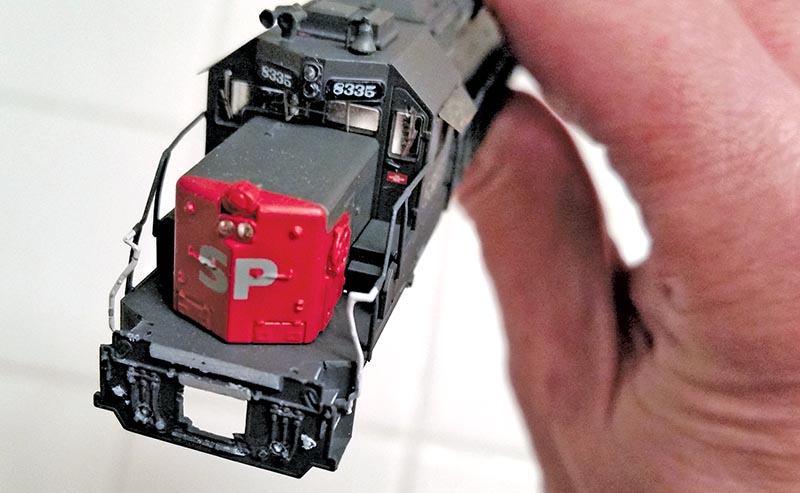
ABOVE: The anti-climber is designed to fit against a flush pilot face, so the existing pilot extension must be removed. The author used a small sanding block, being careful not to mar the surrounding pilot details.
Handrails and Body
The handrail stanchions have a small pin at their base which press-fits into the matching holes on the side frame. There is just not enough surface area to hold them in place, which can cause them to fall off or become misaligned. I removed the long hood, cab and nose body shell parts from the frame and glued the handrails to the frame with a touch of cyanoacrylate adhesive (CA) on each stanchion pin.
The body shell parts are made of many pieces that don’t seem to fit together perfectly, which often results in visible gaps, alignment issues, and a skewed cab. Starting with the cab, followed by the long hood and ending with the nose, I reinstalled these parts to the frame, taking care to fit them together as square and true as possible. The locomotive cab is the most important piece to get right. Make sure it seats perpendicular to the frame and does not tilt forward or backward. I then locked the cab in place with CA.
ABOVE: The two smaller antenna base platforms located on the cab roof were made from Evergreen .080 channel. The larger antenna base platform was cut from cardstock and mounted to the top of the inertial air filter hatch on the long hood. Holes were drilled in the center of each platform base for the antennas, which were cut from .008 diameter brass wire. Holes were also drilled near the front top of the cab roof and conduits were run from there to each antenna base using the same .008 wire.
In a similar manner, I attached the long hood to the frame, again using CA where necessary to achieve a tight fit and to hold it in place. The nose was installed last and locked in place with CA. This results in a combined shell and frame structure that together is much stronger, instead of individual components that are only held in place by a few locking tabs.
This is also the best time to install the provided cab sunshades, which can be very difficult. They usually are a very tight fit into the provided slot above the cab side window. A few times I was able to push them in using smooth-jaw mini-pliers but usually I found it necessary to thin down the tabs on these parts with a file to get them to fit into the slots.
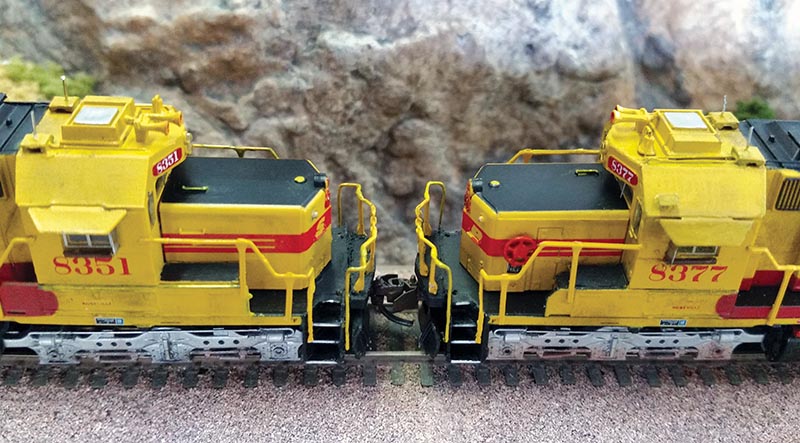
ABOVE: Only three SP SD40T-2 “Snoots” were painted in the 1985 Southern Pacific-Santa Fe merger scheme. Units 8315, 8351, and 8377 retained the full front and rear light packages, anti climbers, and Locotrol antenna array. The added details, weathering and paint corrections really make these “Kodachrome” units stand out.
Another common issue was that the shell would often come off in your hand when picking up the locomotive. The problem is caused by the dimples on the chassis and the matching indentations inside the shell not providing enough grip. I added small strips of vinyl tape to the sides of the metal chassis as needed to make the shell fit more snug.
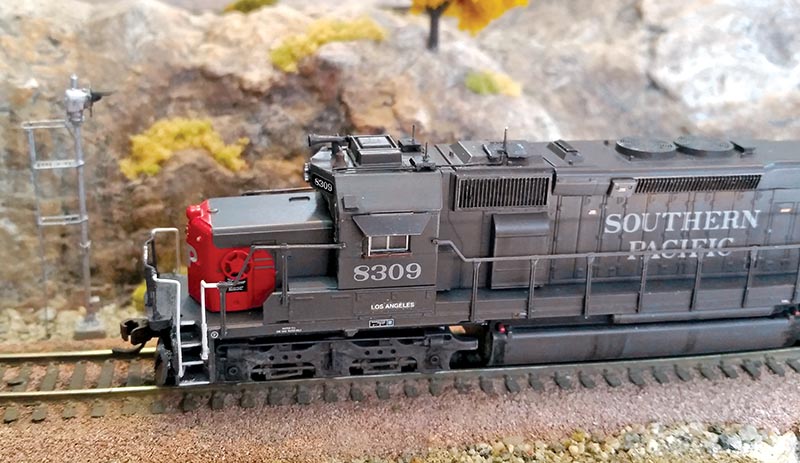
Ride Height Appearance
The visible gap between the trucks and the body shell appears excessive to me. It makes the engine look like it is “riding high” when compared to other models. Because the underframe lacks any additional detail, there is some empty space below the side sill. On a typical prototype hood unit diesel, this area would contain supporting structural members, electrical conduits, air, water and fuel piping, filters, and other features…
