
 by Scott Sanders/photos by the author
Do you have a collection of models, but no layout to photograph them on? Are you in the middle of building your dream layout, but itching to try some new scenery techniques? Maybe you want to try your hand at building a small scene before you jump into building your next layout. Whatever the reason, a small diorama is a great way to get started and learn some realistic scenery effects.
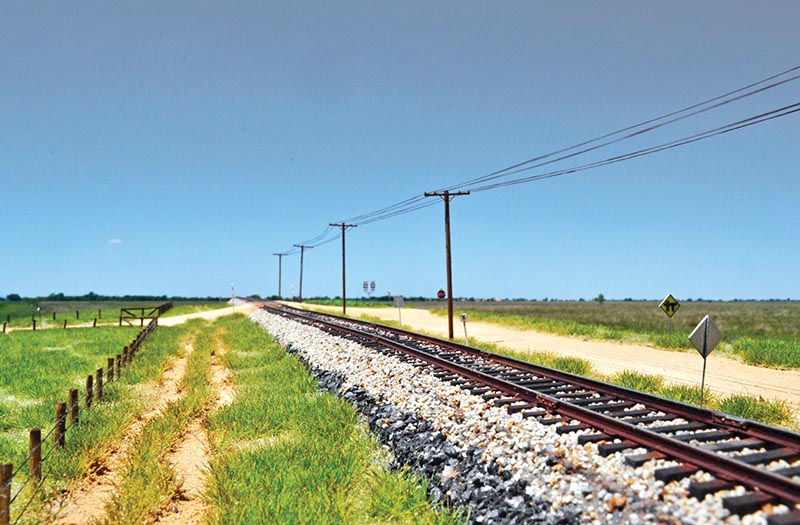
I wanted to create a simple country scene to have someplace other than my workbench to photograph my models. Eventually, I intended to incorporate these sections into a home layout once space became available. The goal was to create something realistic without having to engage in anything particularly complicated while using readily available materials. While I’m working in HO scale, these methods can be used to create a scene in any scale.
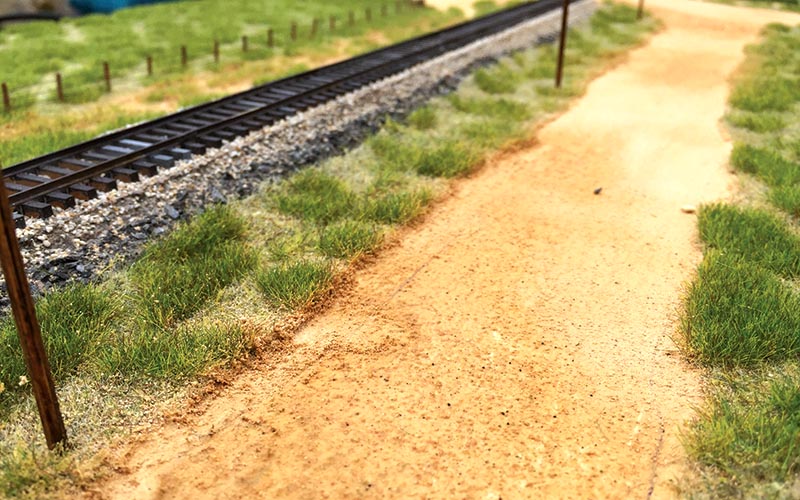
ABOVE: The crossing has been installed, scale 2×6 lumber was used and stained with Old English scratch remover.
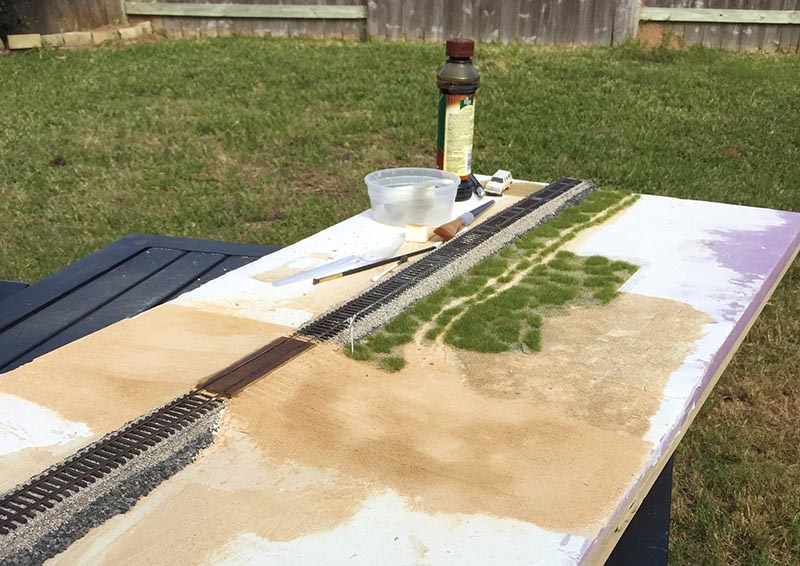
The base is a 2×4 sheet of particle board. The reason for going with something this dense and heavy is due to taking all my pictures outdoors in natural sunlight. At times here in southeast Texas it’s fairly windy, so I needed something that won’t get blown over or even lifted away. The weight of this diorama has changed my thinking about using these sections on a home layout, however, as I would prefer to use the extruded polystyrene foam board due to its light weight. My advice is to use whatever base will suit your needs best.
As you can see in the photos on the opposite page, I did not think about documenting this until I had already started on it, but visible in these images you can see I used a piece of wooden threshold trim to elevate my roadbed. On top of that I glued cork roadbed. I had half a bag of large stones left over from another project, so I glued them along the edge of the threshold where it meets the base to simulate a drainage ditch.
ABOVE: A gravel road was added along one side of the tracks for visual interest, and to create another photo angle.
I used Code 83 straight track from Oak Hill for the main line, which was secured to the cork roadbed using white glue. I applied some basic weathering to the track using Rustoleum Camouflage Brown from a spray can. Individual ties were “sunbleached” using earth-tone weathering powders. An initial layer of ballast was applied using Arizona Rock & Mineral Pennsylvania Railroad Mainline Ballast (no. 105-3)…
