
 By Jeff Carlson/photos as noted
A few years back, I was perusing the junk bin at the local hobby shop and found an Atlas C30-7 shell in Santa Fe paint for all of $7.00, assuming somebody could use it. I know enough Santa Fe guys, and surely one of them could go for a good deal, right? Wrong. As a result, I was left with a perfectly good shell and had to find something to do with it. So, what’s a die-hard Burlington Northern modeler left to do in this situation? Wreck it!
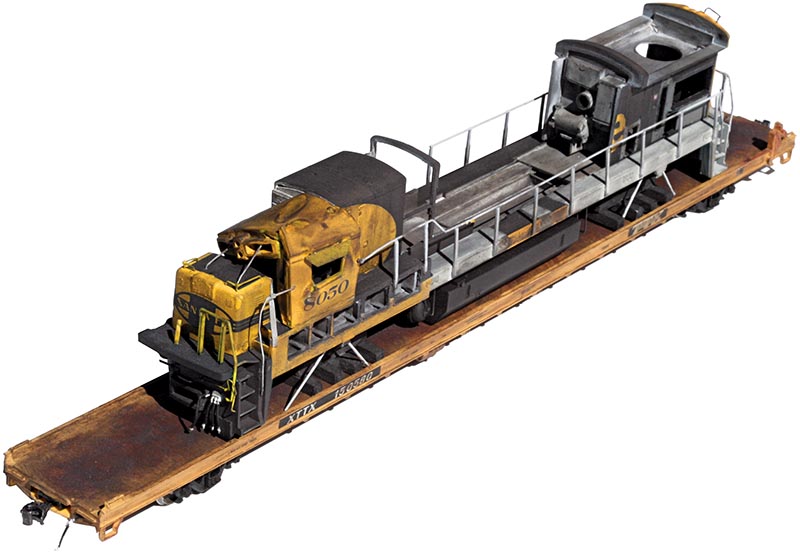
This isn’t the first piece of wrecked equipment that I’ve placed on a flat car, but for the purposes of an operating layout that features a scrap yard, I had to make this load removable. It required some creative, but simple, engineering that assures the load can be removed at its destination without preventing other loads from being placed as well.
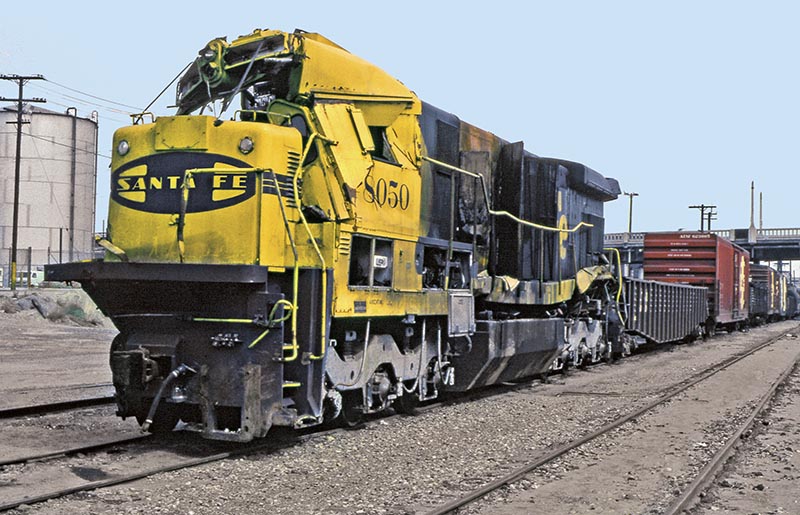
ABOVE: Wrecked Santa Fe 8050 was sitting outside the shops at San Bernardino, Calif., on October 15, 1983. —John Doughty
The Prototype
In the late 1970s the Santa Fe found themselves in the market for new, high-horsepower freight locomotives, and turned to General Electric for the solution. They found it in the form of the C30-7, their successor to the U30C, and after numerous orders, the Santa Fe ended up purchasing 167 of the units, which found service system-wide on everything from coal drags to potash trains. The first of these was delivered in 1977, with the last one delivered in early 1983. The 8050 that I’ve modeled here was from the group that was built in early 1978, no. 8020-8057. Unfortunately, the 8050 was wrecked on May 4, 1983, in an incident near Griffith, Ariz. Interestingly, the unit was on fire, then after having been set out, it ended up rolling back into the train it had been on.
It languished around the San Bernardino shops for years, receiving some repairs, but eventually was scrapped after numerous parts were removed over the years. According to Kevin EuDaly’s Santa Fe 1992 Annual, the 8050 was retired as of March 1989. Although the railroad this model lives on is set a few years later and features the Emporia Sub, I applied some “modeler’s license” to allow for this unit to survive into the Super Fleet era and be transported to the Erman Corporation scrap yard in Kansas City, Kansas.
Modeling the Wrecked 8050
Working in Topeka, Kansas, I see wrecked BNSF Railway units frequently, and I wanted to see how possible it would be to replicate this myself in model form. While this project is HO, the techniques shown could just as easily be adapted to most any scale. The end results may look daunting, but so long as you’re comfortable making some 90-degree cuts into a shell and fitting some styrene to fill in the “open” areas, you’ll be good to go. Beyond that, it’s just a standard locomotive detailing and weathering project. Oh, and there’s the tiny matter of taking a soldering iron to a perfectly good plastic shell, but it’s not that scary, I promise.
The Body: Dig In!
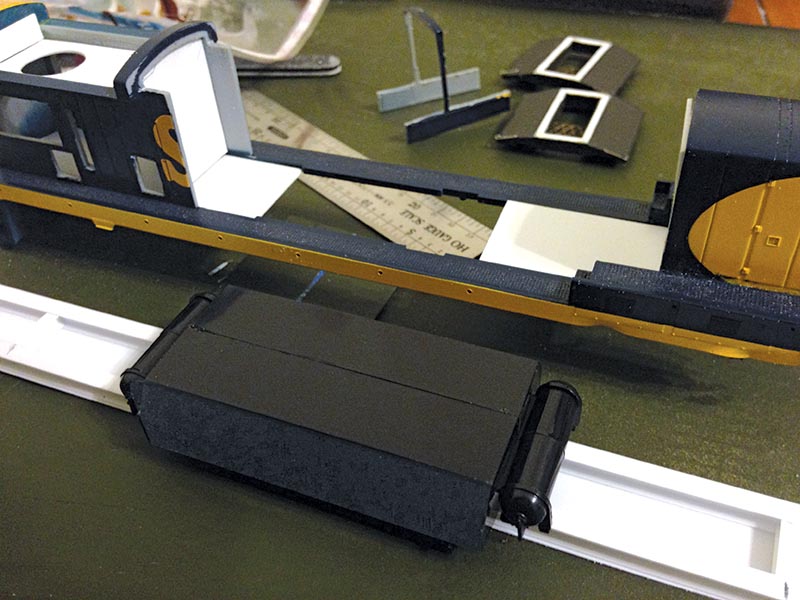
Obviously, the most notable feature of this project is the multiple body parts that had been stripped from the unit over the years. Fortunately, Atlas’ separate body components make this process fairly simple to replicate. Starting with the long hood, I used masking tape to mark off what I would be saving, pulled out my miter box, made three vertical slices in the shell with a razor saw, as in the drawing below, leaving the one vertical batten strip right behind the dynamic brake housing.
At this point, I was done with the long hood, and moved on to the front end of the locomotive. While this isn’t the order that I built the model in, I’d suggest removing the left side battery box doors at this point. For this, I masked off each of the doors one at a time, and then, using a medium-sized bit in my Dremel tool, I drilled out a series of holes around the perimeter of each one before slicing through the material in between with an X-Acto #11 blade. With the doors all roughly removed, I used a series of files to clean them up and make them square.
Using prototype photos as a guide, I used nippers to remove the right side of the cab, the windshield’s center post, the battery boxes, front steps, anticlimber, and a portion of the front pilot. You’ll want to sand the anticlimber’s area smooth, and drill holes for the new Details West anticlimber, which we’ll install later. When you’re satisfied with the work here, you can set these aside, but take note that the walkway will be quite fragile at this point…
