
By Chris Brimley/photos by the author
Separately cast or cut windows are the norm for many structure kits today. They are much easier to paint and can be glued or snapped in once dry. However, kits with cast-in details are just as popular with today’s model railroaders. Just about every layout has at least one mixed in somewhere, and why not? They are economical and highly detailed. While Design Preservation Models (DPM) is not the only manufacturer out there that makes this style of kit, they are the most common. Most of the first structure kits I built were DPM and I remember the sloppy paint job I had on all of these and it drove me crazy. Careful painting of the cast-in details can be the most discouraging aspect of these projects.
Cast-in windows on structure kits can be a challenge to paint. Look in just about any model railroading forum, chat room or group and I bet this question has come up at least once: “What is the best way to paint cast-in windows?” This is a method that I have developed and used on multiple kits from manufactures such as DPM and Lunde Studios. While I don’t believe this is the end all solution to this dilemma, I feel it is a very good one and it has served me very well by saving time and headaches.
One option is spraying an entire section the color you want for the walls, and then going back and brushing the window frame color in. This method can be very time consuming and if your painting skills are not the best, you could over paint onto the brick or siding. Then you run into the issue of having to touch up the wall color. If you sprayed the walls then you can’t simply re-spray the area because you will over spray onto the window frame color and then you are back to square one. You can touch up the paint that was sprayed on the walls by brush, but then the color goes on darker and will draw attention to your error.
Another method is to paint the entire wall section the color of the window frames, then come back and brush in the wall color. Problems with this are similar to the method mentioned above. By brushing the paint onto the walls, you won’t get as good as a coat if you would have sprayed it (this can be argued). Up till now I would go back and forth between the two methods and usually settled with the first.
If you wanted to spend the time you could do the second method by spraying the walls the color of the windows, then mask them off with tape. This works but again is very time consuming and colors bleeding through is a possibility. Not something you want to happen if you spent hours getting masking tape to fit in each window. I spent two days masking off the windows on my structures, only to come back and spend another two hours touching up the bleeds. This is probably not the way you want to spend your precious modeling time.
My Solution
I had purchased an N scale department store kit from Lunde Studios. To my disappointment, all of the windows on the kit were cast-in and there was 107 of them. Not wanting to deal with the issues of painting each one by either of the previously mentioned methods, I knew I had to think of a more effective solution. First I thought about cutting masking tape to fit in each opening, but I didn’t want to measure and fit for each cut, thus wasting time. Then I thought about cutting paper in strips and then cut into the proper lengths, but I thought I could have some bleeding issues if the paper warped. Then it dawned on me: Why not styrene? I eventually settled on .005″ thick styrene sheet to make my “masking tiles.” The .005″ styrene is paper thin, stable and reusable. The paint just gathers on the surface and doesn’t wick underneath and bleed as easily as other materials would.
 Step 1
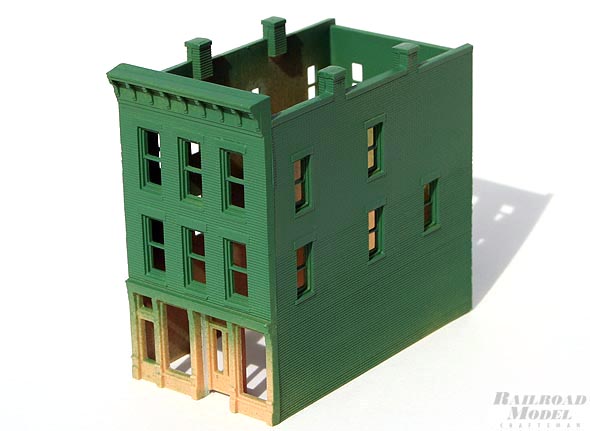
I have used this method of masking and painting kits of this style using an air brush and spray can colors. If brushing by hand is your preferred method, do so with caution. Paint the kit or wall section the color of what you want the window frames to be. Allow to dry sufficiently, preferably overnight.
Step 2
Measure the window openings exactly (use calipers if you have them). Take some .005″ sheet styrene, cut it into strips that is equal to the window opening width. Cut the strip to the height of the opening. I recommend using a Northwest Short Line Chopper or equal device to do this step so you can reproduce many of the “masking tiles” to the same exact measurement quickly.
Step 3
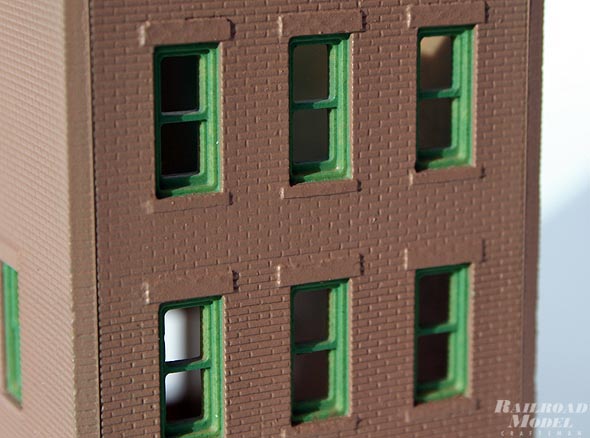
Do a dry fit and make sure that the masking tiles are going to fit properly into the openings. To get the tiles to stick, I dabbed on the tiniest amount of rubber cement to the top and bottom, just enough so they will stick. The rubber cement will not harm the finish beneath, and cleans up with relative ease. Pop in all of the tiles and you are ready to paint.
Step 4
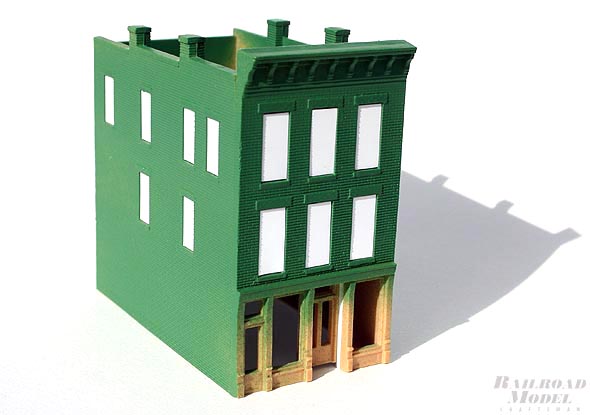
When you spray the building or wall, care needs to be taken. To lower risk of bleeding, spray even and successive light coats. I had one coat go on heavy and had slim to no bleeding. For best results, allow each light coat a little time to dry before applying the next one.
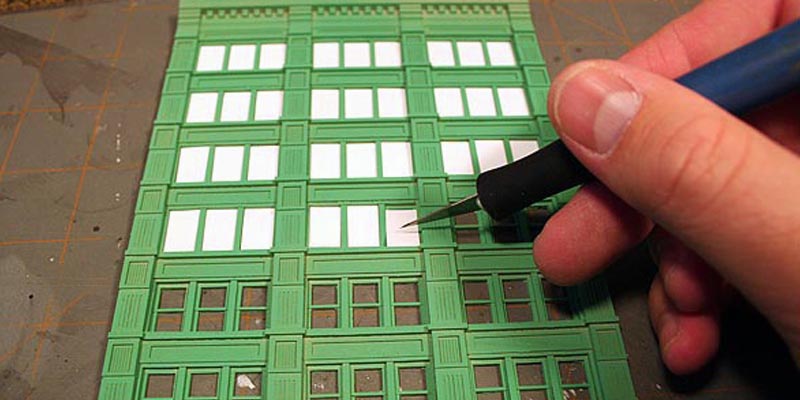
Step 5
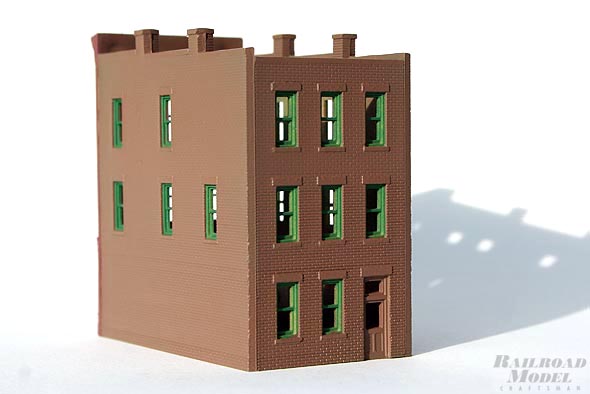
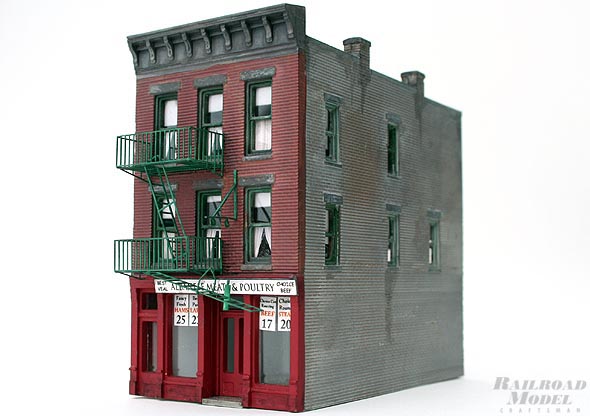
Carefully remove the tiles from the openings with your hobby knife. Rub off any rubber cement that may still be in the openings. After this you should be ready to weather and detail your structure. Touch up on the structures that I have done this on have been virtually nonexistent and you have a clean and professional looking paint job.
Looking at the photos and describing the process can make this method sound long and tedious. However, I was amazed the first time I tried it at how fast it went. The Lunde Studios kit with the 107 windows took less than 60 minutes to mask and paint, something that would have taken at least a good 5 to 6 hours using other methods. This method has its limitations, but it has worked extremely well for me. So give it a try, it might just surprise you.
Chris Brimley is an N scale model railroader from Utah who enjoys modeling urban scenery.