By Joseph Kreiss/photos by the author
Model railroaders, by nature, tend to be pretty resourceful, yet at the same time thrifty (read: “cheap”). We are always looking for a bargain to make our hobby dollars go farther. We look for non-model railroad items to use on the layout, like those protective caps off a disposable razor. “Hey, these could be used to make some cool log bunks for a flatcar!” Our parts bins are filled with lots of different “junk” ready to be used on the layout.
I tend to be thrifty when it comes to scenery-making materials. My wife Kim always gets a hoot out of me when I spot an old tree branch or twig lying on the ground. “Oh, look,” I’ll say. “This has a scale bark pattern that would look great as a downed cypress tree that’s been under water for about 50 years. That’s going Masking Tape Web Scenery on the layout!”
While building the scenery for my On30 Mosquito Creek Lumber Company swamp logging layout, I wanted a fast, easy, and cheap method to cover the open benchwork with plaster. Over the years, I’ve tried my hand at pretty much every known scenery method: window screen, crumpled newspaper and white glue, cardboard strips, and stacked and carved extruded foam insulation boards. All these work well for supporting the plaster base coat. Deciding which is best depends on what type of layout scenery and terrain is being modeled.
Lately, I have been using regular masking tape as a base for my swamp forest scenery with great results. Masking tape is easy to source, inexpensive, plus it is fast and simple to use. I buy common masking tape and not the blue painter’s masking tape that’s popular nowadays. I find the old school stuff sticks better and is much cheaper. (There’s that word again!) Most of us have a few rolls of masking tape tucked away at home or in the shop. For the masking tape web scenery, I use one-inch wide rolls.
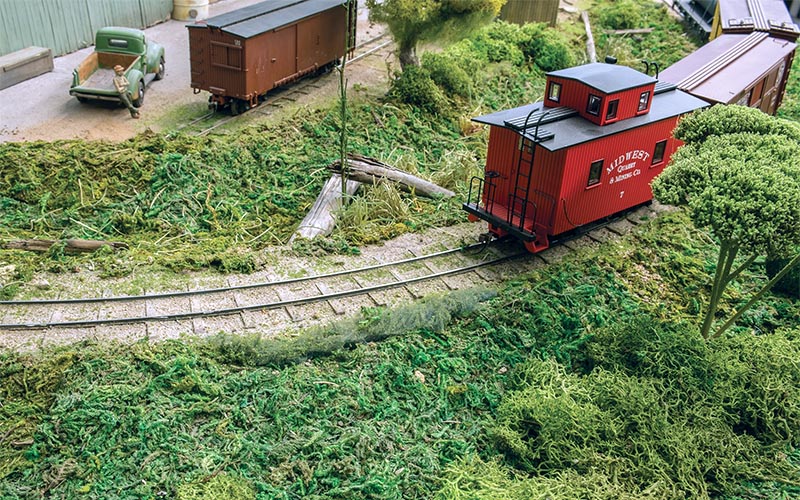
To get started, I make sure there are numerous places on the layout’s benchwork and sub-roadbed to use as attachment points for the tape ends. Spanning wider areas with the masking tape may need additional benchwork supports. It also helps to have the layout’s fascia boards installed to act as an outer edge support for the tape.
I begin in a section needing new scenery by making a web with the masking tape. I pull the tape from the roll across the gap and stick the tape to the attachment points as tightly as possible without pulling off the tape from the layout. I do this again and again at two to three-inch wide spacing and then go back at a 90-degree angle and stretch out sections until the entire area is covered in a web of masking tape. I use my finger to rub down all the spots where the tape is attached to the benchwork supports to make sure they adhere firmly. I go back and press each intersection of tape together to get a good bond. It’s surprising how strong the completed masking tape web is at this point.
To make a depression in the land form, or create an area for a pond or body of water, I allow the tape strips to sag in the middle as I string them across the opening. The greater the sag, the deeper the pond or depression will be.
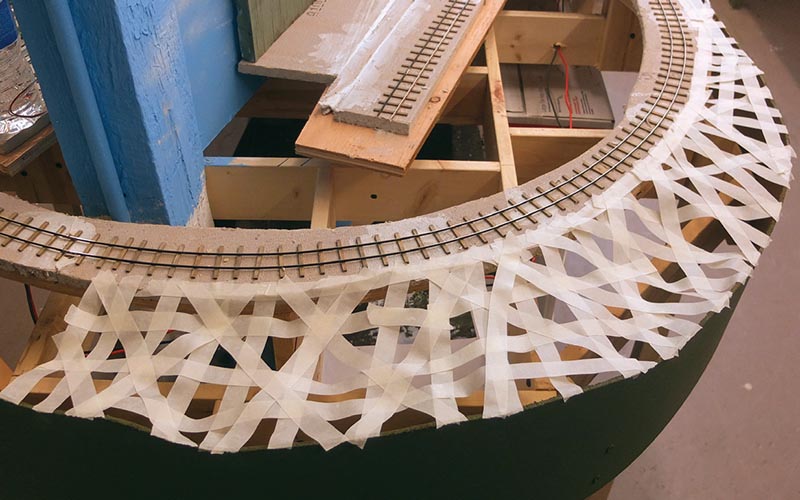
Once the tape webbing is complete, I mix a batch of casting plaster, making the consistency thin enough to coat the strips of newspaper or paper towels used to form the scenery base. Commercially available plaster gauze, such as offered by Woodland Scenery, can be used as well. Working quickly, I dip the newspaper strips into the plaster to coat completely and then run the strip between my fingers to squeegee off the excess plaster. I lay this strip on top of the tape webbing and continue the process, laying more plaster-soaked paper strips over the tape until the web is completely covered. Allow the plaster to dry completely overnight before adding a second layer of plaster-soaked paper strips. I’ll give the dried plaster a quick spray of water from a spray bottle before adding the next layer of wet plaster. Dampening the plaster helps the next layer of plaster to stick better and not harden so fast, Again, completely cover the area with the plaster-soaked paper strips and allow to dry.
At this point, the scenery shell is quite strong. However, for added strength, a third coat of thicker plaster can be brushed on or rubbed on by hand to create ground texture. It also helps hide any seams in the earlier plaster and paper layers. To create a neat edge of scenery where it meets the layout edging, I run a utility knife parallel along the edge of the fascia board and trim off any dried plaster overhang.
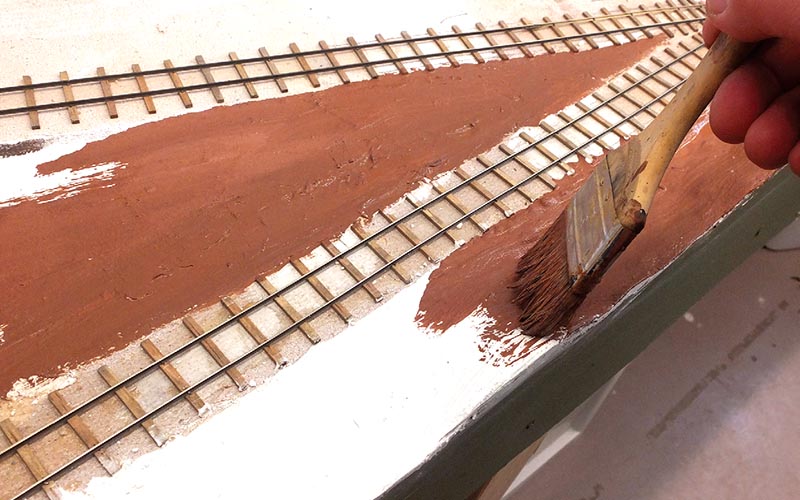
Once the plaster has dried, the scenery is ready for basic painting and the addition of your choice of ground cover. I use a water-based powdered brown craft paint for my base color just to hide the white plaster. I then glue moss sheet material over the plaster shell as my basic ground cover material. I like using the moss mat. The small, green fern-like material really represents the foliage typical for my layout’s swampy Louisiana locale. The moss comes in large rolls (available at most large craft stores), costs about $20 per roll, and covers a large area. The back of the moss mat is made of a nylon mesh, which is easy to cut and holds the moss in place.
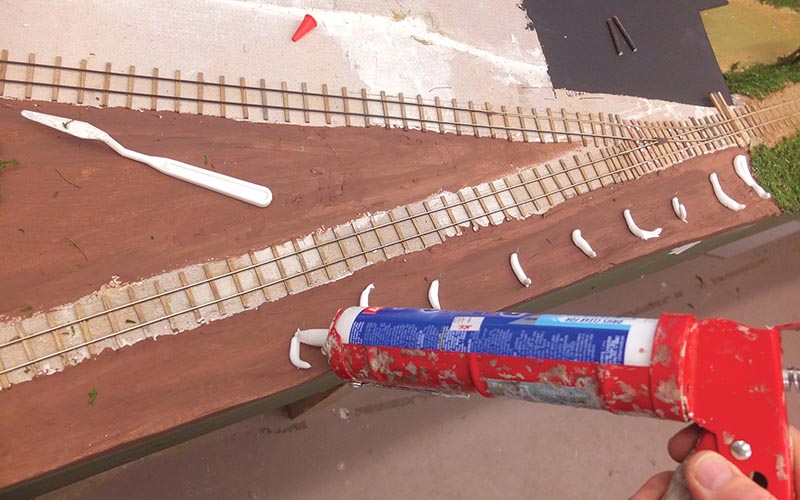
ABOVE: This section of the layout is ready for finishing and offers a good starting point to add rock castings, boulders, or other natural ground details. Since I model the swampy bayous of the deep South, I wanted a relatively smooth base on which to add my thick foliage. I’ve had great results using Loc-Tite “Power Grab” on my layout to hold everything from track to scenery materials in place. It’s found in building supply and hardware stores, comes out white, dries clear, and washes up with water. I used a caulking gun to dispense the adhesive to the scenery base and then spread the material around with a putty knife and my fingers.
I use LocTite Power Grab all-purpose construction adhesive. It comes out white and dries clear. I use a caulking gun to dispense small blobs of the adhesive on the painted plaster and then spread the material evenly using an artist’s palette knife.
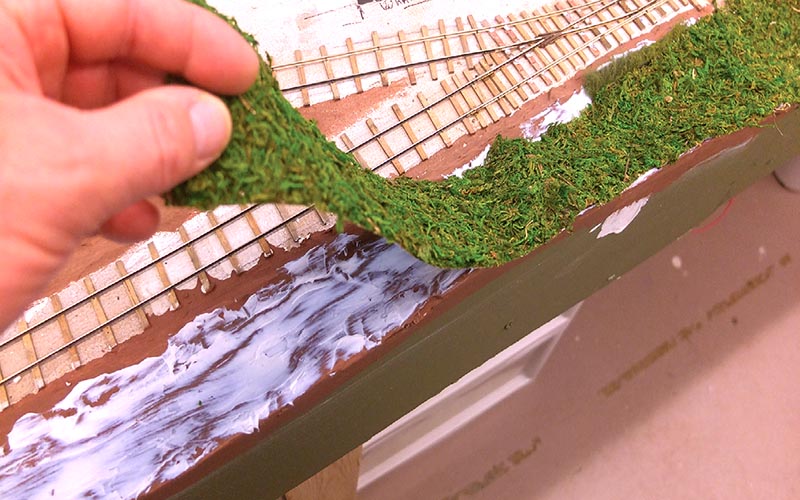
ABOVE: With the “Power Grab” spread over the painted plaster, the moss mat sections are positioned into place. If the pieces don’t cover the area exactly, it’s not a problem — only the brown “dirt” color will show.
Once in place on the layout, I add other layers of scenery material, such as lichen bushes, static grass, ground foam, rocks, and trees to hide the edges of the moss mat and add variation in texture and color.
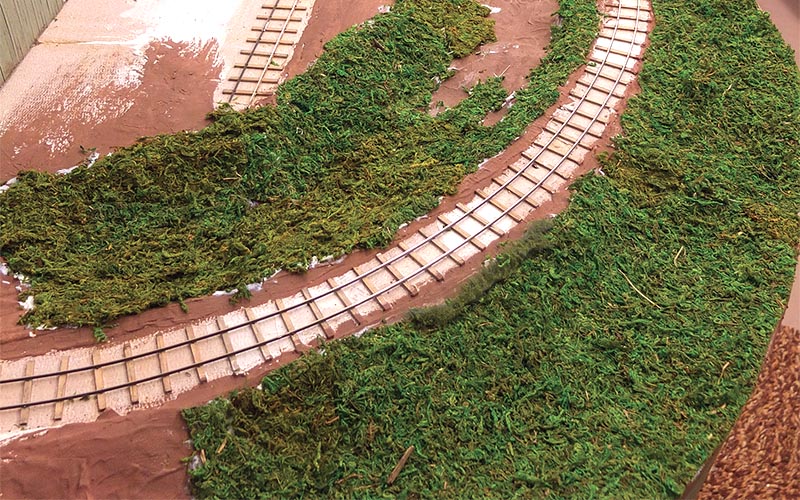
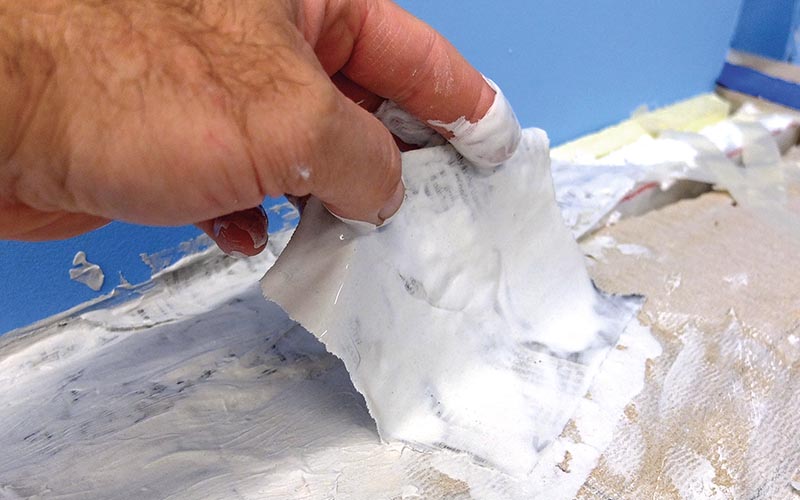
ABOVE: From this scenery base, I added ballast to the hand-laid track, plus placed trees, stumps, and old logs. An assortment of bushes, grasses, and several commercial ground foam products were added for texture and give the area depth and interest.
Grab a roll of masking tape from your workshop and start spinning a tape web over the unfinished scenery areas of your layout. I’m sure you find this technique fast, fun, affordable, and easy to use, yielding great results.