 By Tom Johnson/photos by the author
For more than 150 years, the general store (or “country store”) has been the cornerstone of many rural American communities as a place to shop for groceries and home goods, sometimes some live bait or ammo, and even to catch up on local news and gossip. Some stores doubled as the local post office and, in later years, as a stop for rural bus routes. Often packed to the brim with a variety of merchandise and adorned with colorful advertising, their often ramshackle appearance begs to be modeled.
I have built several country stores over the years for my rural HO scale layouts. So many, in fact, that my friends know me for my models of country stores (and grain elevators). In an effort to keep that reputation up, I decided to build a few more for my new layout after a recent move from Indiana to Florida.
My previous examples all started from various laser craftsman kits that I tweaked a bit. I decided to work in plastic this time and used inexpensive Walthers Cornerstone snap-together structure kits as a base.
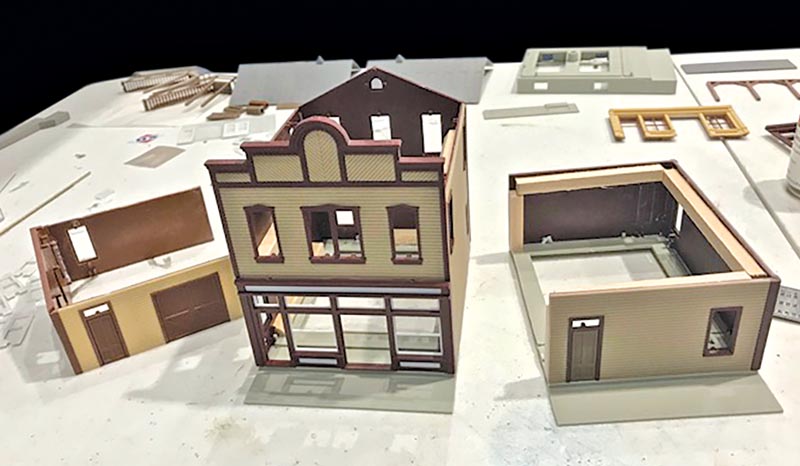
The center part of the structure is Benson’s Five and Dime. The portion on the left is a cut-down version of J.C. Landry Feed & Seed, while the right portion is another Benson’s cut down to a single story and turned sideways.
Construction
Since I was modeling an older wooden structure, I purchased two Walthers Cornerstone Benson’s Five and Dime Store kits (933-3661) and one J.C. Landry Feed & Supply Store kit (933-3662). Both items have since been discontinued, but can still be found on hobby shop shelves and from other secondary sources. While the construction may be simple, these kits turn out very nice with proper paint and weathering. I used Faller Expert Plastic Glue (no. 140792) to bond styrene, and medium strength Extreme Power Instant Adhesive (no. 238022) to reinforce the inside corners. Plastruct Bondene solvent cement was used to attach very tiny parts used for trim.
I started my country store kitbash by building one Benson’s Five and Dime as per the instructions. I took the second Benson’s kit, cut it down to one story, and added it to the right side of the first store to add some visual interest, I turned it sideways and decided to add a flat roof instead of using the supplied peaked roof.
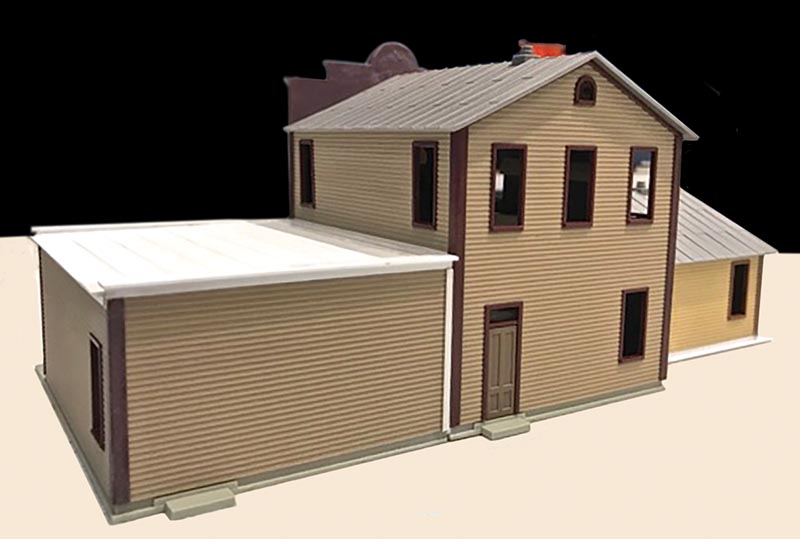
Variation in rooflines helps add visual interest to this model. A flat roof was added to represent an addition put on at a different time than the rest of the building.
The last step was cutting down the J.C. Landry Feed & Supply kit to one story, turning it sideways, and attaching it to the left side of the original Benson’s building. This completes the basic core construction.
The roof over the main part of the general store and the left addition are original steel roofing that comes in the kits. You will have to trim the roof over the left addition a bit so it does not overhang the end too much.
The roof over the right addition was made using Evergreen styrene for a base and then adding individual strips representing tar paper, using Evergreen styrene plastic sheets that are as thin as paper. I measured and cut each strip with scissors. I used my Faller Expert styrene glue, but was very careful not to apply too much because it will melt the very thin plastic strips. I applied two lines of glue per strip. I added some Evergreen bracing under the roof and glued them to the inside front and back wall at a slight angle for drainage. Make sure you cut the end wall slightly shorter than the front and back wall to accommodate the slight angle of the roof for drainage.
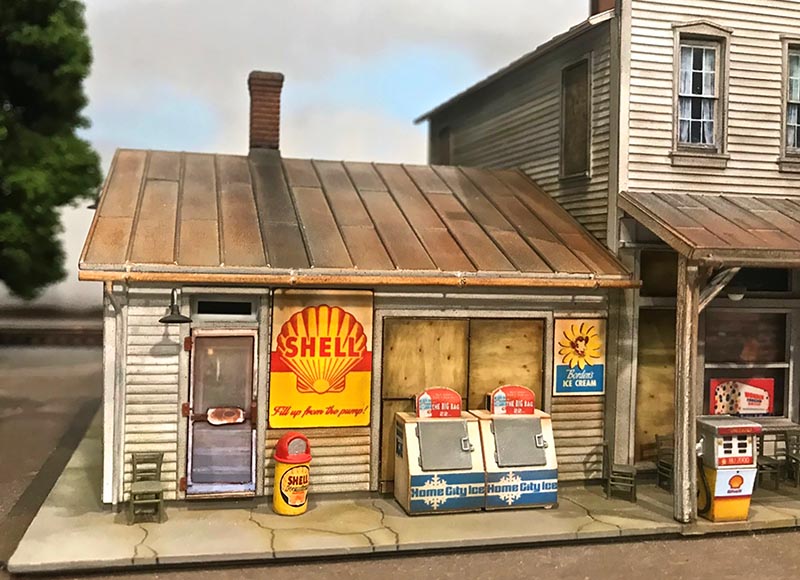
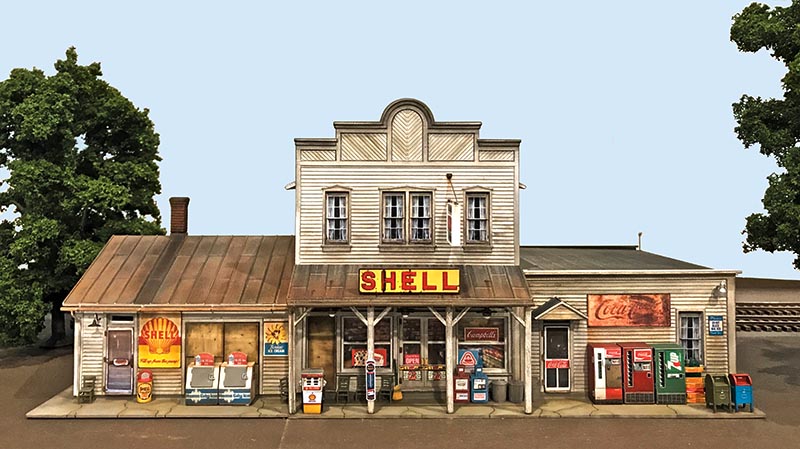
The ice machines and gas pumps are commercial castings from Showcase Miniatures, enhanced with layered images downloaded from the internet and sized to scale. A sharp hobby knife is your best friend for a project like this.
The right side addition was simply made by using three walls from a second Benson’s Five and Dime kit like the center two-story part of the general store. If you look carefully, you can see the back that was cut down and used for the front. The end wall came from the cut-down left side of the store (not seen in this photo).The back wall came from the cut-down section from the right side of the center store. I cut off the end pitch and made the roof flat. I used Evergreen styrene strips to trim out the corners and where parts joined.
The left side addition was made using cut-down walls from J.C. Landry Feed & Supply. The front wall is a cut-down first floor wall from the back of J.C. Landry. I filled in the door opening with pictures of plywood sheets found on Google Images, which I reduced to HO scale in Photoshop, and then mounted to a piece of styrene. The side wall is from the second floor from the back wall of the kit. I cut in the large door. The blank back wall came from the opposite side of the kit…


