
 By Jeff Johnston/photos by the author
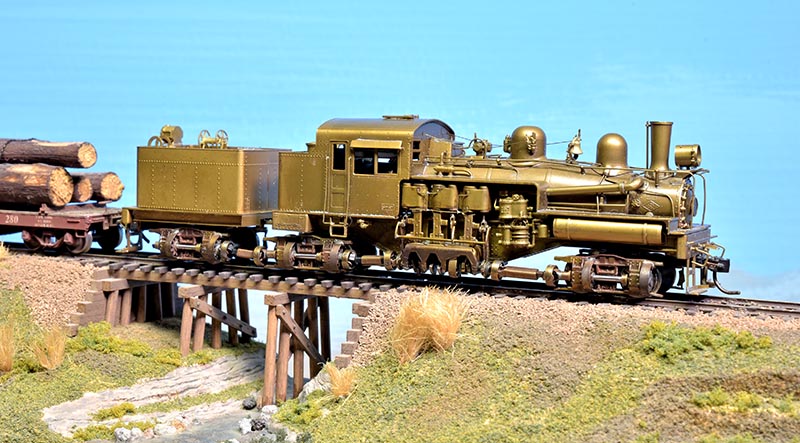
There are any number of compelling reasons for installing a new, contemporary motor in an older model locomotive. This project concerns an HO scale Pacific Fast Mail (PFM) brass import model of a Pacific Coast Shay from approximately 1970 or earlier. A new motor will be quieter, smoother, draw less current and possibly be smaller than the original which could leave more space for a flywheel, DCC decoder, extra weight and the like.
The overall plan was to replace the old open frame motor with a new can motor. This required us to fabricate a new driveline support and connect the motor to the driveline with NorthWest Short Line ball-and-socket parts. You don’t need to be a professional machinist to tackle this project.
The motor I chose is direct from eBay. It’s listed as a “Minebea DC 12V 6500RPM DC Motor 6-Pole Rotor Large Torque Small Mini 15MM Square” and it’s priced at $2.70. The use of really cheap components in an important project is never in my plan but this motor was recommended by Ken Clark, a guy with a lot of re-motoring and custom locomotive work, who said he has successful experience with these motors and that’s a good enough recommendation for me. As Ken describes the 6-pole armature nature of the beast, which has four field magnets, “each magnetic pulse rotates the armature only half as far as in the typical two-magnet motor; resulting in half the RPMs and twice the torque of a similar size can motor.” Those are good things for modelers.
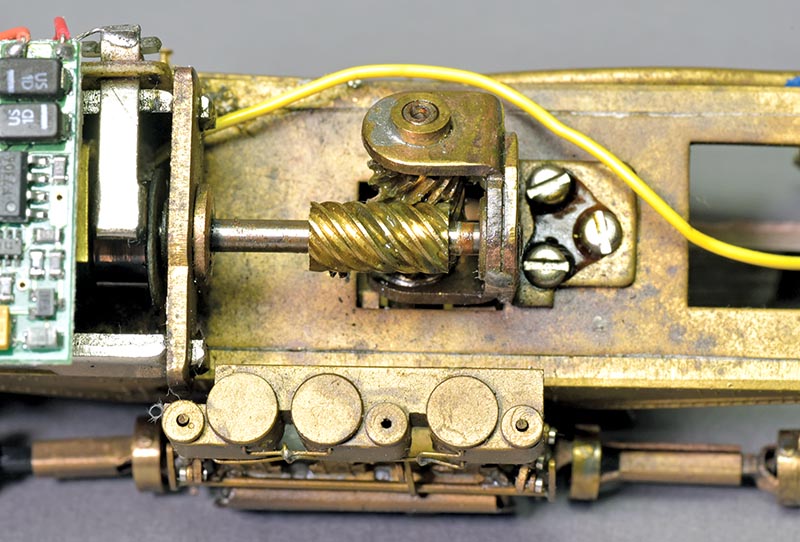
The motor serves as the rear driveshaft mount in the Shay. Once the motor is removed, a new mount is needed.
It measures a mere 15mm height and width and about 21.6mm long, not counting the 11.8mm- long by 2mm motor shaft. It’s amazingly small for its performance characteristics.
Tools
It would be a huge help, in fact almost a necessity, to own and know how to use a vernier caliper for this kind of job. Brass locomotives use metric hardware and parts so a caliper that features millimeters as well as inches is the right choice. You don’t need an ultra-expensive model, either; just one of average good quality will do. Skip the cheap plastic $1.99 models and spend a few dollars. It’s a worthwhile investment.
Digital-readout calipers are available but it’s also fairly easy to learn to read the vernier scale. Calipers come with instructions and there are numerous how-tos available online.

It may be overkill but a slip-joint pliers makes a fine tool for evenly and squarely pressing the NWSL drive cup on a shaft with delicate control.
Open it Up and Document Everything
Pulling a few screws allows for the loco body removal (but be sure to place the screws back in their holes in the body to avoid losing them). Next, we document the entire powertrain area including the clearances inside the body, and pertinent wire routings and the like. We had installed a Lenz DCC decoder years back and it was placed on the front of the motor in the higher-clearance area inside the cab, so that was our initial plan for the new motor setup as well….
