
 by Glenn Lapkin/photos by the author except as noted
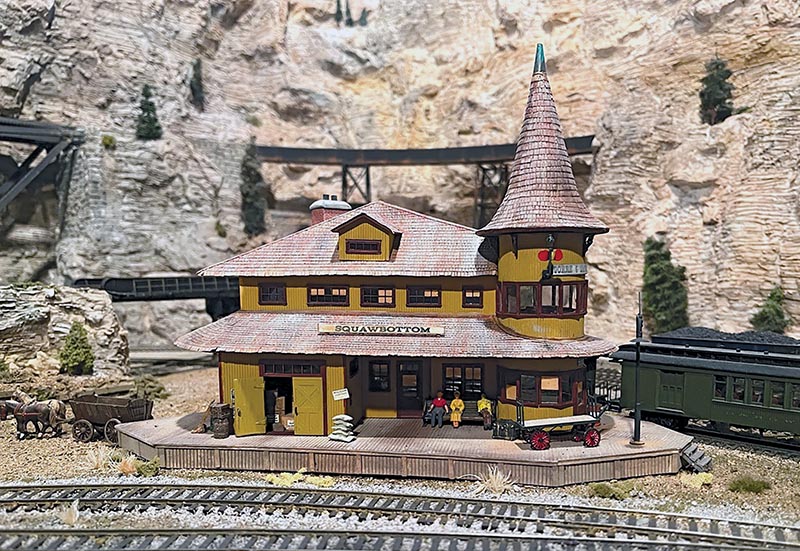
Taking an iconic structure and adapting it to fit my layout is always a rewarding creative challenge. I had been saving a triangular space where my standard gauge and narrow gauge lines converge, and it seemed like the perfect location for a station, since my narrow gauge line terminates there. I spent some time considering what might fit — not just any structure, but one that could serve as a true showpiece.
My Cease & Desist Railroad takes its name — and much of its inspiration — from John Allen’s Gorre & Daphetid, which continues to influence both the look and spirit of the layout. Several scenes pay homage to the G&D, interpreted in my own way. The era is intentionally flexible, spanning from the late 1890s through the early diesel years of the 1940s. Set amid the dramatic scenery of the Colorado Rockies, the railroad features rugged mountains, waterfalls, and steep grades, with both standard HO and narrow gauge HOn3 operations.
As an enthusiastic admirer of Allen’s work — and while pursuing my Master Model Railroader certification — I kept returning to Squawbottom Station, built by Jim Findley for Allen around 1968–1969.
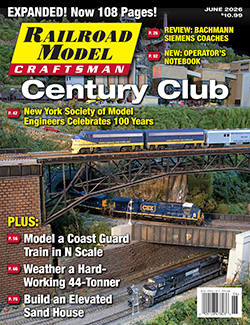
ABOVE: Forming the shape of the “hat” was a real challenge in that the pointed upper section had to smoothly transition to the lower section; it was built up with cardboard. This design element was popularized in Victorian and Queen Anne architecture between 1880–1920 and French Normal styles between 1920-1945.
Squawbottom was a notable town, canyon, and station on the Gorre & Daphetid. The area is best known for the dramatic Squaw Creek High Bridge and, as one of the most visually striking scenes on the layout, is frequently captured in photographs. Pine Canyon Scale Models later produced a popular kit, “Rockbottom,” inspired by the original station. The G&D itself was celebrated for its realistic operations, with Squawbottom serving as an important stop. Tragically, the layout was destroyed by fire in 1973, just days after Allen’s death.
On the original layout, the site existed for some time before a structure was placed there, and when I studied the building, it seemed like it might fit my space — but the orientation wasn’t quite right. After some thought, I realized that if I reversed the front and back and relocated the turret, it would work.
That became the plan. Without firm dimensions to work from, I developed rough measurements by studying photographs. I was also able to compare notes with Tom Hokel of Pine Ridge Railroad fame, who had built a now-long-discontinued resin kit produced in the early 2000s. Tom had taken measurements during construction, and when we compared his figures with my estimates, they turned out to be very close.

ABOVE: Using full-sized cutouts of Tichy windows and doors further confirmed the correct layout among the walls. Correct spacing and size also aided in the selection of the specific windows and any (and there were) modifications to those windows.
Having built railroad structures for more than 50 years, I found this to be one of the more challenging projects, largely due to its many rounded features. I began with a cardboard mock-up, starting with the turret and its distinctive “witch’s hat” roof to establish the basic forms.
Witch’s Hat
I decided to tackle the hardest part first, and this certainly qualified. After estimating the correct diameter at the base, I cut an 18-foot-diameter circle from cardboard. I then rolled a piece of thin cardboard into a cone slightly smaller than the final base diameter to allow for the transition section. Once I was satisfied with the shape, I taped the cone to hold it in place and trimmed the bottom flat. The overall height of the hat was set at 25 feet, including the finial described below.
Next came the transition section, which blends the cone into the base. I formed this using a carefully cut conical ring of cardboard, taped into place. It doesn’t have to be perfect, as it will be covered with shingles, but the profile should create a smooth transition from the upper cone to the base.
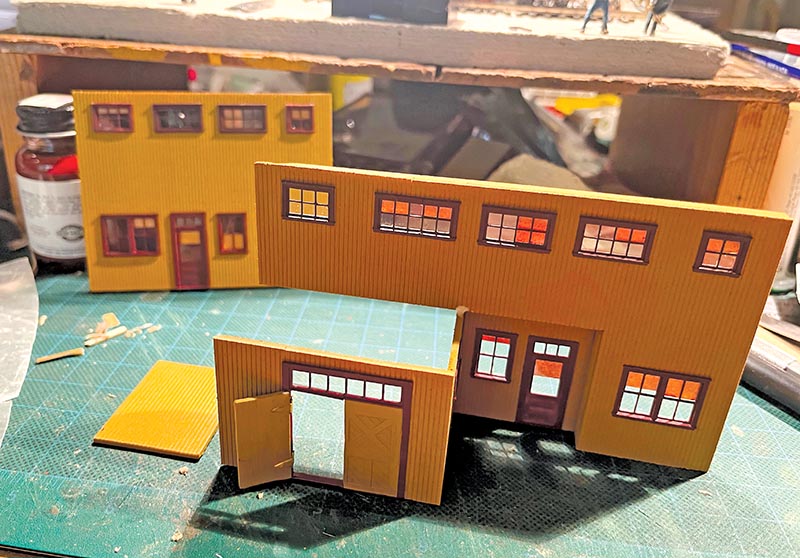
ABOVE: The wall sections were assembled into the final structure.
The entire roof was then covered with shingles. It helps to mark the surface evenly around the cone so the rows of Campbell shingles stay level and meet cleanly as they wrap around. I worked from the bottom up to the peak. To finish it off, I soldered a small copper finial, which adds a nice bit of character.
With the witch’s hat complete, I turned my attention to the turret itself, working out its height and diameter. These proportions are critical — too tall or too narrow, and it won’t look right. The relationship between the turret and the rest of the structure also had to be considered, particularly where the overhang of the roof meets the station’s hip roof.
I built a full cardboard mock-up of the station to check these relationships. I used a cardboard tube as a temporary stand-in for the turret to help establish overall scale. Since I had reversed the orientation of the original design, this step was especially helpful in visualizing how everything would come together.
Once the basic form — turret, witch’s hat, and triangular station structure — was established, I made a mock-up of the roof. This proved to be fairly complex due to the asymmetric hip roof and the continuous lower roof with its overhang, including the curved section wrapping around the turret. When the proportions and overall stance looked right, I added temporary window and door openings using printed catalog images of Tichy castings. This allowed me to evaluate the appearance before committing to the final construction…