
 By Don Weixl/photos by the author
I have heard many times that a model railroad is never finished. While that may be true for some, my goal is to help inspire you to finish your layout, or totally finish a major scene or two.
Having a space to work on a layout over a long period of time is key to being able to finish a layout. I have lived in the same house for the past 29 years, so I have no excuse for not finishing my projects. I must admit that I am impressed when I hear about a large layout that was finished in a relatively short time span such as five years or less, but as in life, the only true deadlines are the ones you set for yourself.
I started my current layout in 1991. While I am now calling it “finished,” that doesn’t mean I won’t be working on it, upgrading rolling stock, replacing the odd building, adding weathering, and so on. Another way of looking at it is if you built your home and moved into it after it was finished, you would still do renovations, re-decorate and repaint, reshingle the roof etc. I think that the same applies to a layout.
The Vision
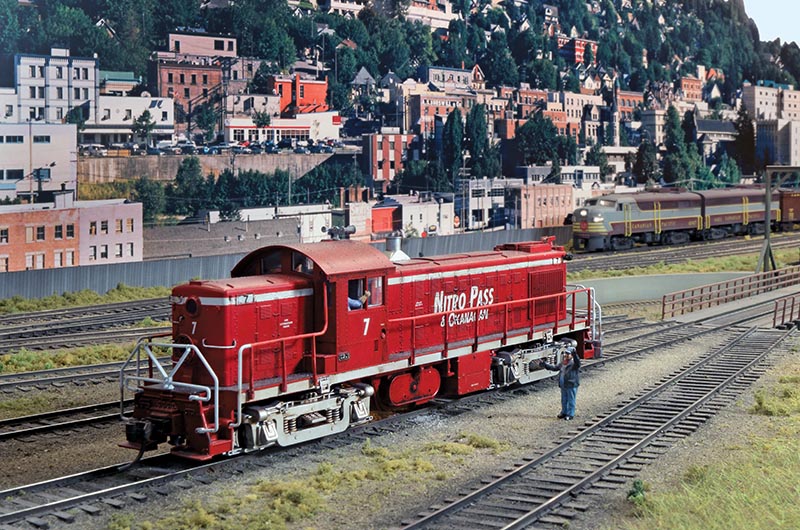
I built the HO scale Nitro Pass & Okanagan (NP&O) in a 12×16 room in our unfinished basement. My original vision was to build a freelanced standard gauge branch line with a narrow gauge “feel,” set in the mid-1950s in southern British Columbia. I was inspired by Canadian Pacific operations in the Kootenay Region and came up with the fictional Nitro Pass & Okanagan. In my miniature world, the NP&O was a subsidiary of the Canadian Pacific. This allowed me to run both NP&O and CP equipment together as I saw fit.
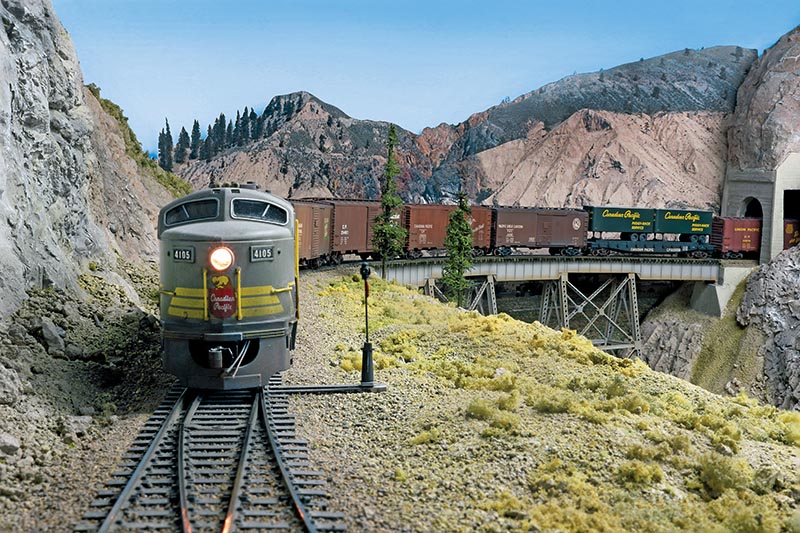
ABOVE: Canadian Pacific Fairbanks-Morse C-Liner 4105 assisted by a FM H-16-44 pulls into Summit Siding after completing the climb up the Nitro Pass. The C-Liner is a Life-Like Proto 1000 model.
In order to get a decent length run between towns in my limited space, I decided to use a double-deck plan connected by a four-turn helix. Tighter 24 degree radius turns were necessary to fit my track plan into the available space. Code 70 Micro Engineering flextrack and Shinohara no. 6 switches were used for the main line, while Code 55 track was used for some sidings and spurs. The initial benchwork was completed by 1992 and most of the track work laid by the end of 1993. I installed an analog command control operating system called “Onboard” that I continue to use to this day.
Scenery came next. I made fairly quick progress until our daughter was born in 1994, which was the first curveball to delay progress. The second curveball thrown my way was rediscovering my love of scale model aircraft and car building in the late 1990s. A renewed interest in slot car racing in 2013 was the third delay. Even with all of these curveballs, I slowly chugged along toward the goal of finishing my layout.
The Last Project: Rock Tipple
The biggest project I had to complete before calling my layout “finished” was building a hard rock mining operation. I had been looking at the blank space allocated for a mine for over 25 years. I dreamt about how the finished scene would look. Every time I had a new visitor to my HO scale model railway, I described my vision for the empty space. I finally got tired of making excuses, and started on this final big project about two years ago.
The first step was to cut in a switch for the spur. The plywood roadbed for the spur was already in place with rudimentary scenery built around it. I needed to scrounge up about six feet of Code 55 Micro Engineering flex track for the spur as I like the realistic look of the lighter rail.
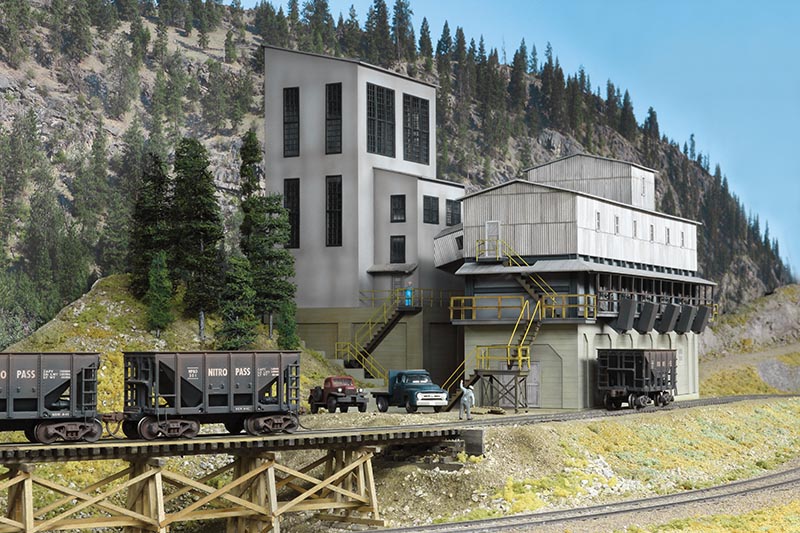
ABOVE: Nitro Pass ore cars are spotted at the Rattlesnake Mine tipple for loading. This was the last major scene to complete on the model railroad.
The end of the spur goes over a dry gulch, so I needed to construct a wooden trestle. The last time I built a wooden trestle was more than 25 years ago. I had just enough left-over scale lumber from that project to build my new trestle. I examined my first trestle carefully and tried to remember the methods I used to build it. At my workbench I glued the various wood sub-assemblies together and then installed the assembled trestle as a single unit. Whenever possible, I try to do as much modeling at the workbench instead of working in place on the layout. This has the advantage of being easier on my eyes and back.
Having a plausible mining operation was important to me so I needed to research how hard rock mines were typically configured in southern British Columbia. Due to my limited space, I was going to have to compress the scene significantly and only model the buildings closest to the actual spur. My modeled era is the late 1950s to the early 1960s. Most wooden ore tipples (ore bins are often called “tipples”) that you see in reference books were constructed in the late 1800s or early 1900s. I determined that a more modern tipple would be appropriate for my era. I found a prototype that was constructed in 1923 at the Cominco mining operation in Kimberley, B.C. It was built from steel and concrete and was covered with corrugated metal siding. I found several photos online showing the tipple under construction and in service. Using these photos for reference, I sketched out a compressed tipple that was inspired by the Kimberley design…
