

 by Jeff Johnston/photos by the author
If you’ve been part of the DCC community for awhile there will likely come a time when you decide to upgrade one or more of your older DCC-equipped locomotives. That was the case with my HO scale models of the Sugar Pine Lumber Company No. 5 Minarets type 2-10-2T and 2-8-2T No. 1.
When originally finishing these locomotives I added Lenz non-sound decoders and extra weight – probably too much, truth be told, but that big boiler tank space was tempting – so both of those items will be addressed. In the time since the project was done the Soundtraxx Tsunami sound decoders are making their way into more of my locomotives. The company’s CurrentKeeper accessory, or the comparable TCS Keep Alive unit, look like just the things for my small tank loco fleet. Given the limited power pickup capability of a small locomotive with a modest wheelbase and no tender wheels for extra current flow, the CurrentKeeper and Keep Alive should fill that smooth-operation gap.
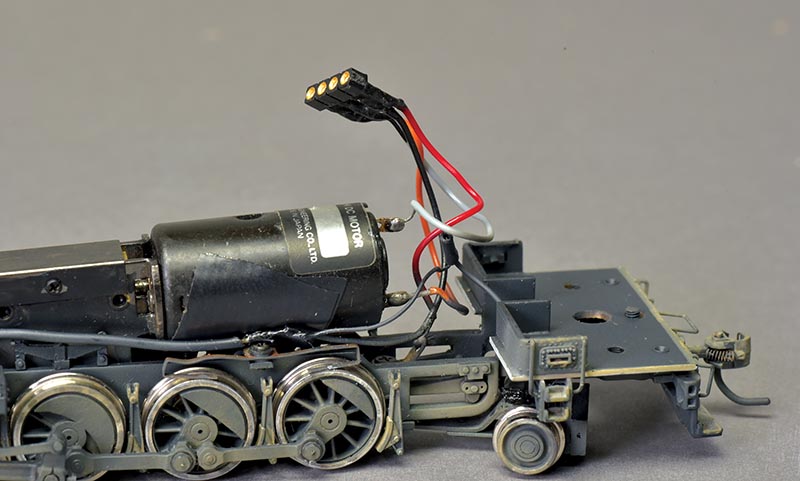
ABOVE: The original 4-prong mini plug was removed and replaced with simple hard-wiring from body to chassis. The author has never needed to separate the parts, so the plug is unnecessary.
Choosing the Parts
I had a Soundtraxx TSU-1000 Tsunami Econami in my parts box so that’s the one I initially chose for this upgrade. Locomotive 5 had enough interior space that I could save my smaller Tsunami 2 decoders for smaller locomotives.
Unlike some later model Tsunamis, there’s no direct plug for a Current Keeper device on the TSU-1000 so I used the wiring diagram in the tonystrains.com site for instructions on how to make the proper connection.
Because I’m new to the whole DCC “stay-alive” device scene, I started from zero with this project. I began my stay-alive device shopping and selection by cutting out some polystyrene chunks in the approximate sizes of some popular stay alive models by Soundtraxx and Train Control Systems. These helped me get a feel for what would fit without excessively handling the real devices.
I also purchased a TDS High Bass .78” speaker and a TDS High Bass speaker enclosure with the hopes this component could be used in the water tank wrapper. The initial hardware selection seemed a reasonable array for No. 5.
Next I weighed the locomotive, as-is, to see what kind of change I’d see after removing some boiler weight, both because the loco seemed too heavy and I needed more space for electronics. It tipped the scales at 19.53 ounces so we’d see how that compared after the project was done.
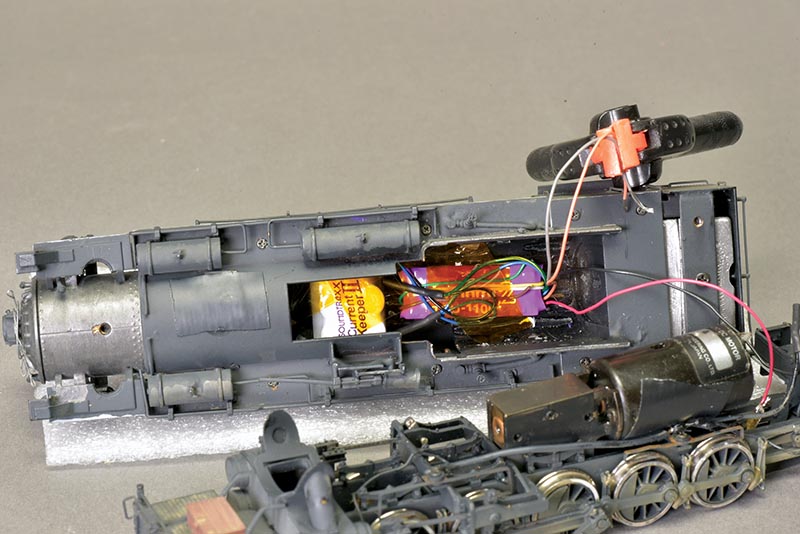
ABOVE: The Tsunami2 decoder is smaller than the Econami and makes a better fit in the body. Shoe Goo and Kapton tape help hold the parts in place.
Disassembly and Tank Removal
The boiler-wrapping water tank comes off after removing four screws. I’ve heard horror stories about axles wearing through their bearings due to over-weighted locos. Such stories may be largely apocryphal and may be ancient problems aggravated by older, less-effective lubricants or guys who completely filled any boiler spaces with lead. My No. 5 wasn’t that bad but I’d still need some of the space for electronics, so losing some weight wouldn’t be a bad thing.
The weights were glued in with Walthers Goo. I used a soldering iron to warm some of the weights and that softened the Goo, even after years of being cured, which allowed me to pry some of the weights out. It took some careful use of a small screwdriver and dental pick pry tool but the flat lead weights finally popped loose from the sides and top of the tank which opened up some space inside. The leftover yellow Goo inside looks obnoxious but is not to leave in place.
With the tank off but before removing the body, I inventoried the pertinent clearances between chassis and body components which started with test-fitting the Econami in a potential mounting spot. These clearances included from the motor to the boiler, the back of the motor to the boiler backhead and the chassis to the top of the water tank inside. This step is important to ensure a trouble-free parts fit later. There is almost nothing protruding up into the tank area above the running boards and the motor and gearbox are closely coupled together with no visible moving parts to snag any wires. That final detail simplifies things considerably.
I cut the double-stick foam tape securing the old decoder in place, carefully unsoldered the motor leads and disconnected the red and black right- and left-rail pickup leads. The decoder was relegated to my used-but-functional non-sound decoder box…
