
 By Walker Embry/photos by the author
If you’re a model railroader, you’ve probably heard of Walthers. Their building kits, locomotives, and rolling stock are staples of the hobby at this point. They are so prominent, in fact, that their place in the modeling railroading world has somewhat turned to stereotype. I’ve heard it many times from multiple modelers. “It’s a Walthers kit, everyone has one on their layout.”
If you’ve built a multitude of their kits like I have, you’ve probably had the same realization as I did. While being great kits out of the box, easily kitbash-able and very friendly to modification, they just seem to have a blandness to them if any of the latter isn’t done.
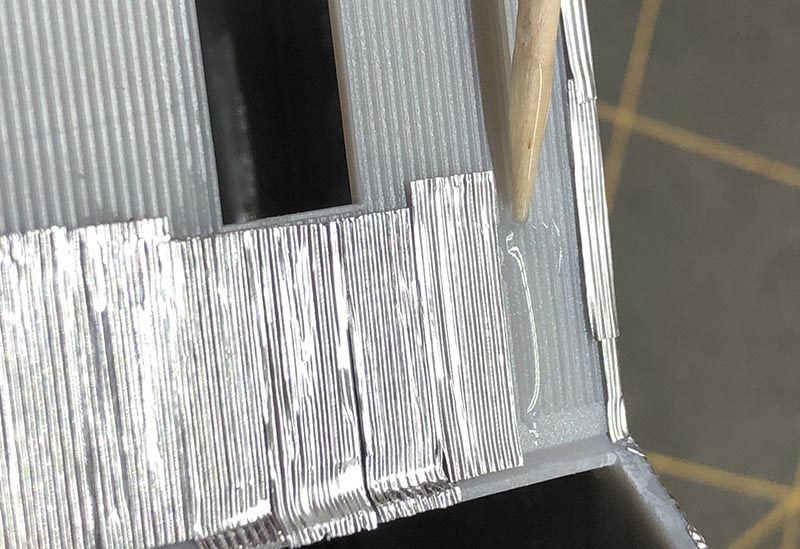
ABOVE: Although tedious and time-consuming, applying the paneling to the structure was very rewarding. Take your time with this step, and be careful not to crush the detail in the tin foil panels.
I recently picked up their Valley Growers Elevator kit for my own layout. Knowing what to expect, I wanted to add personality to the structure. This structure in particular has corrugated iron detail molded into the wall panels. At a basic level it looks good but I wanted to accentuate the individual panels and capture how the real-life counterpart looks.
I’ve used multiple techniques in the past to highlight corrugated iron detail such as scribing individual panels into the molded plastic walls with a straight ruler. This works well but fails to put emphasis on the 3D aspect.
I decided to take the scratchbuilder’s approach and make my own panels to bring the façade to life. I picked up a Brunel Models Corrugated Iron Maker tool online. This tool is made from acrylic with grooves layered into the base, and a small wand mirrors it to produce the wave detail. Being an N scale modeler I opted for the 3×9’.
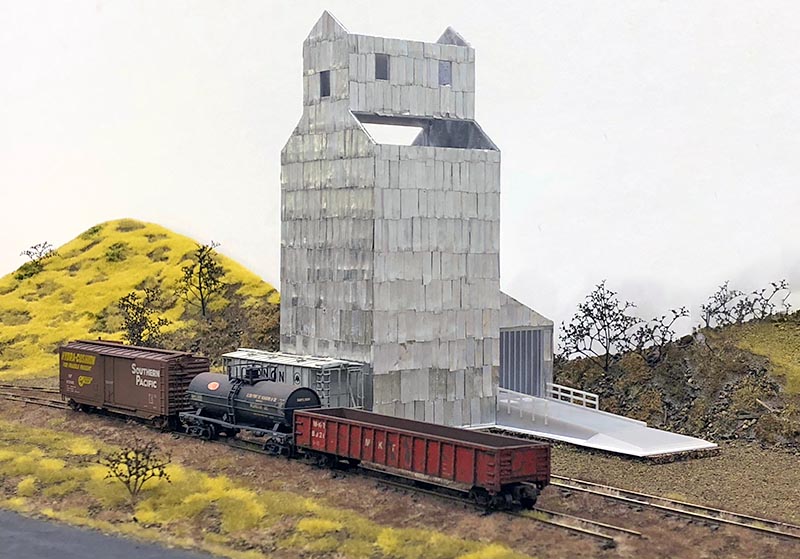
ABOVE: Here’s the model with all of the panels applied, before primer, paint, and weathering. Already the look of the stock kit is improved with this extra level of detail.
The tool is simple to use but demands patience. I started making my panels by cutting Reynolds Wrap Heavy Duty tin foil into 5/8” strips using a metal edge ruler and a hobby knife. I secured the base of the iron maker tool with tape to my workbench so it wouldn’t move.
With the end of the tin foil strip squared over the grooves on the base I used the wand to burnish in the panel detail. The trick is to position the wand at a slight angle and let the grooves between base and wand find each other. Use very light pressure and only in one direction. More than one pass was sometimes necessary to achieve the proper amount of embossing…
