
 By Otto M. Vondrak/photos by the author
Welcome back to our “Consider the Commuter” HO scale project layout. We apologize that our train has fallen behind schedule, but we’re back on track and on the move once again.
This month, we apply ballast and ground cover, and put our structures in place for the end-of-the-line scene at Flagstone. You may notice some slight changes we made to the track plan, including some minor revisions to structure placement. Every model railroad is a work in progress and deviations from the original plans occur from time to time. We flipped the orientation of the lumber yard spur so that a local placing a car would back into Flagstone instead of into the adjacent Bucklin Junction scene. We also rearranged some of the structures on Route 206 because we liked how they looked (and because of what was available at the time). Let’s get started!
Ballast
When we last visited Flagstone (see Part 5, June 2018 Railroad Model Craftsman), we had laid the track and painted and weathered the rail and ties. We also installed the Route 206 grade crossing. These are important steps to complete before ballast and ground cover are applied.
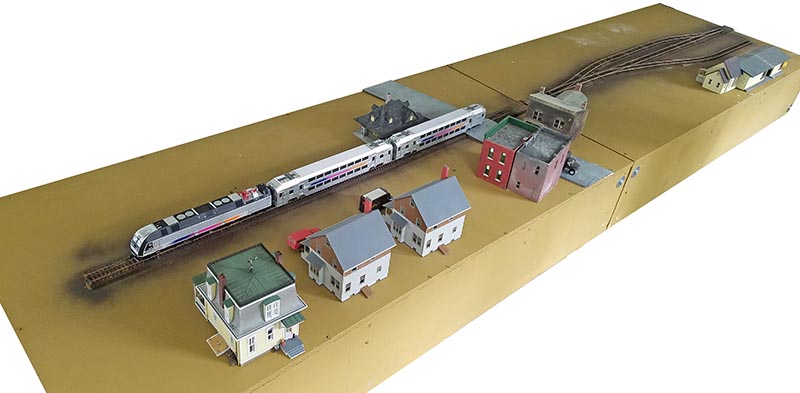
Structures are placed on the modules to determine where streets and sidewalks will be built. It’s also fun to imagine how scenes will look when they are done!
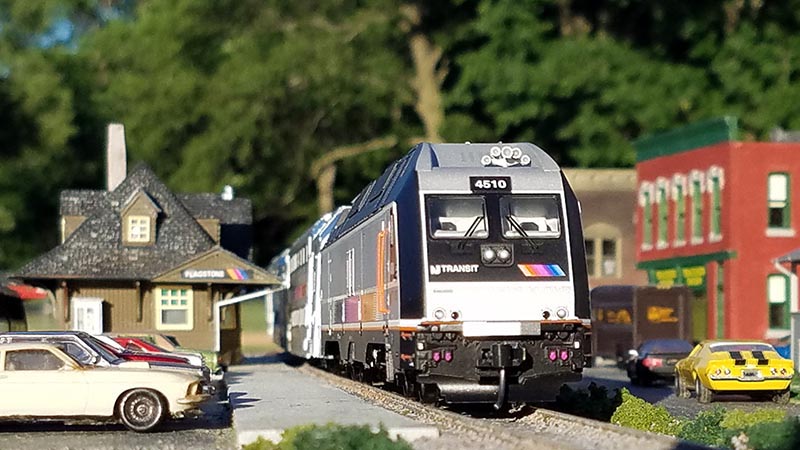
Because the ballast will come right up to the edge of our station platform, we need to place it first. Since this station is located at the end of the line, I scratchbuilt two platform extensions using .040” Evergreen sheet styrene and .080 x .080” square stock. The resulting extensions are the same height as the Atlas depot platform. To finish the extensions, I added texture by cutting some chips off the edge here and there, carving in a few cracks, and roughing up the surface with some 150 grit sandpaper. I sprayed them with Testors Light Aircraft Gray (no. 10111) and a light dusting of Flat Black (no. 10181).
I checked clearances with the train before glue was applied to make sure the locomotive and coaches wouldn’t clip the roof of the depot.
While I was checking clearances with the Atlas NJT commuter train, which consists of a locomotive and two coaches, I saw that the end of the train stuck out an inch into the highway crossing! Fortunately, I had not installed the bumper at end of track yet, so this was easy to remedy. I used a Bachmann EZ Track model of a Hayes-style bumper (no. 44591), which I removed from the molded roadbed and glued in place on a piece of cork. The track was sprayed with flat camouflage brown plaint, while the bumper was dry-brushed with yellow to complete the installation.
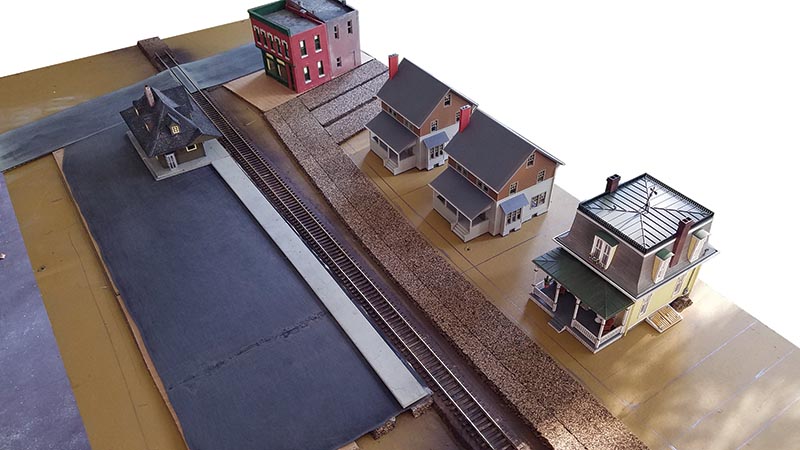
Because the ballast will come right up to the edge of the platforms, they were installed first. Because Schaffan Stret runs right alongside the tracks, roadbed was placed for it as well. The parking lot is .040” styrene sheet. Note the slight angle as the side street comes off Route 206.
You can tell a lot about a railroad based on the condition of the track and how clean the ballast is. Since our railroad represents a branch line of a busy commuter railroad, the track will be in good shape with fresh, clean ballast. The runaround (used by freight trains) will be slightly dirtier, and the customer siding into the lumber yard will be literally buried in the mud. Not only are these variations in texture realistic, they add visual interest as well.
To get started, I used a brush to remove any dirt and debris from the track. For the main line, I used Woodland Scenics Gray Fine Ballast (B1375) right out of the canister. It’s a consistent color without being too bright, perfect for representing a line that sees constant use. To apply the material, I poured some ballast into a plastic cup. Using a slight side-to-side motion, I applied ballast down the middle of the track. I then used a small bristle brush to distribute the material evenly. Work in small sections and take your time. You don’t want to have any ballast covering the tops of your ties, or sticking to the inside (web) of the rail. Take extra care to yield realistic results and trouble-free operation.
I worked on the lumber yard module at the same time so my colors and textures would match across the two scenes. For the runaround track, I started with Gray Fine Ballast as a base, but also added a pinch of Cinders Fine Ballast (B1376) and Brown Fine Ballast (B72) to represent older, dirtier material. With the darker colors, a little goes a long way, so be careful. When I was satisfied with the mix, I applied it to the runaround.
A sheer stocking pulled over a plastic cup sifts fine dirt onto wet white glue. The goal is to completely bury the lumber yard siding in the mud.
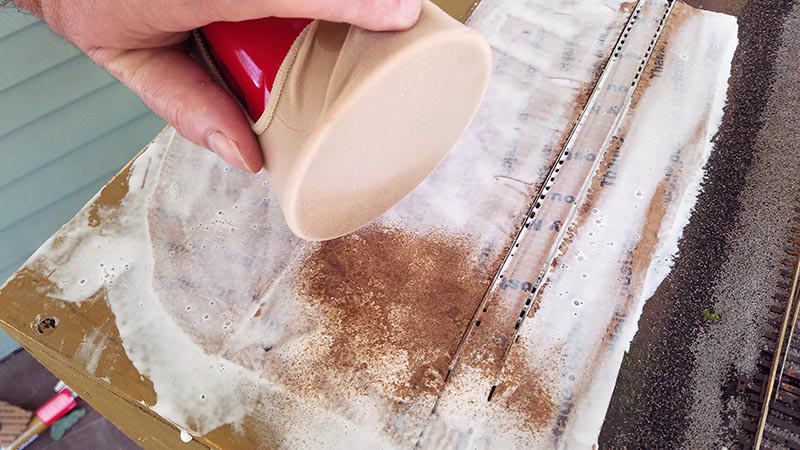
For the lumber yard siding, I mixed up an even darker blend, starting with Cinders and Brown, and adding a little Gray, blending back towards the switch coming from the main line. I did not ballast the track right in front of the lumber yard, as we’ll be using a different technique there.
There are many methods to secure loose scenic materials to your layout. I like to prepare two spray bottles; one with water with some isopropyl alcohol and a drop of detergent, the other with a 50/50 mix of water and white glue (and a drop or two of detergent). The first step is to set the spray bottle to fine mist and a wet down the loose material with the water/alcohol mix. The fine mist will rain down on the ballast and not disturb it.
Once the material is wet, switch to the water/glue mix and apply in the same fashion. You could also use a pipette to apply water/glue mix right down the middle of the track. Either way, don’t stop applying glue until you see small puddles form. Otherwise, you risk the glue making a hard top crust with loose material underneath.
Roads and Sidewalks
While the glue on the ballast was drying, I turned to laying out the streets and sidewalks for our suburban neighborhood. I like to use black sheet Evergreen styrene as a base for paved surfaces. First, the black color is an excellent base for any colors and textures added later (and if it gets scuffed, you don’t get glaring bright white showing through). Second, styrene is more durable, especially for a portable layout. And third, I find it easier to work and faster to set up than using plaster or other products.

The long shadows of late summer fall over our suburban scene at Flagstone. The Allegheny Midland boxcar at Haedrich Lumber has been unloaded and will be picked up by a Norfolk Southern local freight crew.
To lay out the streets, we had to place some of the structures in town. While I had originally planned on building some structures, I found some second-hand buildings at a local hobby shop that were already assembled, painted, and “priced to move.” The tavern is Woodland Scenics “Carol’s Corner Cafe” (no. 11300) and the antique store is “Kelly’s Saloon” (no. 10100). The stores facing Route 209 would have wider sidewalks, plus a small parking area in the rear, so I made sure to accommodate that.
Because I wanted the streets to be at the same level as the track, I used cork roadbed to support them. I used cardboard to transition down to Route 206, where the elevation is slightly lower. Because Route 206 is on an angle, and the stores front the highway, the first part of Schaffan Street is angled. That angle then straightens out to parallel the tracks. Not only does this add visual interest, but our brains interpret the angled roads to be “longer” than ones laid out perfectly parallel to the tracks and edges of the modules…