
 by Jack Hughes/photos by the author except as noted
Any attempt to model the Purina Chows mill in St. Johnsbury, Vt., begins with understanding the structure itself. During the 1960s and 1970s, it was one of the town’s most recognizable landmarks, its bold checkerboard paint scheme forming a colorful backdrop for countless photos of St. Johnsbury & Lamoille County, Maine Central, Canadian Pacific, and Boston & Maine trains. Though the main concrete structure still stands today in altered form, surprisingly few detailed photographs of the mill seem to exist.
Researching this project proved far more difficult than expected. While other St. Johnsbury structures are well-documented, close-up images of the Purina building — especially during switching operations — remain elusive. Months of online searches, inquiries with collectors, and outreach to the St. Johnsbury Historical Society yielded mostly distant views. That scarcity ultimately shaped my approach: rather than striving for absolute precision, I focused on capturing the overall character of the complex.
Built in 1948, the concrete mill was later expanded with metal sheds and, over time, a series of grain bins and elevators as traffic shifted from boxcars to covered hoppers. At its peak in the early 1970s, Purina had seven grain elevators and four additional grain bins, served by four tracks for what is assumed both inbound bulk grain and outbound bagged grain. That must have been fascinating to see in full operation during its heyday. Ultimately, the Historical Society notes that the mill began shutting down sometime in early 1975 and was fully closed by 1976. I can only speculate at the reasons: possible conflicts between local railroads that affected service, reduced demand, trucking competition, or a combination thereof.
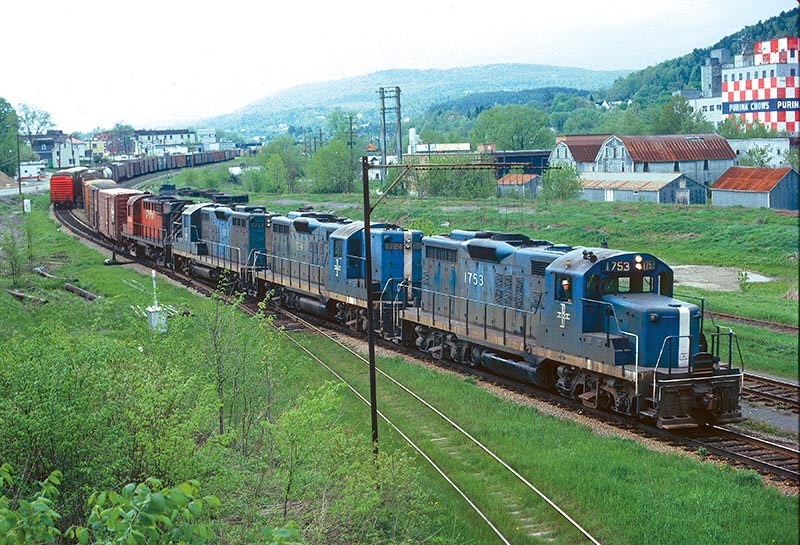
ABOVE: A mix of Boston & Maine and Canadian Pacific power leads Train 904 at St. Johnsbury, Vt., in May 1976. The large Purina facility was a local landmark and generated significant traffic for the railroad. —Tom Carver photo
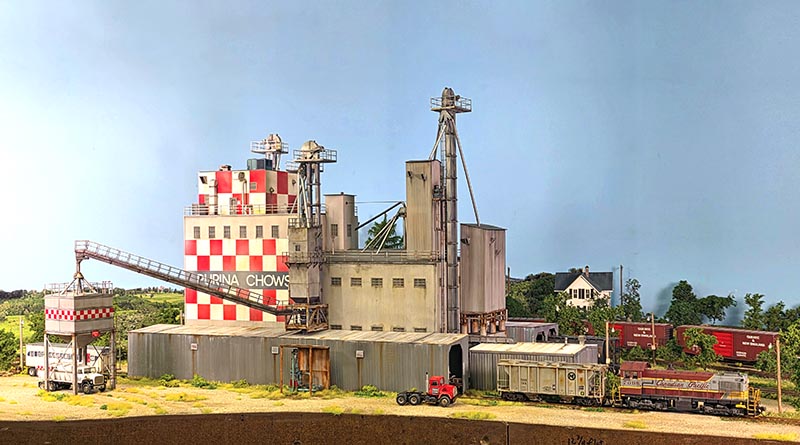
Given the lack of close-up documentation, modeling the later horizontal “Purina Chows” lettering provided welcome flexibility. My goal was to convey the flavor of the prototype — and from a reasonable viewing distance, I believe it does just that.
Main Structure
With over 45 years of modeling, I’ve built all kinds of kits. As a young teenager, I remember kits like Campbell’s that came in what I called the “Pizza Hut boxes” because of their red square and resemblance to tablecloths when I’d sit down to enjoy my favorite pizza. I was also young enough to be exposed to Fine Scale Miniatures kits, although at age 15 I was far too intimidated to attempt one of those. Today, plastic injection models from the Walthers Cornerstone line provide a good starting point for kitbashing as I did for the Wabasso Mill that appeared in the November 2024 issue of RMC. Also, the 3D printing market has just exploded in the last couple of years with some absolutely amazing parts, as you will see in this article.
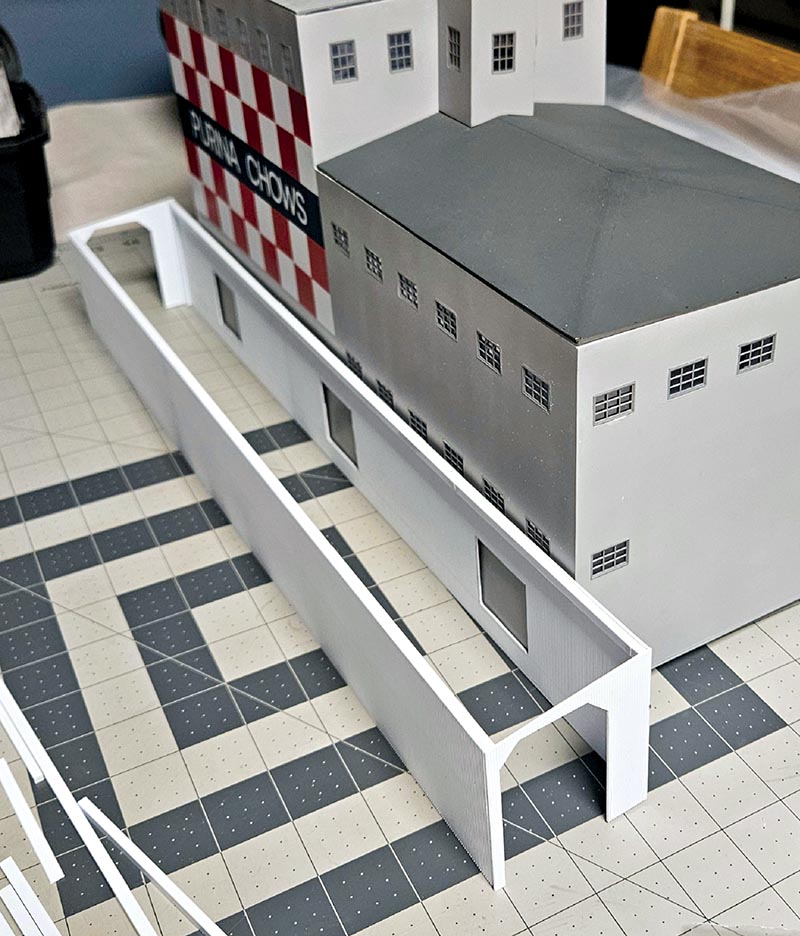
However, for the Purina Mill build, I wanted something relatively accurate and there was nothing in the Cornerstone line that I felt had the right size and window arrangement for the structure. As a result, I elected to construct this entirely of styrene siding, with a few purchased 3D-printed parts. I’ve always been comfortable building things like loading docks, detail parts, and other components from styrene, so I figured building an entire structure out of it couldn’t be too difficult. Let’s jump in and see how it turned out.
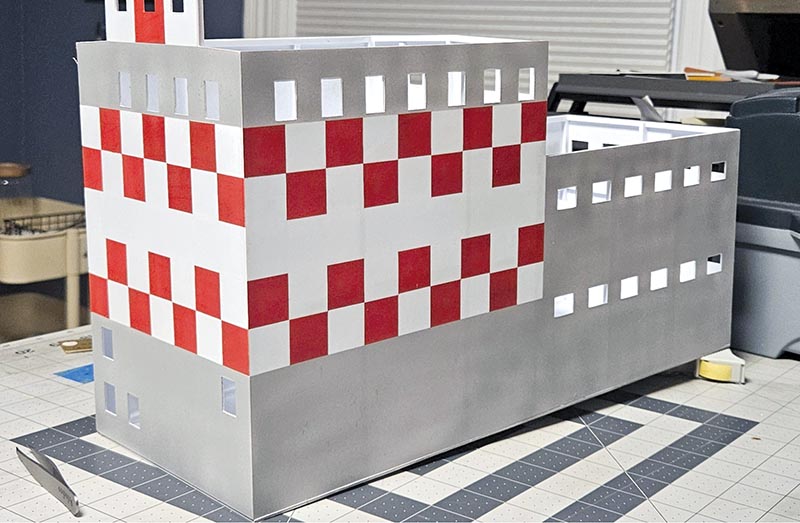
The space I had for the Purina Mill was limited to about 110 by 45 scale feet for the main structure. This would be a scaled-down version since the real one was three times as long at over 360 feet but only slight wider at 65 feet. I started with large sheets of Evergreen 0.040” styrene, which allowed me to make each large wall from a single sheet without splicing.
I also needed to source the correct windows that resembled the prototype. Fortunately, I had photos taken more recently of the building, long after Purina closed its doors, but from these photos I was able to approximate the window type and sizes. Researching the available windows at my local hobby shop, I discovered that Tichy makes a nine-pane masonry window (no. 8046) that was slightly smaller but close enough for my purposes. Knowing the building would only be seen from three sides, I elected to skip the windows on the back side, but even then, the structure required 47 windows. Following the research, I was able to buy about half of what I needed, completely wiping out my local hobby shop’s inventory, but fortunately the store owner ordered the rest along with some extras. With about half the windows in hand, I was eager to get started.
The first step was to place the windows on each of the styrene walls to get an idea of spacing. Since I had no exact dimensions, I relied on my “close-enough-for-me” approach. I did some careful math to space seven windows evenly across the top of the upper wall section and six across the lower section using the actual window as a template to cut each opening. After cutting the first 13 windows with a sharp hobby knife, my fingers were sore. I took a break and used the time to pencil in the rest of the window openings on the other walls. With fingers recovered, I cut another six windows by scribing and re-scribing repeatedly until they were done. This was a slow, tedious job, but spread out over several days I managed to get the remaining windows cut…
