
 by Scott Meyer/photos by the author
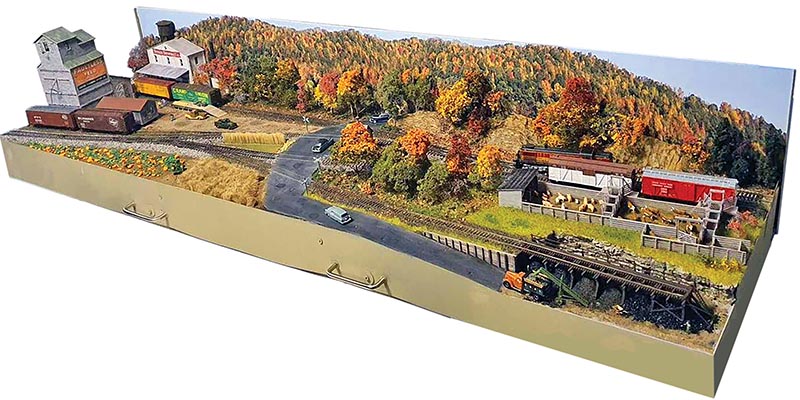
I built my first portable layout partly from necessity. I was the only N scaler in the club I’d joined and had no place to run my trains. I also wanted to participate in the shows where the club displayed its portable HO layout. I was given a “standard” 6×2’ module to use for my stand-alone project. It was framed with 1×4” lumber with a plywood top and four 2×2” legs. I built a nice little N scale layout using plaster scenery material. It was portable but needed two people to transport and set up.
Then a club member asked me to build him a Z scale portable. People at the shows asked him if N was the smallest scale and he wanted to show them it wasn’t. He had framed out a 4×2’ wood rectangle with 1×4” lumber to start with. By now I was acquainted with foam insulation as a building material, and using it ended up with a much lighter result.
It was time to update my own portable. Using foam and 1/4” plywood as fascia, it was 5’ x 28” and weighed 28 lbs. Having recently changed scales to HO, I wanted to build myself a new portable. I swore I could do better, lighter and more portable, but knew it would be an experiment.
My storage space was maximum 72” by 18”, it had to fit under my 18”-wide shelf layout. I found a track plan by Rob Chant on the Facebook group “Journal of Model Railroad Design” that fit my needs perfectly. Lengthened by just six inches, the footprint was 66×18”. Your layout size may differ, but I would be wary about exceeding 72×40” as you may find the materials may not hold up to constant moving and storage.
Construction
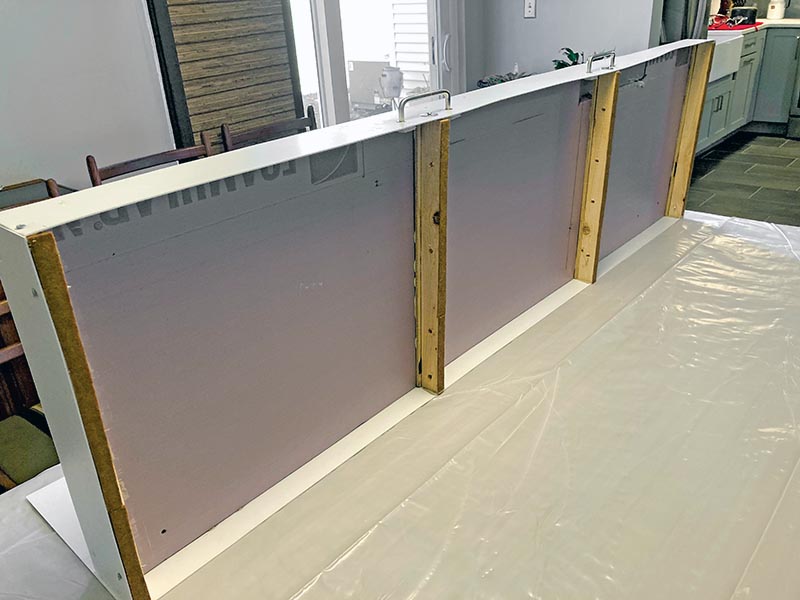
I planned to use two 1”-thick sheets of foam glued together, with .06” styrene as the 4” fascia and 12” backdrop. I had used this material for a free-standing backdrop across a 6’ window with good results. Four wooden joists would span between the front fascia and the backdrop. Glue and a few screws would tie these elements together to form a sturdy, rigid and light platform for my project.
Interstate Plastics is a good source for styrene. They sell 4’x8’ sheets and cut to order. My project required five 4”-wide and one 12”-wide 6-foot strips. Cutting the 4’x8’ sheet into shorter lengths reduces shipping cost considerably! Have the rest of the styrene cut into shapes you can use for other projects.
Please note that the only adhesive used is Liquid Nails For Projects. An inexpensive latex-based construction adhesive, it bonds well, sets quickly, and will not attack the foam like other solvent-based adhesives.
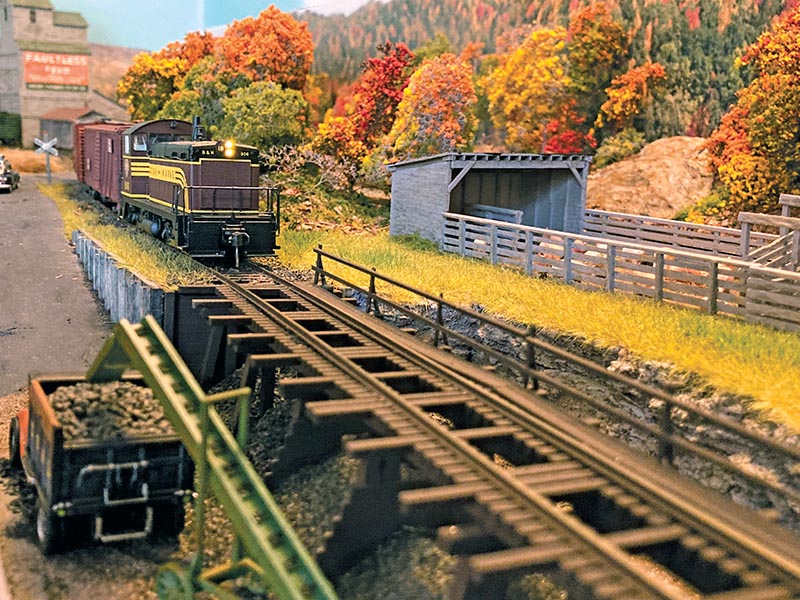
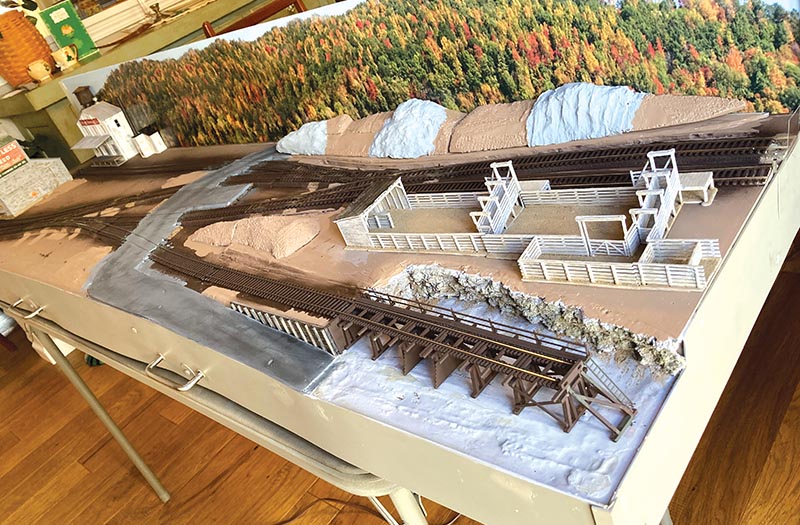
I cut out the space where my coal trestle fit, also cutting slots to separate the ramps leading to it. I use layered foam on all my layouts now. The lower sheet provides a flat, level surface for waterways and other depressed features. Cut the top layer to the contours you need and don’t get glue on the base in those areas. I used a hot wire tool.
Next, glue and clamp the sheets together. Now fashion the wood crosspieces using 1×2” lumber cut into four 18”-long joists. They are topped with a 2”-wide strip of 1/4” plywood the same length. Glue them together forming two L-shaped girders and two T-shaped. Don’t forget to drill holes for your wiring! The L-girders go flush with the ends of the foam with the plywood glued to the underside of the layout. The T-girders are glued 22” in from each end. Place the joist side down on a flat level surface. This way you will be able to see and adjust the joists to be perpendicular to the foam. Place weights on the top while they set. I used a 5 ft. folding table to weigh mine evenly.
Now cut the styrene fascia. One 4”-wide strip 66” long for the front, two 18” long for the sides and cut the 12”-wide strip 66” long for the backdrop. The rest of your 4” strips are for the staging module.
