Just like the real thing, your trains need tracks to run on. If you get started with a train set, you’ll find that it includes a basic loop of track. This allows you to run your train around and around without having to stop and turn around your train. You may decide at some point to expand your set with additional tracks, maybe even some switches. Let’s take a look at some of the basic parts of our model railroad tracks.

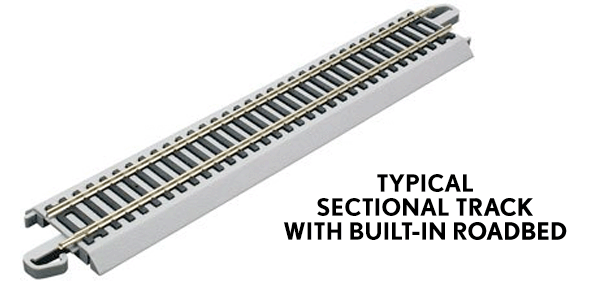
Most sectional tracks for model trains come in one of two forms. The first kind is sectional track that consists of metal rails fastened to injection-molded plastic crossties. The sections may range in size from 1″ to 9″, and may also contain rail joiners at the ends. These folded metal joiners not only connect the track, but also help complete the electrical circuit that powers our trains. If these joiners get damaged or lost, you can always buy replacements at your local hobby shop. Some kinds of sectional track include a molded plastic roadbed underneath the ties that also have clips at the ends. These clips help maintain a positive physical connection between sections, and will keep the rail joiners from accidentally working themselves apart. This additional roadbed will also help keep dirt and fibres from getting sucked up into your locomotives, which can cause them to stop working properly. Both kinds of sectional track are widely available from your local hobby shop dealer.
Almost all model railroad track rails are made from nickel silver, which is very durable and easy to keep clean. Dirty tracks will prevent the flow of electricity from the rails to our locomotives. Some less expensive versions are made with steel, or even brass. Even though real railroad tracks are made from steel, typically it makes a poor material for model trains to run on. Its largest drawback is its poor ability to conduct electricty, not to mention the chance of rusting in humid conditions. Brass tracks are less common than they were a few years ago, though still available. While less expensive, brass tarnishes very quickly, and must be cleaned often to maintain good electrical contact with your trains.
You may hear of different kinds of track being referred to in “codes.” It’s not a secret, but “code” refers to the height of the rails in thousandths of an inch. Most HO scale train sets include Code 100 track, which means the rails are .100″ high. Code 83 is the next popular size down for HO scale track, equal to .083″ tall. While Code 83 may be closer in scale to real world railroads, there is nothing wrong with using Code 100. If you buy additional tracks to expand your train set, you’ll most likely want to purchase Code 100. If you’re unsure, bring a sample of track from your train set to your local hobby shop and ask them to help you find the right pieces to match.

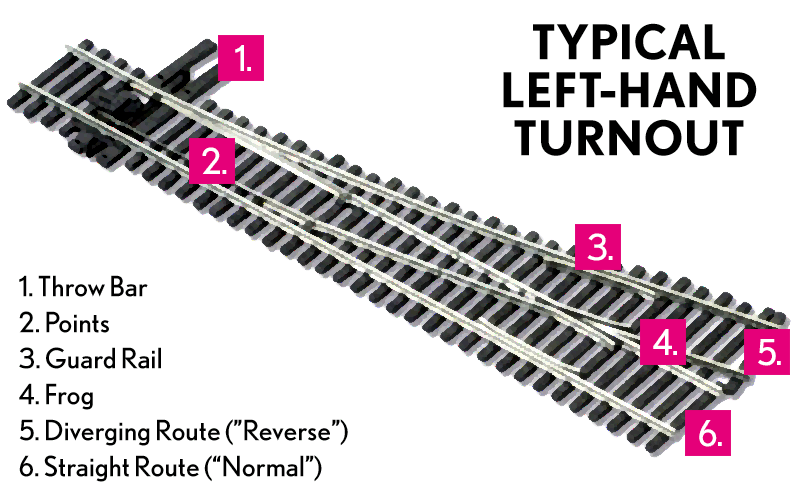
Switch tracks, more commonly called “turnouts” to avoid confusion with electrical switches, allow your trains to move from one route to another. They work much in the same was as their real world counterparts. The diagram above should help explain some of the terms you may come across when purchasing turnouts for your model railroad layout. The throw bar (1) is what moves the points (2), which are the moving parts of the turnout that determine which route your train will take. Guard rails (3) help guide your train’s wheels through the turnout, keeping them aligned with the rails as they change from one route to the other. The frog (4) is the point where the rails of the two different routes converge, often said to resemble an amphibian (maybe). The diverging portion is sometimes referred to as the “reverse” (5) route, while the straight portion of a turnout is sometimes called the “normal” route (6.
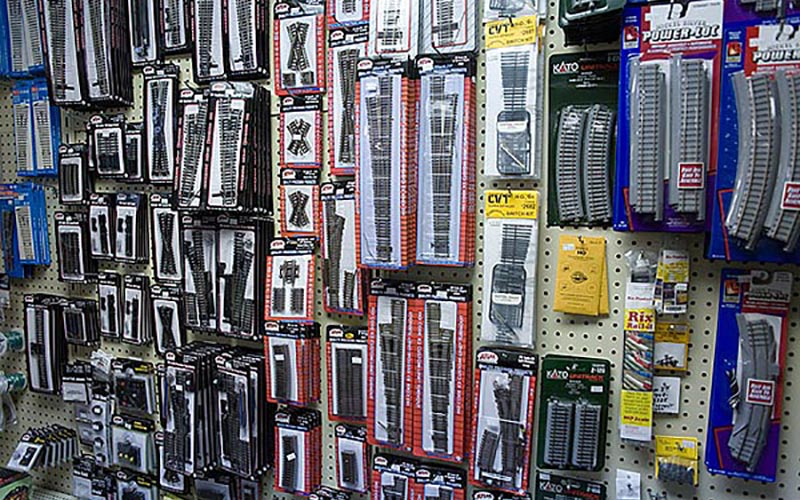
Turnouts come in left-hand and right-hand configurations. The sharpness of the diverging route is expressed in a number. For instance, a No. 4 turnout is nearly equal to an 18″ radius curve in HO scale. A No. 6 turnout is nearly equal to a 22″ radius, and so on. Usually the broader the curve, the more reliable operation you will experience. However, you may need to use sharper radius turnouts to fit into your available space.
Step 2: Setting Up Your Trains


