
 by Chris Adams/photos by the author
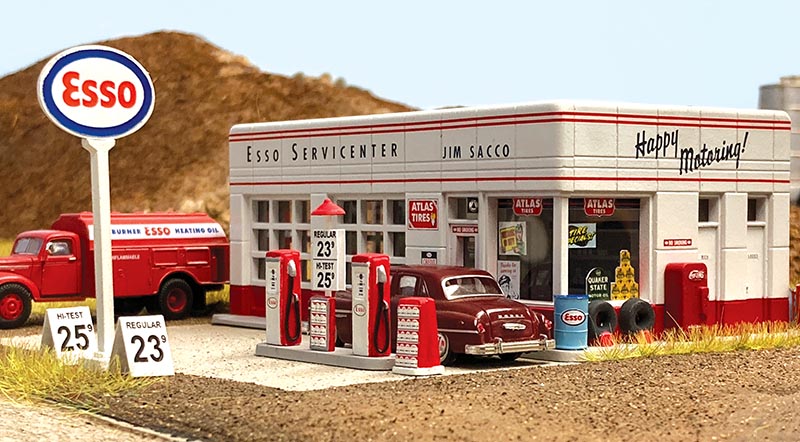
One of the best parts of this great hobby are the friends you make along the way. I first met Jim Sacco through our mutual adoration of Alco’s DL-109 diesel locomotive, but our growing correspondence ranged from locomotives and scenery techniques to tips on how to build his City Classics structure kits.
After he passed away early last year, I decided my town of Cromwell, Conn., needed a gas station and Jim’s “Crafton Ave. Gas Station” kit (no. 108) fit the bill perfectly. With just four walls, a roof, and a base, it’s an easy kit to build, especially with Jim’s detailed instructions. But don’t let its simplicity fool you. I’ll share some tips and tricks I discovered that, along with a little extra effort and detail, will make this simple kit into a real showpiece.
Assembly
As with most injection-molded kits, many of the parts have tapered edges to make them easier to remove from the mold. I made sure the bottoms of the walls, as well as the ends of the walls where they’re glued, were perfectly square so there would be no gaps. I know I’m done once the walls can stand up on their own without falling over.
If this kit has any shortcomings, it’s that the foundation requires you to assemble four separate pieces into a perfect square. Again, in order to avoid gaps, I needed to do some sanding to square up the ends of the parts. Then I used my one of my favorite structure assembly tools — 1-2-3 blocks — to press the parts together and applied liquid styrene cement to the joints.
These blocks are especially helpful in assembling the walls and guaranteeing the corners will be square. Assemble two walls at a time, then put the two “Ls” together to form the main box of the structure.
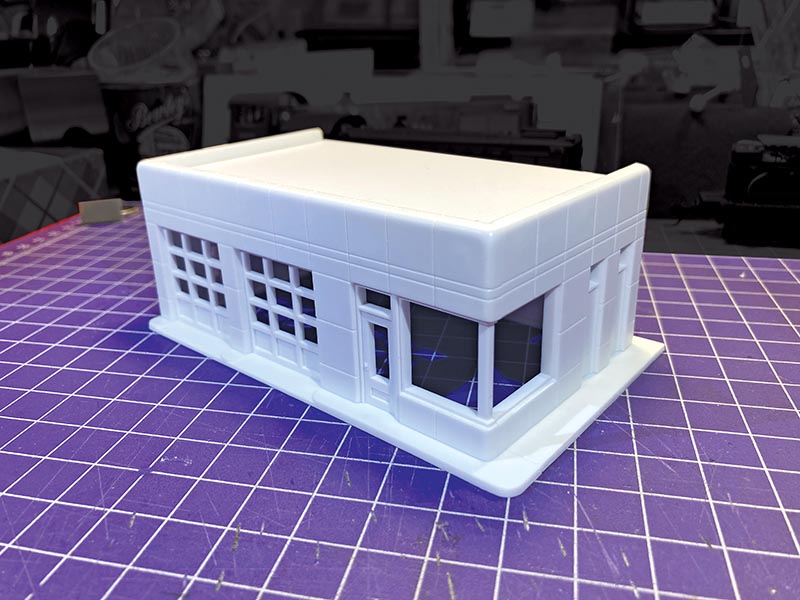
The roof is made from a sheet of styrene included in the kit. To get the proper size and cutting lines, I turned the structure upside down and traced along the inside of the walls.
Since the roof and foundation were painted separately, I just test-fit them here. But as you can see, it doesn’t take very long to get this structure looking “complete.”
Painting
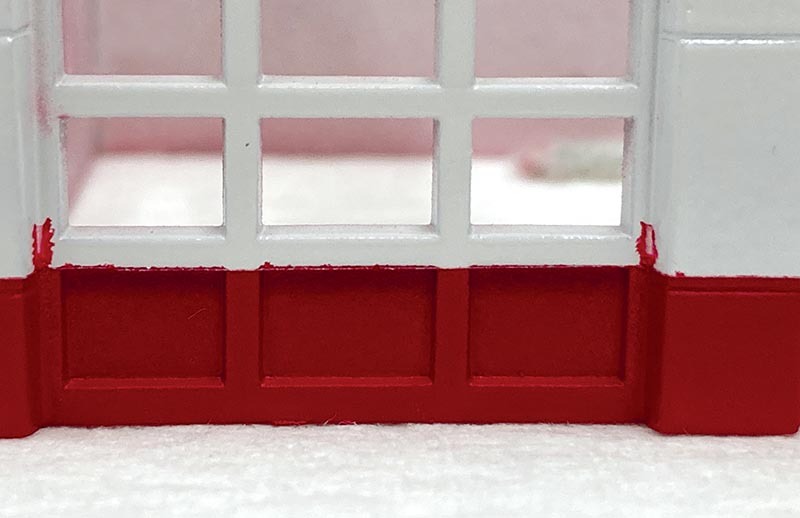
With the four walls assembled, this is a good time to paint. To replicate the “porcelain” tile walls, I used a spray can of Rustoleum gloss white. While I was at it, I went ahead and painted the rest of the white parts on the sprue (gas tanks, oil can racks, sign parts, etc.).
It can take a long time for the white paint to fully cure, so if you don’t want to risk fingerprints while handling the model (ask me how I know), consider setting it aside for up to a week depending on humidity levels. Once cured, I masked off the “porcelain” with regular low-tack blue painters’ tape and sprayed the rear “cinderblock” wall with some gray. I also sprayed the foundation and gas tank island gray, and painted the roof flat black…