
 by Chris Adams/photos by the author except as noted
They say you never forget your first love and for me — locomotive-wise at least — that first love was EMD’s SW1 switcher. Ever since seeing its silhouette in my first Atlas track planning book, I was drawn to the idea of operating a lowly, local wayfreight, switching the various industries along a branch line, and interacting with folks along the way. Almost forty years later, I’m still enthralled with this type of operation and my current layout focuses on the interaction of no less than four local freight jobs on the New Haven Railroad’s Connecticut Valley line.
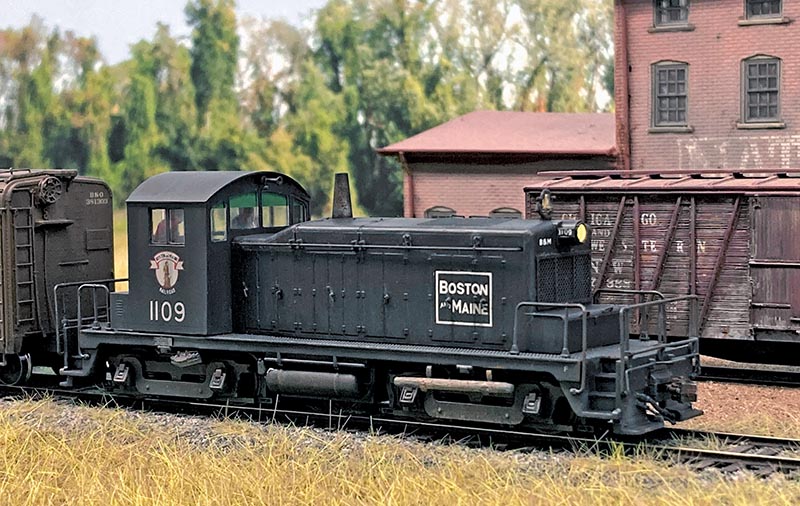
Unfortunately, the New Haven never owned an SW1. But the railroad did occasionally lease locomotives from neighboring Boston & Maine, so I figured it wouldn’t stretch plausibility too much if one of their ubiquitous switchers made its way south. But imagine my surprise when I discovered that ex-B&M SW1 1109 actually turned its wheels on the line I model — though not under its own power, and only as a museum display piece. No matter; I now had more than enough reason to add an SW1 to my layout.
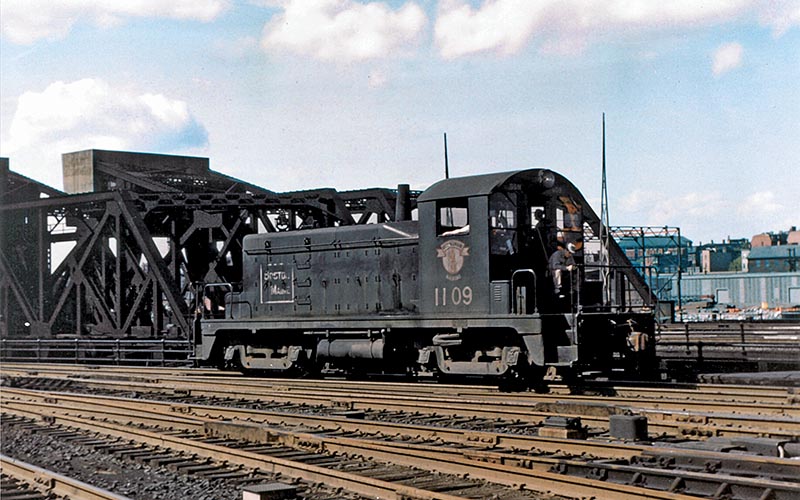
ABOVE: The real B&M 1109 is seen switching at North Station in Boston in 1953. —Arthur E. Mitchell, David Hutchinson collection
Boston & Maine’s first order of SW1s (Order No. E-288) was built in November 1939 and included just three units numbered 1109-1111, assigned class DS-2c. After serving 20 years primarily at Boston’s North Station, 1109 migrated to the Montpelier & Barre Railroad in Vermont, then was acquired by Pioneer Valley Railroad in Massachusetts in 1982. It was finally purchased by the Connecticut Valley Railroad Museum in 1986 and stored for many years at sites in Essex and Old Saybrook, Conn., two towns I model. It currently resides at the Railroad Museum of New England in Thomaston, Conn., and is notable not only as the first diesel to have EMD’s famous 567 prime mover but is also the oldest diesel locomotive still in existence that was used by a New England railroad.
Building the Model
To create an HO scale version of B&M 1109, I started with a Walthers Mainline SW1 in Pennsylvania Railroad livery, donated by my friend Philip Taylor. After having an ESU v5 decoder, TCS KA1 capacitor, and Scale Sound Systems speaker installed, I got to work on the body shell.
ABOVE: The author started the bodywork by using a small chisel to remove all the door handles and lift rings.
I started by disassembling the body shell, being careful when removing the lighting and contact board from the cab. I also removed the railings and front headlight lens, but the rear lens wouldn’t come out so I later just masked it using MicroMask.
Once everything was taken apart down to the main styrene body parts, I stripped the paint by placing the parts in a jar filled with 91 percent alcohol. After soaking less than 10 minutes, the paint and lettering starts to dissolve.
I then dumped the alcohol and parts into a small bowl and, using an old soft toothbrush, I gently cleaned off the remaining paint residue. The final step was to move the parts over to a “stop bath” of soapy water for final cleansing. After a final rinse under running water, and air-drying, this former PRR unit is ready for additional details, paint, and decals to convert it to B&M 1109!
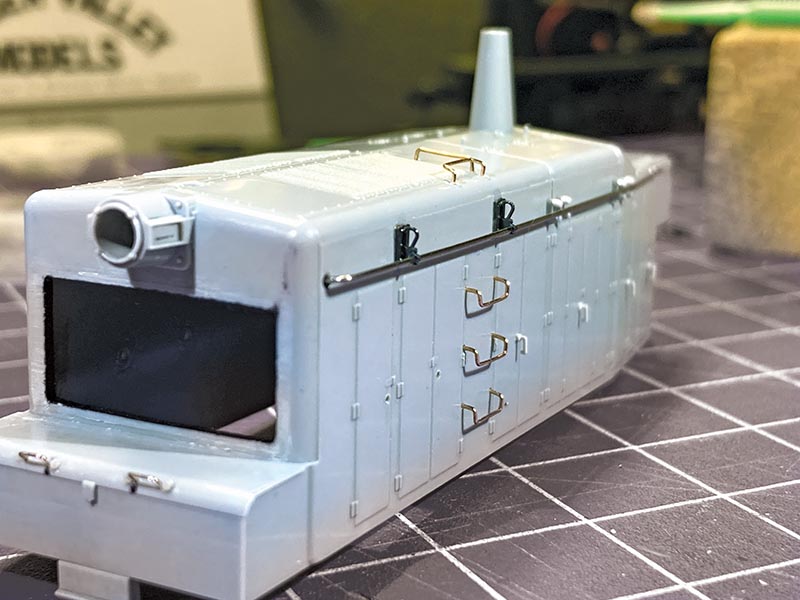
ABOVE: All of the door handles were replaced with Cal-Scale no. 190-731.
Grabs, Lift Rings, Door Handles
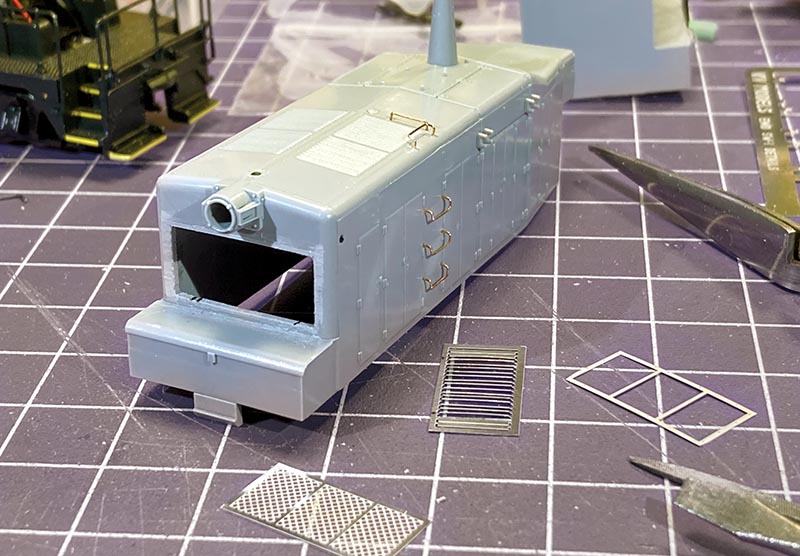
I started the body detailing by using a small chisel to remove all the molded-on door handles and lift rings. Fortunately, while the Walthers shell doesn’t have molded-on grab irons, it has dimples for locating the holes you need to drill to add them separately.
I used a #77 drill to add 18” drop grabs (Tichy no. 3015) to the side of the hood, as well as one on top of the hood. Use Tichy no. 3021 for the other 18” straight grab iron crosswise on top of the hood. In the photo to the left, I’ve added the hood grabs and removed the radiator screen from the body shell by drilling a series of holes and cleaning up the edges with files and sanding sticks. I’ll be replacing it with the KV Models stainless steel parts you see above. I also planned to install a new bell from a Kato NW5, so I removed the stock bell casting and filled in the hole…
