
![]() By George Riley/photos by the author
By George Riley/photos by the author
It is hard to believe that laser-cut kits have been commercially available for a little over twenty years and yet many model railroaders have not tried to assemble one. The kit category has dramatically expanded the structure, rolling stock and detailing offerings available to today’s hobbyist. Currently, prototype specific buildings are readily available since the run sizes necessary to produce are much more manageable than those needed for tooling and die-work required for metal and injection molded items.
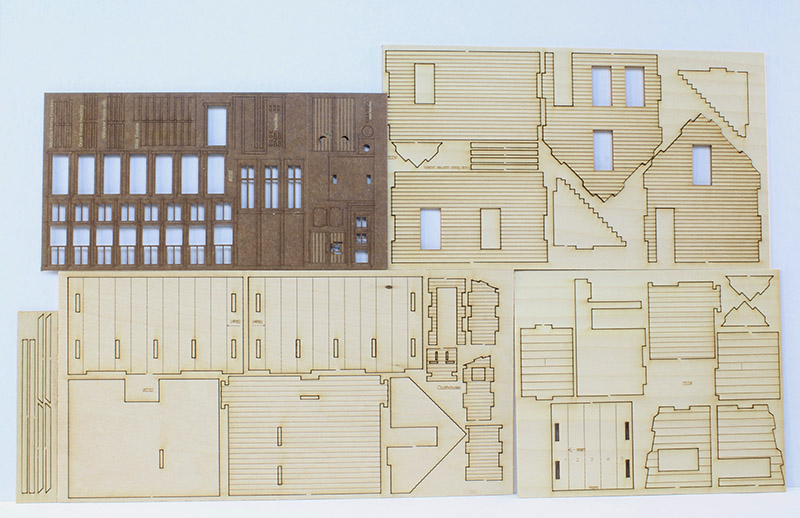
As a basic overview, a “Laser” kit is comprised of one or more frets holding cut parts. These frets use wood sheets, laser board or card stock as their basic material. Each part is held in place by a thin tab, which is easily cut with a razor blade or hobby knife. In addition, there may be individual strip wood and either die-cast or injection molded details. Depending on the type and manufacturer of each kit, it may include plastic windows and doors. These pieces may also be cut out of sheet goods and assembled in pieces. The main difference between the new laser kits and old school craftsman kits is that the major pieces are precisely cut. This includes not only the model’s sides but also window and door openings. This alone makes the construction of these kits a lot quicker and easier than those of the past. So much so, that the modeler’s main effort will be in deciding how to finish the piece.
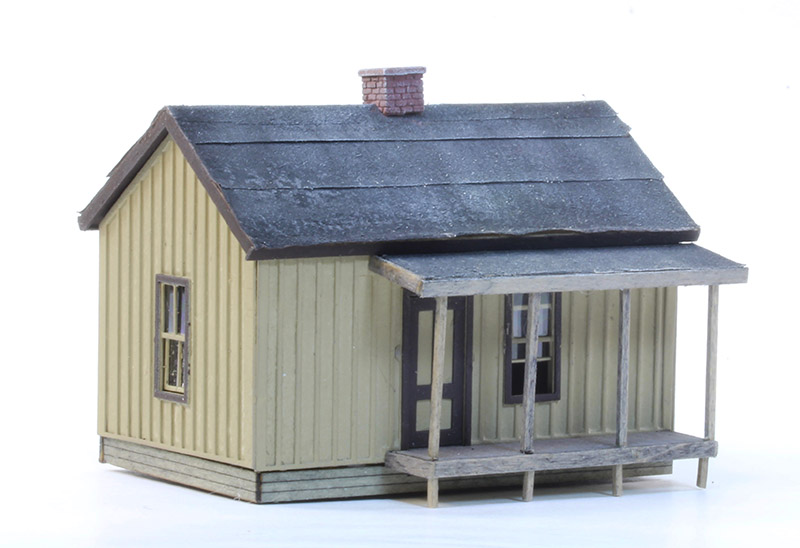
Photo 1: Banta Modelworks Bunk House in HO scale
Laser kits, due to the materials and techniques used in their construction, are usually painted or stained before assembly. One of the first decisions needed to be made is how will the final product look. Will it be well maintained with only a little atmospheric weathering applied or derelict and heavily weathered? Three examples demonstrate this: The bunk house (Photo 1) is painted and well maintained. The freight house (Photo 2) used two types of stain to capture a well used, yet still maintained structure. Finally, the Berkshire Valley Models two-story house (Photo 3) is well weathered with a dark stain base coat followed by a white pickling stain to capture the failing paint often seen on older, derelict buildings. Laser kits allow the builder to have full control over the finished model with all of the weathering literally built into the structure.
If the model is to be painted, begin by sealing the wooden components with sanding sealer. Deft spray-on lacquer-based sanding sealer is easy to use and dries quickly thereby speeding up the process. The next step is to prime the pieces. There are a wide choice of primers that range in color from whites and grays to blacks. This stage will provide a good foundation for the subsequent color coats. An additional benefit is that it will reveal any flaws in the item’s assembly, which can be easily corrected at this point. The last step is adding one or more color coats to the item. While most of the models that I have built are painted using off the shelf spray cans, excellent results can also be obtained using a brush or airbrush.
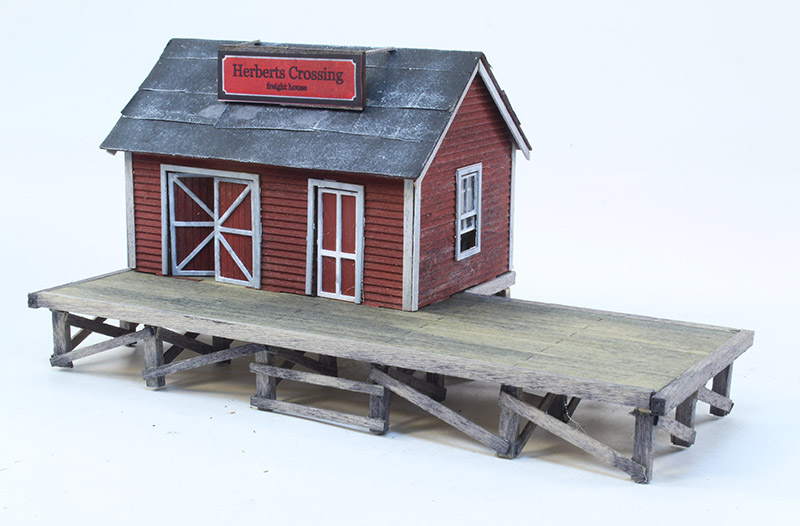
Photo 2: Banta Modelworks Herberts Crossing Freight House in HO scale
Stains are an excellent vehicle for creating an aged and derelict appearance in a building. There is a wide range of solvent or alcohol-based stains commercially available or the modeler can make up their own mixture using alcohol mixed with India ink or shoe polish.
A moderately complex kit from Wild West Scale Builders (Photo 4) is used to demonstrate the various finishing and assembly steps involved in assembling a laser kit. In order to capture the well-aged appearance of our example, which is based on an existing mining cabin in Ironton, Colo., several pre-mixed stains were used during the model’s construction. These were chosen to replicate the model’s prototype. To accomplish this, three different alcohol-based colors were used on the exterior of the house, shed and privy, while the main floor was given a solvent-based penetrating stain followed by two sprayed coats of spar urethane varnish. Lacquer sanding sealer was applied to the interior walls followed by a coat of flat white primer to mimic interior painting.
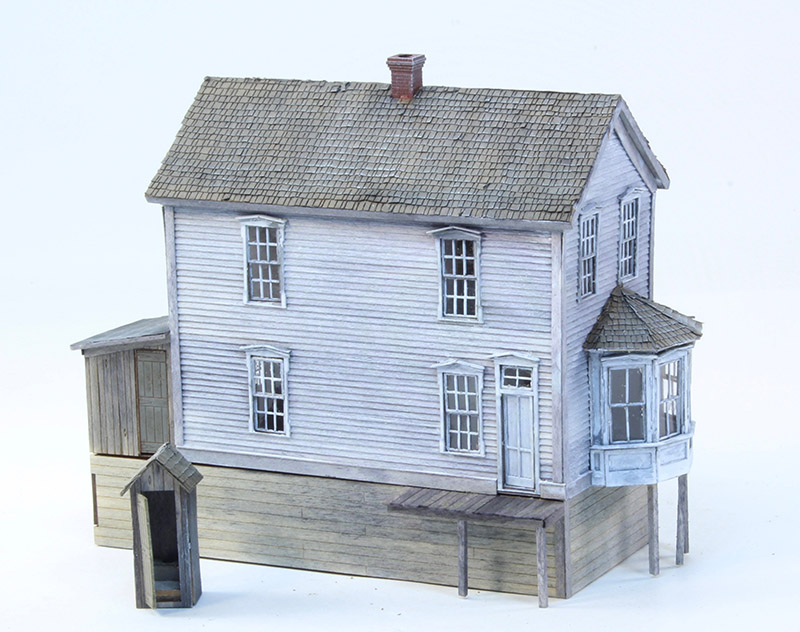
Photo 3: Berkshire Valley Models Two-Story House in HO scale
When all of the individual pieces and subassemblies had fully dried, the main structure was assembled. Due to the high humidity of some areas, a solvent-based glue such as Ambroid or Duco is recommended, however, Aliphatic resin glues such as Titebond or Elmer’s Carpenter’s Glue often work well as do PVA adhesives.
With all of the walls assembled the next step is to add the various trim and details. While some, like the window and doorframes, are laser cut, other items will need to be trimmed to size by the modeler. A sharp blade will make quick work of this. Since the model also features interior partitions and a staircase, these were finished at this time as well. The entire model was given a coat of clear sealer, in this case, Testors’ DullCote. This helps to seal the stained wood and minimizes any changes to the structure due to humidity and temperature changes.
Next, the window frames and glazing were applied. This is one of the finals steps since most flat finishes will cause clear window material to frost. Since it dries clear, yet retains some flexibility, Aleene’s Tacky Glue was used to install the windows.
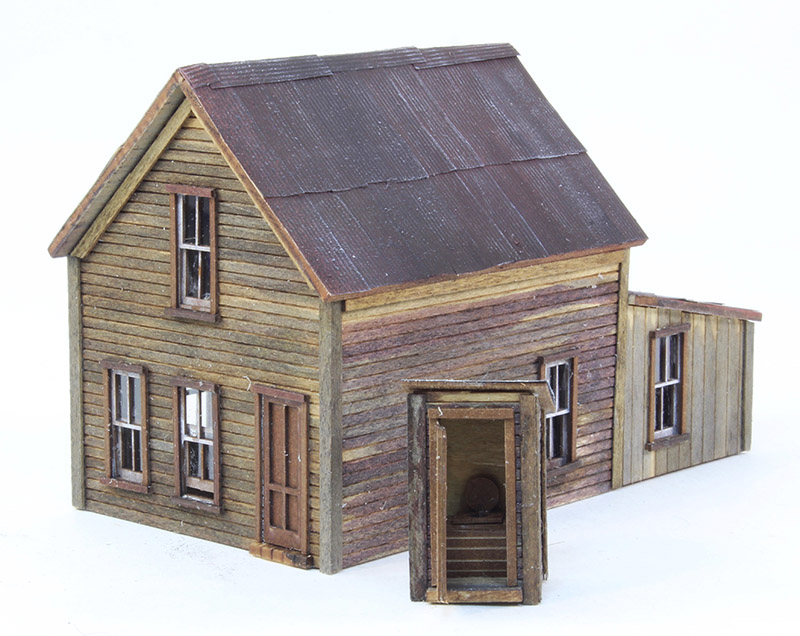
Photo 4: Wild West Scale Builders Mining Cabin in HO scale
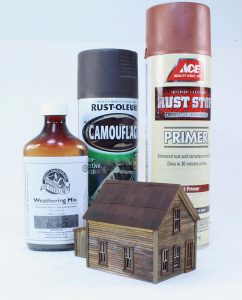 The roof covering consists of embossed paper simulating corrugated metal. Four different steps were taken to capture the well-rusted look. Red oxide primer was sprayed over all of the roof followed by a thin coat of dark brown spray paint that allowed some of the primer to show through in spots. When these two coats of paint dried, a wash of black stain was flowed over the roof and allowed to settle into the crevices to provide shadow. The final step was to dry brush a light flat tan over the entire structure to provide highlights and definition to the details.
The completed model is ready to add to the layout or scene. The three view walk-around captures the look and feel of the prototype with its variations of weathered timber siding and trim work. The well-worn tin roof speaks of years of heavy snows, hard rains and scorching sun. Hopefully, this step-by-step feature will demonstrate the ease that laser kits can be assembled and the realistic results that this category of models can attain using readily available finishing materials and only a few simple tools. Becoming a craftsman has never been easier!
