
 by Bob Walker/photos by the author
Before we begin, I must confess to a bit of bias on my part, as I once made my living manufacturing detail parts in cast metal. I spent many a night, after a full day’s work at a real job, standing over a 160-pound pot of 750-degree molten metal. It was not so bad nine months of the year. On a hot August night, not so much. In those years, I was burning the candle at both ends and in the middle. Apart from the real job, I was on the board of the Illinois Railway Museum, supporting my little business (Walker Model Service), and trying to start a “real” business where partner Dennis Storzek did the bulk of the heavy lifting at Accurail. Sleeping three to four hours a night was starting to take its toll, and wife Donna finally put her foot down: “Pick something, and quit it!” Well… I quit my real job, freeing up about 50 hours a week for some needed rest. The rest is history.
Even before I got into the detail part business, I was a detail hound. As a young hobbyist growing up in the 1950s, I was taken by the level of detail some folks put into their models. The model press had, and still has, presented some remarkable model work. I became aware at a young age that it is better to know something about the real thing before you “detail” your model. As a teen, I had a Mantua 2-8-2 that I dolled up with a load of brass detail parts and several actual feet of brass wire piping. I had piping going everywhere, from one illogical place to another, in what must be called an “overabundance.” When I took it to show off to the local inhabitants of Art’s Hobby Shop, I got a polite lecture from the older guys about the workings of a steam locomotive. Gee, I guess the injectors don’t deliver water into the smokebox! I learned to put a little more effort into researching the real world. No one was rude or impolite, and it was a learning experience, not a putdown. I thank them to this day.
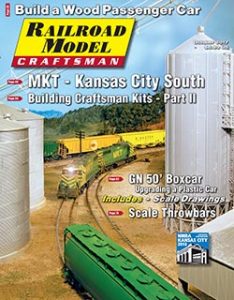
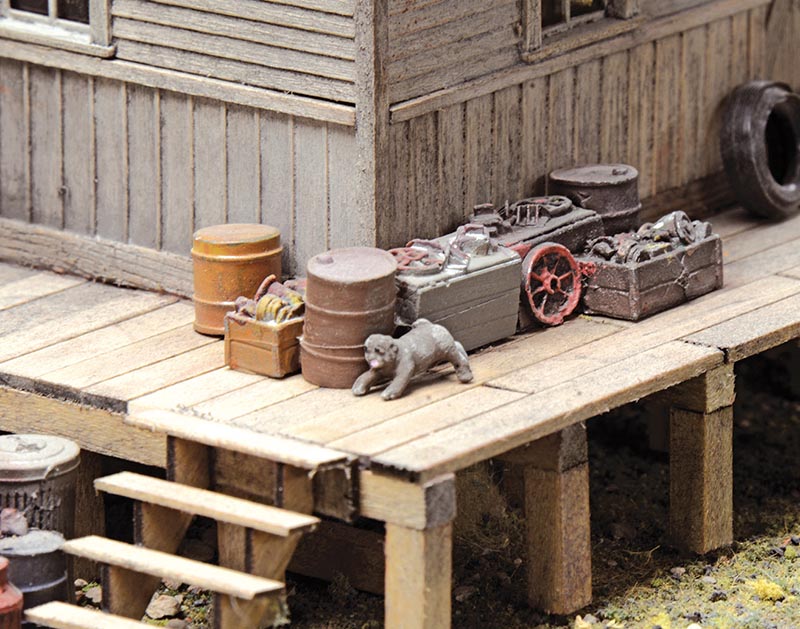
“Around the back” is usually where the junk ends up. Note the variance in color and texture here.
I was never a thespian, but have always enjoyed plays. In high school, I went to plays mostly as an excuse to date girls, but I actually learned something in the process. I was at a production of “South Pacific” and took note of a crudely painted palm tree on the background and an actual potted palm in the foreground. Often, our railroads are compared to a play, with the trains being the actors, and the scenery and buildings being the props. I’ve come to take those palm trees to heart, with the crude painted one in the background and the real thing in the foreground. It is the same with our railroads; the stuff up front gets the most attention and needs more detail than the stuff in the background. I’ve said this before, but it bears repeating. It is wise to save that “attention to detail” for those areas closest to the observer, even if it is only you. In reality, unless you are doing this professionally, the only opinion that matters is yours. Sure, it’s fun to impress your friends, but remember, it’s only a hobby.
The pack-rat mentality of most railroads, and not just the wooden axle short lines, made for a lot of what Bob Brown of the Narrow Gauge & Short Line Gazette calls “clutter.” His modeling is a shining example of realistic detailing. He does not just scatter detail parts about willy-nilly. There is a logical, well thought-out pattern in the amount and type of detail in a given location. You won’t see laundry hanging up behind the roundhouse, nor a locomotive air pump behind the general store. Give your detailing some thought, and avoid what I like to call the “clown factor.” The world is a messy place, and not exactly a formal garden. There are, however, limits to the amount of junk we can scatter around the layout. Be careful not to overdo it. There actually were some junk-free zones, even on the Rio Grande Southern.
 Populate your railroad. It would look abandoned without the human element.
Windows and doors are details. Windows have shades, curtains, blinds, broken panes, stained dirty glass, broken muntins, are partly open, have things hanging out of them, and a ton of other details going on in and around them. They are also not all the same style, even on a single building. Doors have hinges, door knobs, broken panels, signs, and are even sometimes (gasp) open, revealing what’s inside. Leave a few doors open, and let people see what’s going on in there.
Nail holes, in the larger scales, if they are small and subtle, can add to the effect of an old ramshackle building. In the smaller scales, not so much. A 1/16-inch nail “hole” (in other words, the darn thing rusted off or fell out) in HO would only be 7 ten-thousandths of an inch or one-quarter the size of a human hair. It would be very hard to see, even from a few inches away. If visible, it would look like the results of some highly accurate machine gun fire. I think the “nail hole” phase from the 1960s and 1970s has, more or less, faded away. I was as guilty as anyone, and some of my models looked as if they had been in a gun fight.
In real life, grab irons are 5/8 or 3/4-inches in diameter. That comes out to 0.004-inches in N, 0.0086 in HO (0.008 wire is available), 0.012 in S (also available), 0.015 in O, (yep, available), and 0.031 in G (use 0.030, folks). Using the correct size for your models enhances the realism. Using properly sized components of all kinds makes it all the more believable. In my misspent youth (as an avid HO modeler), I took the lazy way out and used K&S 0.020 brass rod for grabs. In retrospect, they looked like sewer pipes attached to a boxcar. In my defense, this was the smallest wire I could find. It was the late 1950s, you know.
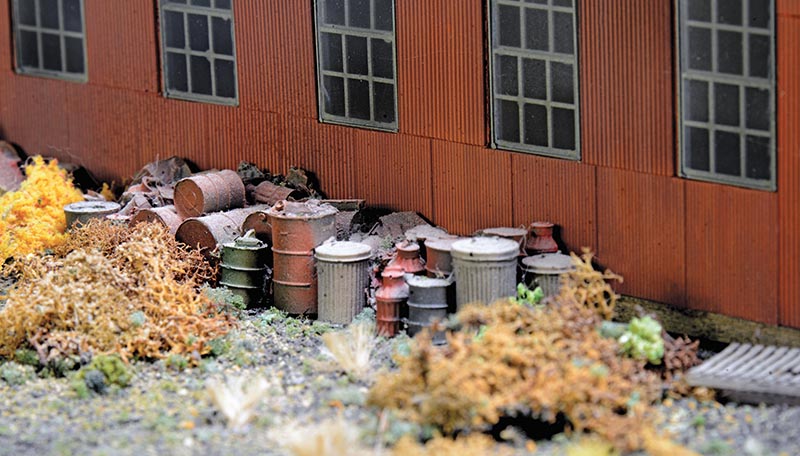
Some leakage is evident under the water tower, though most of the water is from the fireman overfilling the tender to wash the cinders off.
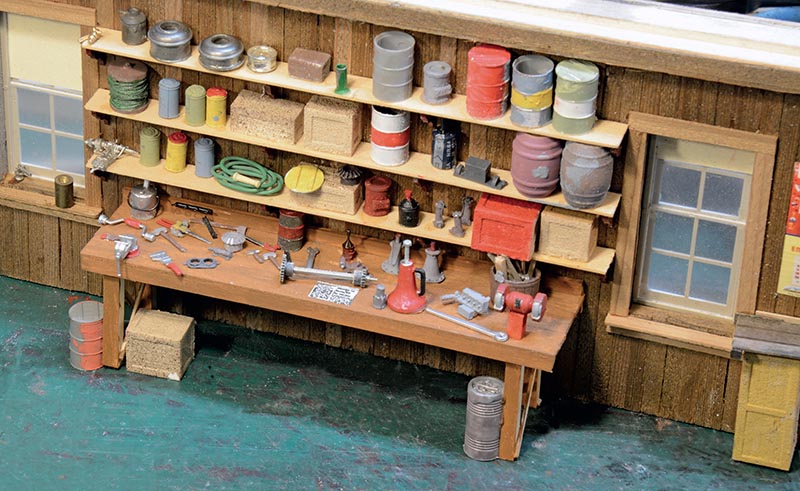
Now that I’m done with my nail hole and grab iron rants, we can talk about making detail parts. Yes, I like to scratchbuild, so a lot of my details are homemade. I admit that many are castings, but I consider them to be scratchbuilt because I made the original patterns. If you are going to need a lot of something, it is worth the extra time to hand craft an original and cast the daylights out of the pattern. Chief among these items are barrels, boxes, crates, buckets, drums, motors, and the like. I start with a 5×6-inch sheet of 0.040-inch plain styrene and build up a 3/4-inch high dam from several strips of 1/8 x 1/4-inch strip styrene. I set a height limit of 5/8-inch for the patterns to allow for at least an eighth or so of “floor” to the mold. Crates are crafted from stripwood pre-grained and applied to a solid block of wood. As the various pattern parts are created, fasten them to the mold with decent (1/4-inch or so) air space between them. I usually get about 12 to 20 parts into the mold. Now a 10-minute casting run yields a decent number of detail parts.
While I actually do throw stuff away, and the shop trash can always seems to be overflowing, I am a total packrat. You would be amazed at the absolute junk that ended up on the layout as a detail of some sort. Odd bits left over from kit construction, parts stripped off junker models purchased for that very reason at a swap meet, and, in general, anything I think might look right on the layout. I am blessed with a wife who likes to frequent “junk” stores. She has come home with some pretty wild stuff saying: “Can you use this on the layout, dear?” Often as not she turns out to be right on the money. She once bought an old clock, the guts of which are strewn around the layout, appropriately rusted, of course. Her junking adventures have yielded countless “clutter” for the layout. (Someday, I’ll tell you about the old Nikon camera she bought for $7.)
Barrels, boxes, and crates: the mainstay of model railroad details.
While this column is devoted to scratchbuilding, don’t overlook my competitors from the past. They offer a vast array of details. I could live well for a year on the amount I have spent on these parts. Of the thousands of parts available out there, I doubt that I missed more than a few, and I will get to them as well! Whenever I go to a show or swap meet, or any of the hobby shops I’ve visited, I always come away with a lot of detail parts.
The bulk of the detail on my railroad is rust-colored but in a wide variety of shades and textures. When I get into one of my “detailing” moods, I use a dot of ACC to attach several dozen details to a length of stout stripwood. I then use a rattle can to “rust” the whole batch. Gather another 10 or so colors of your chosen paint, a small brush, and a jar of thinner. Paint the other colors right over the rust base coat. When dry, an application of India ink and alcohol and some pastel powders is in order. Snap them off the board and apply them to the layout. I have done this over the last hundred years or so (at least, it seems like it) and the resulting thousands of details on the railroad are, at last, beginning to show. Even a small model railroad sucks up details at a ferocious rate.
This article appeared in the October 2017 issue of Railroad Model Craftsman
