
 By George Riley and Otto M. Vondrak
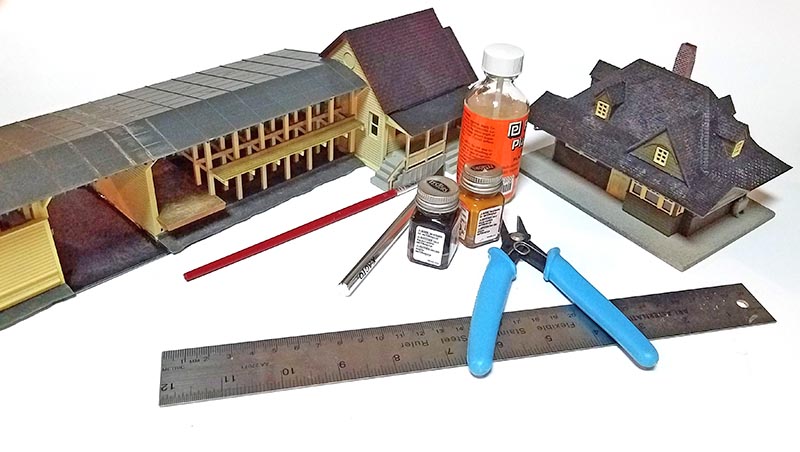
In this installment, we’re going to focus on the key rail-served structures in this scene. When we began this series, we tried to select building kits that would be readily available and easy to customize. The Atlas Passenger Station (No. 706) was an obvious choice for our small town scene. Haedrich Lumber is kitbashed from two Lumber Yard kits (No. 750) and one Life-Like General Store (Walthers No. 433-1351). The passenger station kit was easy to find, but we had some trouble sourcing the kits for the lumberyard. We ended up turning the secondary market to source our supplies, but you should have no problem finding these kits if you visit enough train shows and swap meets. Checking in with Atlas, they assured us the lumber yard has not been discontinued and will return to production soon.
Walls, windows, doors, and the foundation were all painted prior to assembly. The colors chosen are typical for railroad structures across the country.
![]() Our town of Flagstone is loosely (very loosely) based on the real village of Gladstone, New Jersey. The compact wooden depot was built in 1891 and remains in service to this day. The hip roof and dormers reminded me of the Atlas depot, and so that became the basis for our model scene. The real Gladstone depot has worn a number of paint jobs over the years, which gives the modeler many options to pick and choose a pleasing color combination. The Atlas station comes molded in red plastic for the walls and white for doors and windows. I decided to change things up a bit by painting the walls with Testors Flat Olive Drab (No. 1265), while the windows and doors got a coat of Testors Model Master Modern Desert Sand (No. FS 33722). The concrete platform was given a light coat of Testors Flat Light Aircraft Gray (No. 1233). Simply painting a common model in different color combinations can go a long way towards giving your model railroad that personal touch.
Our town of Flagstone is loosely (very loosely) based on the real village of Gladstone, New Jersey. The compact wooden depot was built in 1891 and remains in service to this day. The hip roof and dormers reminded me of the Atlas depot, and so that became the basis for our model scene. The real Gladstone depot has worn a number of paint jobs over the years, which gives the modeler many options to pick and choose a pleasing color combination. The Atlas station comes molded in red plastic for the walls and white for doors and windows. I decided to change things up a bit by painting the walls with Testors Flat Olive Drab (No. 1265), while the windows and doors got a coat of Testors Model Master Modern Desert Sand (No. FS 33722). The concrete platform was given a light coat of Testors Flat Light Aircraft Gray (No. 1233). Simply painting a common model in different color combinations can go a long way towards giving your model railroad that personal touch.
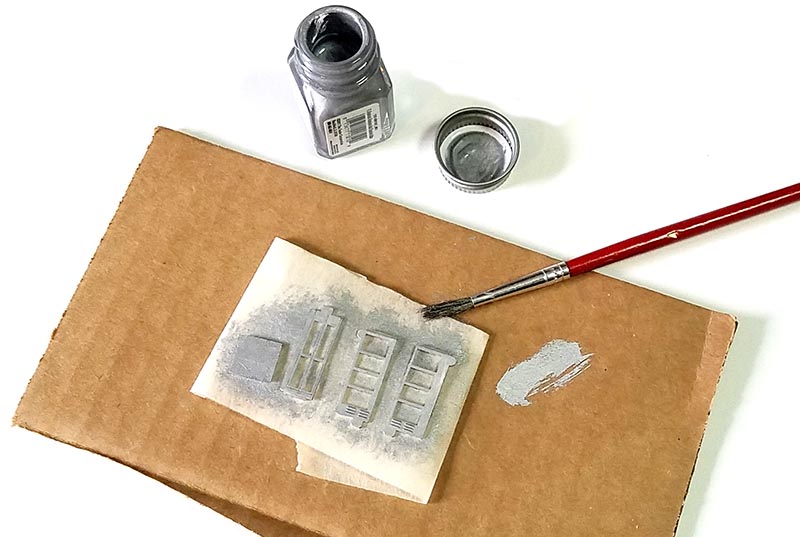
Some details, like the telephone booth, were brush painted prior to assembly. This helps make details stand out and look more realistic.
The Atlas Passenger Station is simply a joy to assemble. Though the tooling is more than 60 years old, all of the castings are sharp and fit together with precision. A number of extra details are also included with the kit, including a baggage cart, hand trucks, milk cans, luggage, a scale, barrels and crates, and more. Modern layouts might pass over some of these options, but a standout feature is the telephone booth. Once common across the country, pay phones are now a forgotten relic in this age of personal cellular devices. Still, it is too cool to pass up (and one of the walls of the phone booth is molded into the station wall, so you’re stuck with it). While the pieces are molded in white plastic, we took extra care to hand paint them using Testors Flat Aluminum paint (No. 1181).
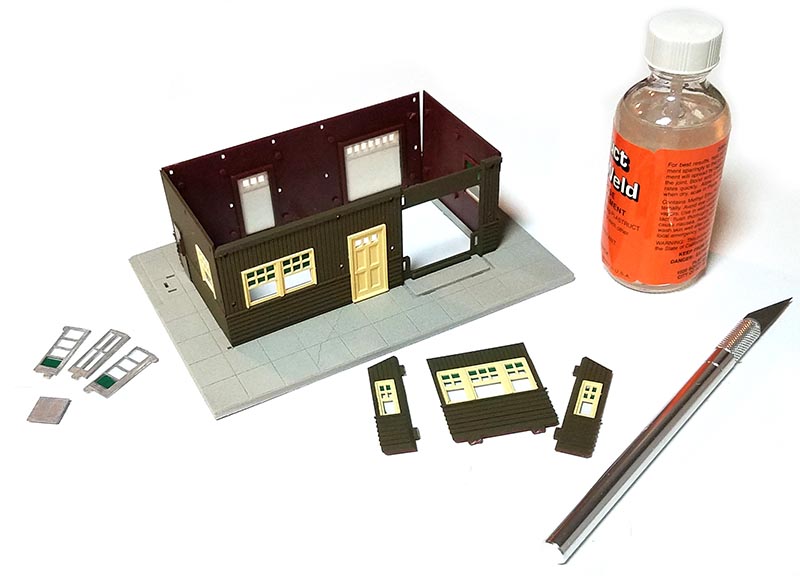
Glazing was glued to the back of the windows before they were installed in the wall sections. The pieces were all test fit in the foundation before they were glued in place.
Windows come with clear acetate glazing (complete with simulated printed “shades”) that you’ll want to glue to the back of the castings before installing them in the walls. We followed the manufacturer’s assembly instructions, except we chose to leave off the platform canopy extension (save these parts for future projects). To finish off the depot, we dry-brushed the roof with weathering highlights including browns and whites. The chimney was rubbed down with white paint to fill in the mortar lines and age the brick prior to installation. Station signs and figures representing waiting passengers will help finish off this structure.
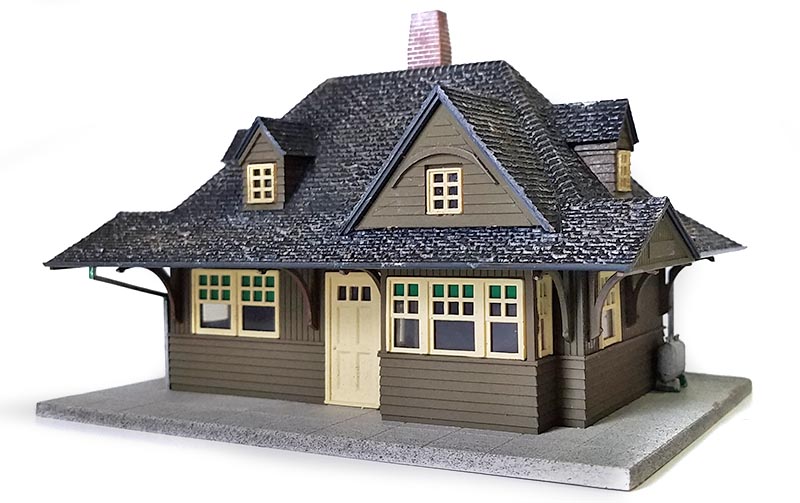
Station signs, figures, and other details will add life to our completed train station model.
 Haedrich Lumber is typical of small town lumberyards across the country. While the original Atlas kit is a good representation of an outdoor lumber shed, doubling up the kit not only makes for a unique structure, but also justifies the need for rail service without overwhelming our model railroad. Inspiration for our kitbash came from Pablo Moya of Argentina, who had shared his work on a Facebook group called “Modelers’ Guild.” In turn, he was inspired by a classic project using similar materials published 30 years ago by “kitbashing king” Art Curren.
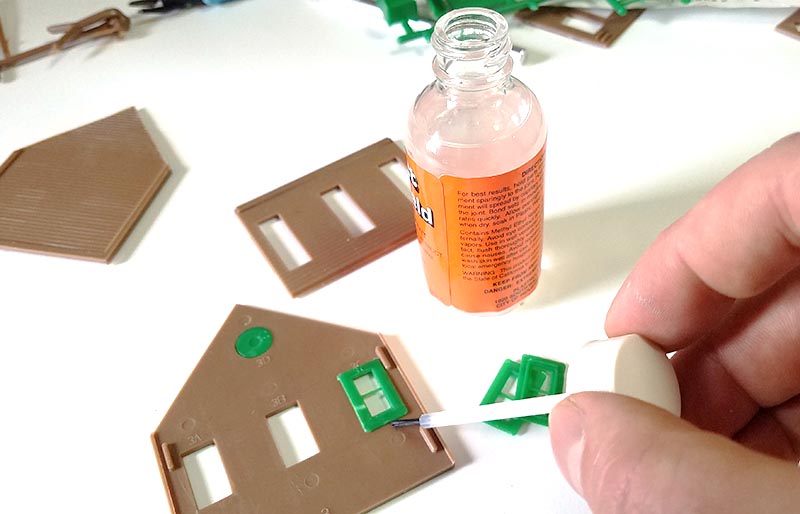
Since everything would be the same color, the windows were glued to the walls of the General Store. The assembled structure (minus the roof )was painted with Testors Modern Desert Sand spray paint.
We started with the Life-Like General Store kit, which has been in the catalog since the 1970s and is currently offered by Walthers. While its basic good design can stand in for many purposes, the individual parts require a bit of careful cutting from the sprue and additional flash cleanup with a sharp hobby knife. The walls are molded in a brown wood color, and the windows are green. Since the windows and walls would be painted the same color to match our sheds, all parts were installed except for the rear freight door. We set that piece aside and gave it a coat of Flat Olive Drab, and then weathered it with some dry brushed brown and white paint. Once the four walls of the main office were assembled and the alcove was attached, we applied a coat of Modern Desert Sand.
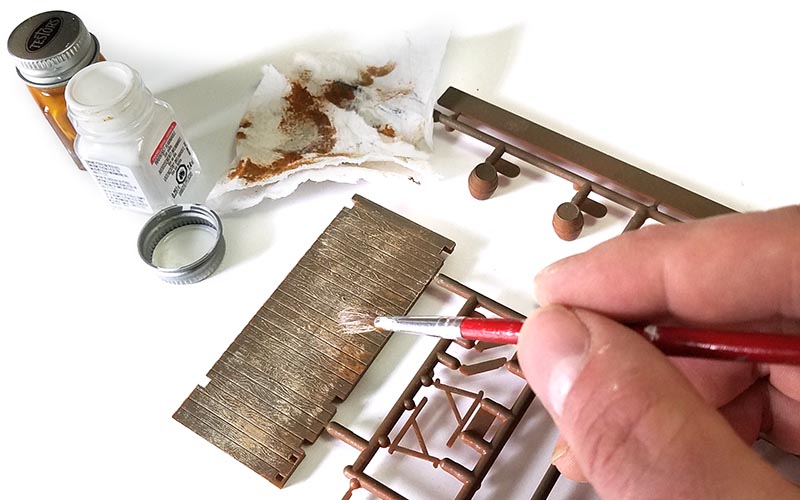
Some details were weathered with a drybrush technique prior to installation. Since the lumber shed loading platform would be inaccessible, it was painted first with a combination of white and brown paint to simulate old, worn wood.
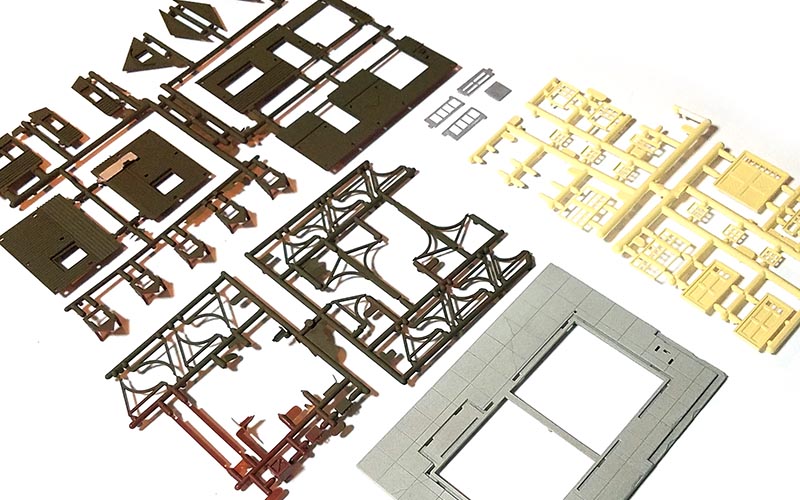
 With the office assembly set aside to try, we turned to the lumber sheds. Leaving the parts on the sprues, the uprights and walls were painted with Modern Desert Sand, while the supports and platforms were painted with Flat Olive Drab. As with the passenger station, the pieces are well engineered and require very little cleanup once removed from the sprues. We used a razor saw to discard portions of the base we would not need for this project. Set aside the pieces that make up the little yellow shed, you could assemble them and use them for other projects in the future.

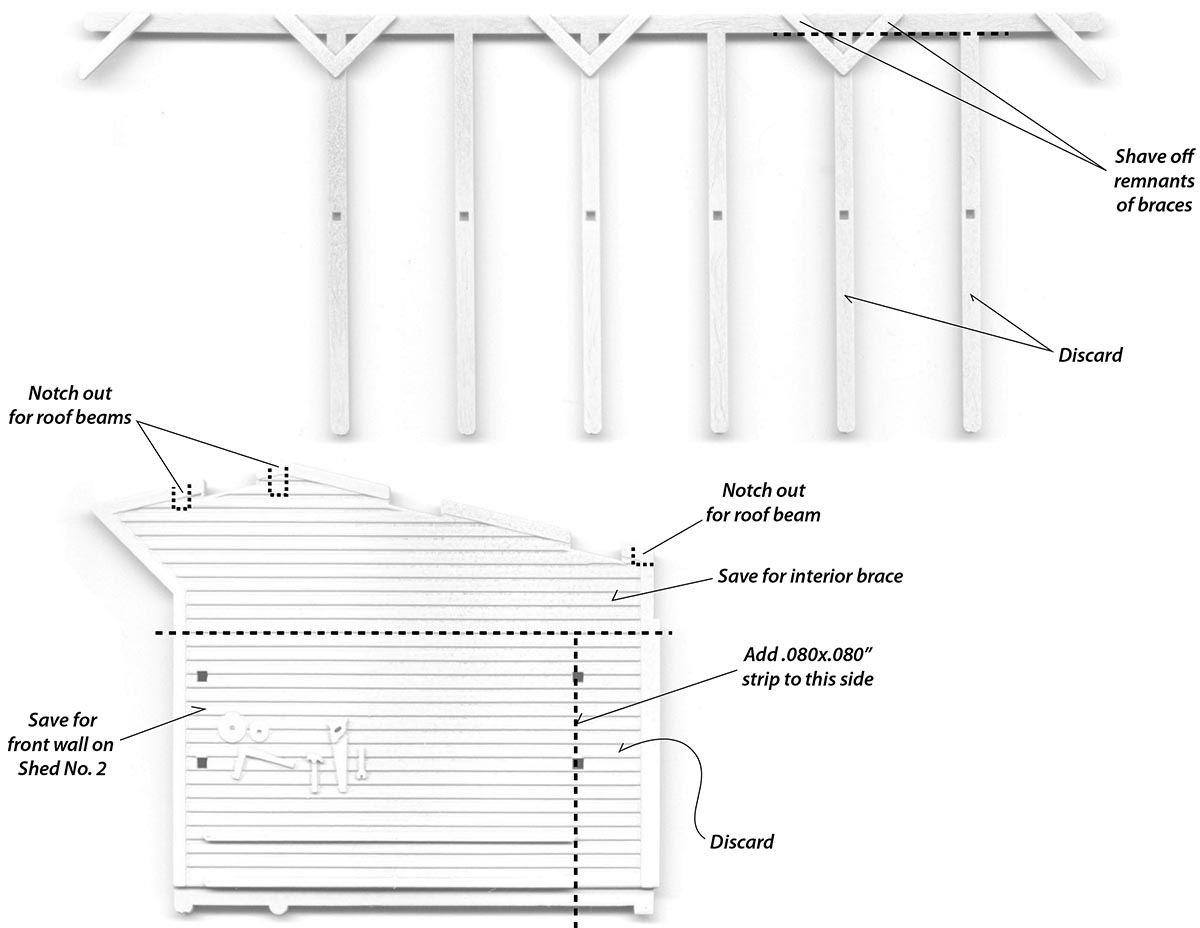 The lumber shed on the right was built more or less by the instructions, except we took the wall with the molded-on tool detail and sanded it smooth to allow for a flat surface to attach to the office. The No. 2 shed took a little more cutting and fitting to accomplish our goals. We wanted to have a pass-through for vehicles while keeping the same roof profile, so we removed two of the uprights and shortened the rear wall by the same amount. The base was also cut back to accommodate the pass-through. The loft structure was also shortened by two bays. We cut the one side wall with the tool details so it could be re-purposed as a view block, adding a strip of .080x.080” square styrene to the right side and a piece of .040x.125” strip as a cap. The pieces were assembled and set aside to dry.
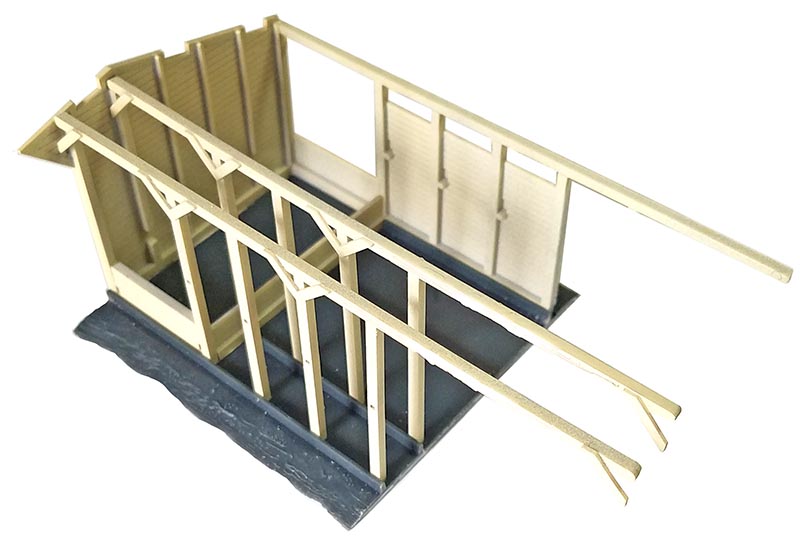
One of the lumber sheds was modified to allow for a vehicle pass-through.
Returning to the office, the windows were glazed with clear acetate and the roof pieces were attached. To add a bit of visual interest, the office was offset from the sheds to expose one window. The roof overhang on both the shed and the office needed to be trimmed so that the buildings would sit flush against one another. A few strips of .030” styrene were added between the office and the shed as shims to provide additional glue contact surface between the two sections.
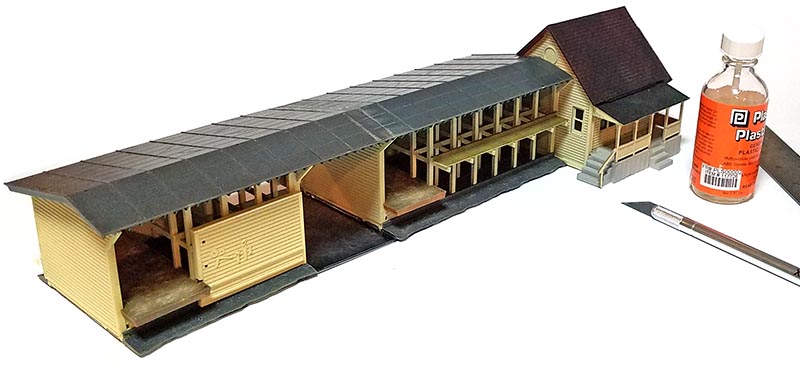
The two lumber sheds and the office were attached to a base made of .040″ black styrene to add strength.
The roof overhang between the two shed sections was also trimmed before they could be joined. Since we had cut away some of the base, we used a piece of .040” styrene to span and support the two sheds (this will be covered by scenery later). The final step in the build was using masking tape to simulate rolled roofing, painted flat black. Additional details for the lumberyard include the installation of signs and placement of finished lumber. You’ll probably also want to add a forklift or two to help with loading and unloading. Make sure that you place the sheds far enough away from the siding so that forklifts can work on either side of the tracks to unload a freight car…
Read the rest of this article in the June 2018 issue of Railroad Model Craftsman!
